 Rose suckers are your chance to vengefully smash where they arise from below the graft - you don't want those because they're from the rootstock, not the above-the-graft plant that provides the blooms you purchased the plant for!
 Trimming – Really, Ripping – Rose Suckers!
Here’s your excuse to get out your anxieties and other negative feelings while ending up with positive results for you and your roses! Rip off – actually tear rather than neatly trim -- rose suckers at their bases with an energetic and harsh downward and outward yank. Don't be gentle and merely cut the suckers. They’ll not resprout only if you damage the bud cells at the bases of the suckers. I’ve found greater and more permanent success with additionally smashing those basal ripped-off areas with a hammer! We’re talking major destruction of the life force there! Aaarrrggghhh!
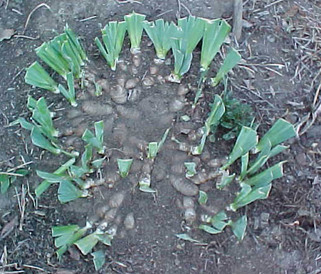 Bearded iris that has been trimmed but not yet dug up for cleaning, trimming roots, and replanting sections with fans. You can easily see how to replant, with fans facing outwards because that's how they'll continue growing.
 If your bearded iris clumps haven’t bloomed well for a year or two, and the clump is pretty large, chances are it’s too crowded and needs to be renovated.
Dig up the entire clump and break off and discard the older central rhizomes that have no foliage – even though they’re still firm and healthy-looking. Never one to toss healthy plants, I’ve tried numerous times to replant these, but to no avail – it’s as if they’ve forgotten how to put out new buds – since they just sit there for a year’s life cycle without doing anything, and then finally just shrivel away.
Let the young, healthy rhizomes dry out of the direct sun for several hours so a callous forms over the break before replanting them. If there are rough breaks or mushy & discolored areas, cut these out and make a clean cut back into healthy flesh.
Clip roots to two or three inches in length, removing the dead and dried-out old roots.
Remove individual dry outer leaf blades, and clip the green foliage to about an eight-inch fan.
Incorporate compost and bonemeal into the top six inches of soil.
Replant the rhizomes a foot apart, with roots straight down and the fan facing outward, since that’s the direction that it’ll continue growing. Barely cover the rhizome with soil, and form a bit of a basin to hold water for the first few irrigations. Fill those shallow basins three times to make sure the entire root zone area is moist and settled around the roots.
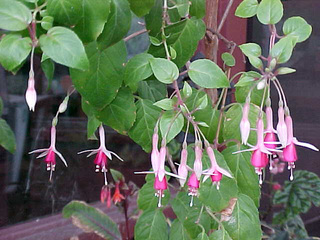 Fuchsias offer long sprays of semi-hardwood combinations of green-and-supple with brownish-and-harder for easy propagation.
 Root woody cuttings of semi-hardwood plants like azalea, chrysanthemum, fuchsia, geranium, hydrangea, and marguerite daisy.
Choose growth that is the conjunction of somewhat woody and still bright green and pliable. Cut a five- or six- inch piece with about 6 nodes (where the leaves come out of the stem) – 3 of the woody section and 3 of the green section.
Strip off all of the leaves but the tiny young top growth and one or two well-developed leaves. You may need to remove some of the green and pliable growth. If the well-developed leaves are large, cut them in half crosswise. You want just enough green top growth to accomplish photosynthesis but not so much that keeping it alive will drain what energy there remains in the cutting before the bottom nodes manage to send out new roots.
Trim the bottom of the cutting to about 1/8” under the bottom-most node. You don’t want to leave much more than this, because chances are it may rot and potentially extend up into the rest of the cutting.
Place the prepared cutting in light, sandy soil or planting mix up to the bottom leaf so about 3 nodes of the woody portion are under the soil mix, and the green portion is above the soil mix.
Sprinkle the foliage and thoroughly wet the soil mixture.
Place the container in filtered light in a sheltered location, and keep the soil mix moist until the rootings are well-established, in about a month. Then the new plantlets can be transplanted, or you can wait longer until the new root systems are better developed.
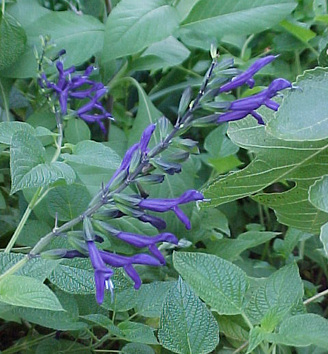 Salvia guarantica will easily root when its long branches touch the ground - or when you purposely bury them so they'll propagate themselves without much more attention from you.
 Long, supple branches of azaleas, forsythias, salvia and viburnums can be rooted for new plants. Bend branch tips to a shallow ditch a foot or so long. Cover the branch with soil up to the top cluster of new foliage. Hold it in place with a rock or other method. Keep the soil moist. Rootlets will form, and a new plant will be ready for transplanting in about a year. Then you can cut it from the mother plant and transplant it to another location.
 RSS Feed