Gardening In LA
  • Home
  • About
  • Services
    • Garden Coaching
    • Speaking
    • Photography
    • Writing >
      • List of Articles
  • Blog
  • News
  • Monthly Tips
    • January
    • February
    • March
    • April
    • May
    • June
    • July
    • August
    • September
    • October
    • November
    • December
  • Events
    • Submit Your Garden Events
    • Botanical Gardens' and Other Organizations' Garden Events
  • Jobs
  • Web Links
  • Newsletter

PUNKINS AND WINTER SQUASH HARVEST

10/27/2015

0 Comments

 
Picture
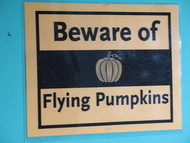
     Now that Halloween is upon us, you may already have carved your pumpkin into a suitably scary Jack O'Lantern.  If not, I hope you’ll remember to salvage the seeds!  Toast -- don't toss -- your pumpkin seeds. 
     First, separate the seeds from the stringy pulp by washing the seeds well.  Then, spread them on a cookie sheet and sprinkle lightly with salt if desired.  Toast them for three or four minutes at 375 degrees, stir to turn the seeds as best you can, and then toast them another two or three minutes until they're evenly golden.  Cool them to room temperature, and enjoy!
     With our still warm weather, even in the evenings, the rest of your winter squashes and decorative gourds may or may not be fully mature so you can harvest them.  The cue is whether or not you can still puncture the hard rind with your fingernail.  If you can, it’s not mature enough to store – you can eat it, must do so within a couple of weeks before it begins to spoil.  The outer skin must be completely impervious to any air entering – literally a solid wall – so molds are kept out. 
     Cut the stems rather than breaking or tearing them, and leave two inches of stem attached to the squash or gourd.  Store cured squash at 50 to 60 degrees in a dry area.  Check them weekly for mold on their surface.  If any appears, wipe it off with a paper towel moistened with vinegar.  With this preparation, the squash should keep up to six months. 

Picture
Picture
Picture
0 Comments

TRANSPLANTING – CALIFORNIA NATIVES

10/18/2015

0 Comments

 
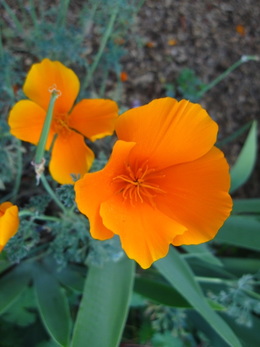
PictureMy one California poppy plant that's blooming now in my garden. Sow seeds now so plants will anchor the soil through our promised winter rains and then provide a glorious display in Spring!
With so many sales of California Native plants and upcoming classes, this is the absolutely BEST time to transplant California natives.  With the advent of so many lawns being ripped out – or at least allowed to die – it’s equally important to install California natives now in their place to actively hold the soil with the prospect of sudden and heavy rainfall through our promised El Nino winter…as perhaps evidenced by the recent mudslides along the Grapevine. Getting them established now will aid in holding our soil where it is.

Here are some of the critical points to installing California native plants, bulbs, and wildflowers from the Theodore Payne Foundation, http://theodorepayne.org/
 
Planting
Make sure you dig a good-sized hole, fill it with water, let it drain, place the plant with care for the roots and for the best orientation, backfill, and water again.
 
Bulbs
Choose native bulbs like Calochortus, Dichelostemma, Triteleia, and Allium. Select species appropriate to various spots in your yard. For example, Calochortus splendens and Dichelostemma volubile are great to plant amid low shrubs as they send their blooms up above the foliage; Triteleia laxa and Calochortus venustus are great for grassy areas; and Allium unifolium, A. validum, and Triteleia peduncularis are best suited for areas that receive water throughout the year.
 
Wildflowers
Select a special mix of wildflower seeds that matches your location, or create your own. Before you sow the wildflower seed, make sure the area is free of weeds and unwanted grasses. Rough up the soil surface, sow your seeds, and water. You don't need to cover the seeds with any soil; they’ll do just fine just like they’re scattered naturally out in the wild!
 
Divide Grasses and Perennials
Dig up and divide cool season grasses such as Festuca, Nassella, Leymus, Calamagrostis, and Melica. Also  Carex tumulicola. Make sure each clump has a good root ball to transplant, and water it in well.  Also divide and transplant Heuchera, Potentilla, Horkelia, and other clumping perennials, including native iris – either divide the entire bunch into smaller clumps that have good roots, or remove individual sections from around the edges. Once you’ve replanted them, make sure they are well watered until new growth appears.
 
And, a “DON'T” – Don’t cut back manzanita or Ceanothus, as they'll set their flower buds in late spring; if you prune them now, you'll be cutting out blooms that will appear in just a month or two.

0 Comments

TRANSPLANTING? BUT IT'S STILL HOT!

10/13/2015

1 Comment

 
Picture
     Last week, I chatted about starting seeds although we’re still tolerating our hot days.  Since then, we’ve had even hotter days that didn’t cool down much at night.  This week, I’ll move on to transplanting since we’re promised more rain this coming week and cooler temperatures – fun to consider 80 degrees as “cool”!  The caveat of course is that if last year’s warm winter weather repeats itself, we might all be able to continue seeding and transplanting through winter.  Nice for us, but not for the plants which should have a bit of rest and recuperation before they must really exert themselves next spring through fall!
 
Some Transplanting Thoughts
 
Perennial Vegetables – Artichokes, Asparagus, Rhubarb
     Plant perennial roots now through November so they, like garlic, will develop extensive root systems before cooler weather.  All three of these “heavy feeders” benefit from incorporating lots of manure and compost and adding more as mulch throughout the year.  As you place them in their planting holes, point their roots downward so they’ll continue to grow deeply and thereby stay cooler and moister through the winter and coming summers.  While you can space asparagus only a foot or so apart, they do need to be about six inches deep to have better access to nutrients washing down from that manure and compost mulch, and to keep clear from harvesting knifeblades.  Also place artichokes and rhubarb roots that deep, but space them a good four to five feet apart to accommodate their widespread foliage as well as root nutrition needs.  After all, you’re planting for harvests through the next 15-20 years!
 
Strawberries
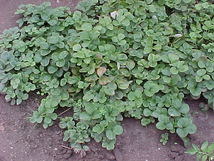
     Separate “mother” strawberry plants and their rooted offshoots from now through November to develop extensive root systems before cool weather slows growth.  Break apart the mother plants and save only the smaller sections with lots of new white roots.  The darker roots with extended necks are too old to continue producing well so they’ll be of greater value decomposing in the compost pile.  Into the new planting bed area -- away from where potatoes, tomatoes, eggplants, and   peppers have grown within the last three years -- incorporate manure, compost, rock fertilizers, and cottonseed meal.  Space new plants a foot apart so the crown is just above the soil level once the area is watered in.  The three distinguishing plant parts tell you how deeply to plant it – the roots covered, the leaf bases above soil, and the middle portion is where the soil level should be.
 
Cole Crops
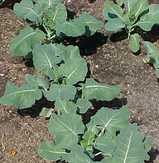
     Plant cole crops up to their first set of leaves to prevent their developing into weak, leggy plants.  Unlike tomatoes, they won’t form roots along that buried portion, but planting this bit more deeply provides more stability, and the cuticle keeps them from rotting which would be the case with planting other seedlings more deeply than they grow on their own.
 
Perennial Flowers and Bulbs
     To transplant large clumps of perennial flowers and bulbs, water the area first to help loosen the soil and roots.  First, with a fork wiggled back and forth to help loosen the rootball from the surrounding soil, try to gently pull apart individual plants.  For harder-to-dislodge portions, use a spade or sharp knife to separate them, paying close attention to cutting into root masses but missing the central heads.  After shaking loose as much soil as possible from the separated sections, discard the old, unproductive ones into the compost pile.  Trim the foliage of the young growth to four or six inches.  Dig in compost, replant, and water in well.


Picture
Picture
Picture
1 Comment

WONDERFUL RAIN & COOLER WEATHER - PERFECT FOR SOWING SEEDS!

10/5/2015

1 Comment

 
Picture
     We’ve been tolerating our hot days, so that wonderful rain yesterday and cooler temperatures have been very much a good thing for the garden.  Perfect for sowing seeds! Seeding is best done now through November, or whenever the nighttime temperatures stay above 50 degrees.  If last year’s weather repeats itself, we might all be able to continue seeding and transplanting through winter – nice for us, but not for the plants which prefer to have a bit of rest and recuperation before they must really exert themselves next spring through fall!
 
Some Seeding Thoughts

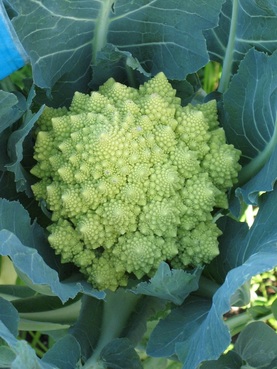
     Just about any variety of broccoli will do well.  ‘Purple Sprouting’ – which sports many small bitesize pieces - provides about four times as much food as the big-head kind, even when the head is cut and the plant resprouts many little ones.  Besides, the purple cast to the stems and leaves make it much prettier.  And, if you count the leaves on either plant as edible, that’s even more food from each plant! ‘Romanesco’ – that chartreuse, spiral-pointed beauty, is a cross between broccoli and cauliflower and usually called some variation of “broccoflower.”

     Garlic cloves can be planted now through November, so they’ll develop good root systems before the cool weather really settles in.  Following winter’s slow growth, they’ll develop quickly and substantially in the spring and result in larger heads by June harvest.  If you grew garlic and harvested a single bulb, it just never separated into individual cloves.  Replant it, and the cloves will form this time around.  If you forgot to harvest and now have a bunch of shoots and roots, dig the clumps up, separate each clove with its shoot and roots, and replant them four inches apart in well-drained and compost-enriched soil so they can continue to develop fully for June harvest.   

     Wildflowers and other bloomers can be seeded now through November, preferably just before a rain or sprinkler irrigation to settle them nicely into the nooks and crannies between soil particles for good germination.  All will develop stronger plants and bloom earlier and more profusely in the spring.  If you wait to plant in early spring.

     Grab the first biggest and strongest flower bulbs you can as soon as they’re available.  Plant them immediately, to assure the most beautiful blooms because they’ve grown their extensive root systems while the soil is warm.  This is definitely the time when cheap prices and bottom-of-the-barrel leftovers are a waste of money rather than a bargain.  
 
Next week – Transplanting


1 Comment

    Archives

    January 2023
    December 2022
    November 2022
    October 2022
    September 2022
    August 2022
    July 2022
    June 2022
    May 2022
    April 2022
    March 2022
    February 2022
    January 2022
    December 2021
    November 2021
    October 2021
    September 2021
    August 2021
    July 2021
    June 2021
    May 2021
    April 2021
    March 2021
    February 2021
    January 2021
    December 2020
    November 2020
    October 2020
    September 2020
    August 2020
    July 2020
    June 2020
    May 2020
    April 2020
    March 2020
    February 2020
    January 2020
    December 2019
    November 2019
    October 2019
    September 2019
    August 2019
    July 2019
    June 2019
    May 2019
    April 2019
    March 2019
    February 2019
    January 2019
    December 2018
    November 2018
    October 2018
    September 2018
    August 2018
    July 2018
    June 2018
    May 2018
    April 2018
    March 2018
    February 2018
    January 2018
    December 2017
    November 2017
    October 2017
    September 2017
    August 2017
    July 2017
    June 2017
    May 2017
    April 2017
    March 2017
    February 2017
    January 2017
    December 2016
    November 2016
    October 2016
    September 2016
    August 2016
    July 2016
    June 2016
    May 2016
    April 2016
    March 2016
    February 2016
    January 2016
    December 2015
    November 2015
    October 2015
    September 2015
    August 2015
    July 2015

    Categories

    All

    RSS Feed

© 2015 Yvonne Savio. All Rights Reserved.                                                                                                                                                         Web Design by StudioMAH.