
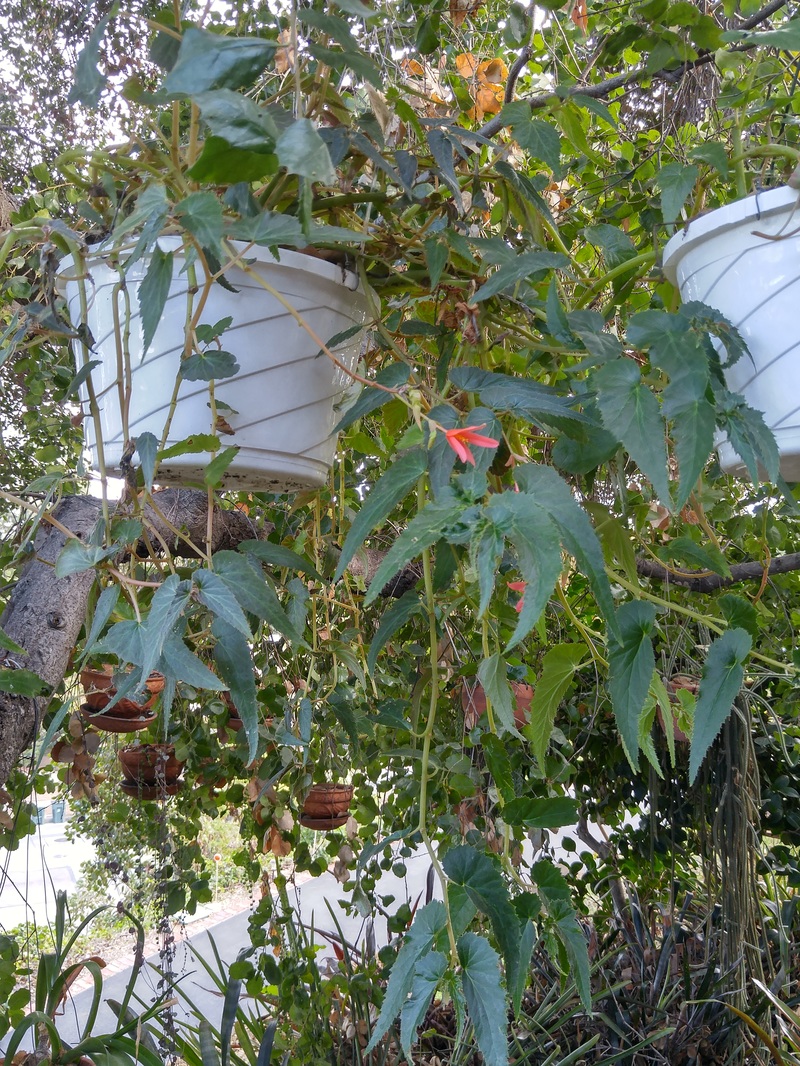
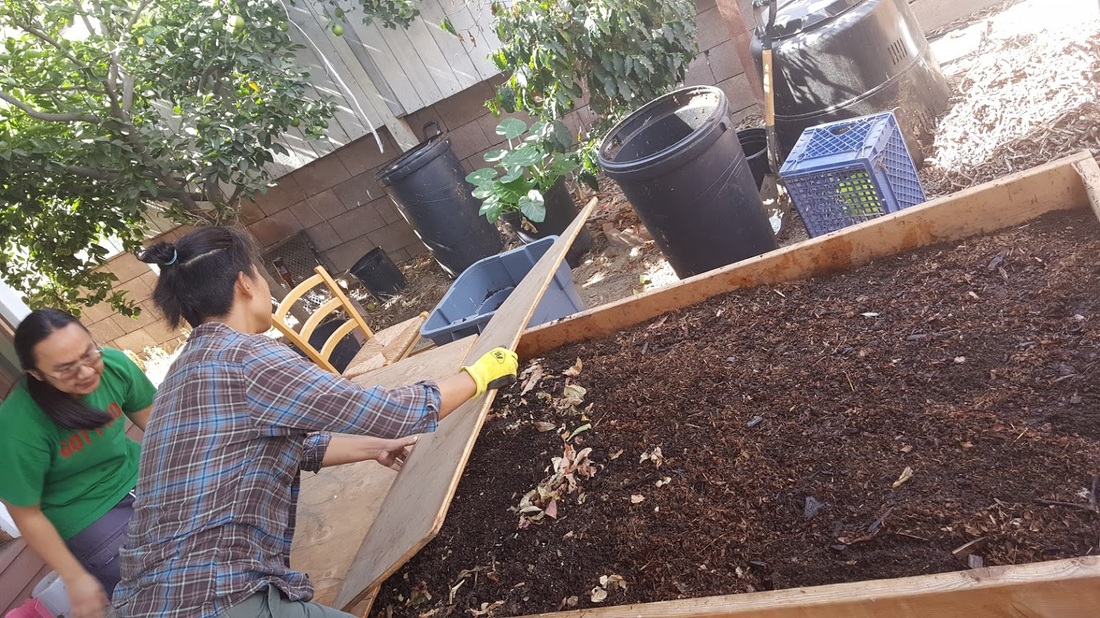
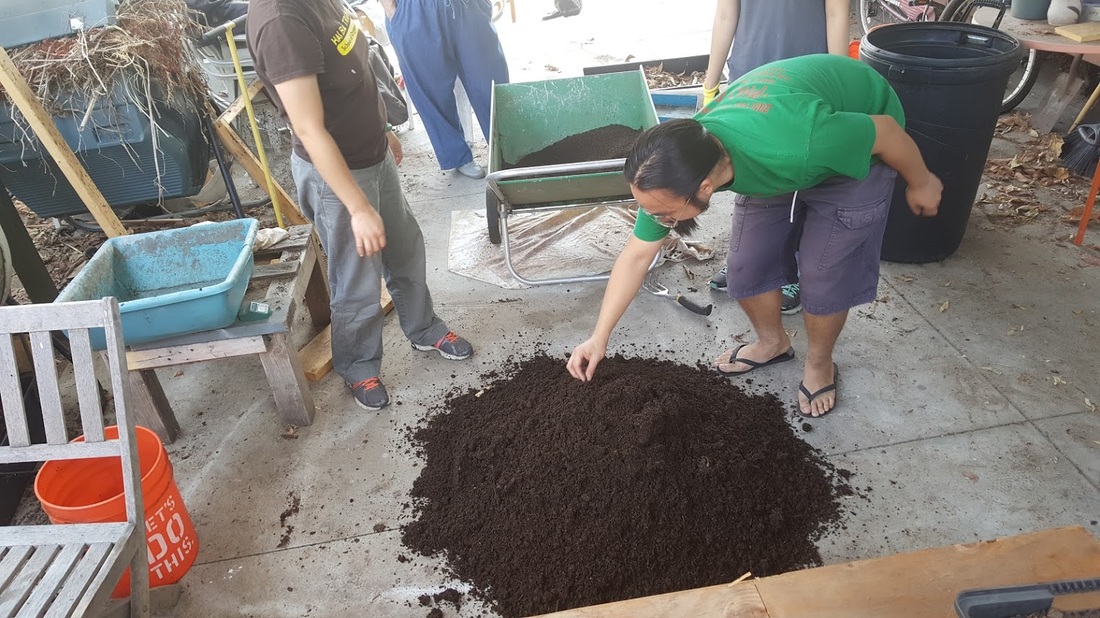
 The straggly begonias that got me started on this propagation project. 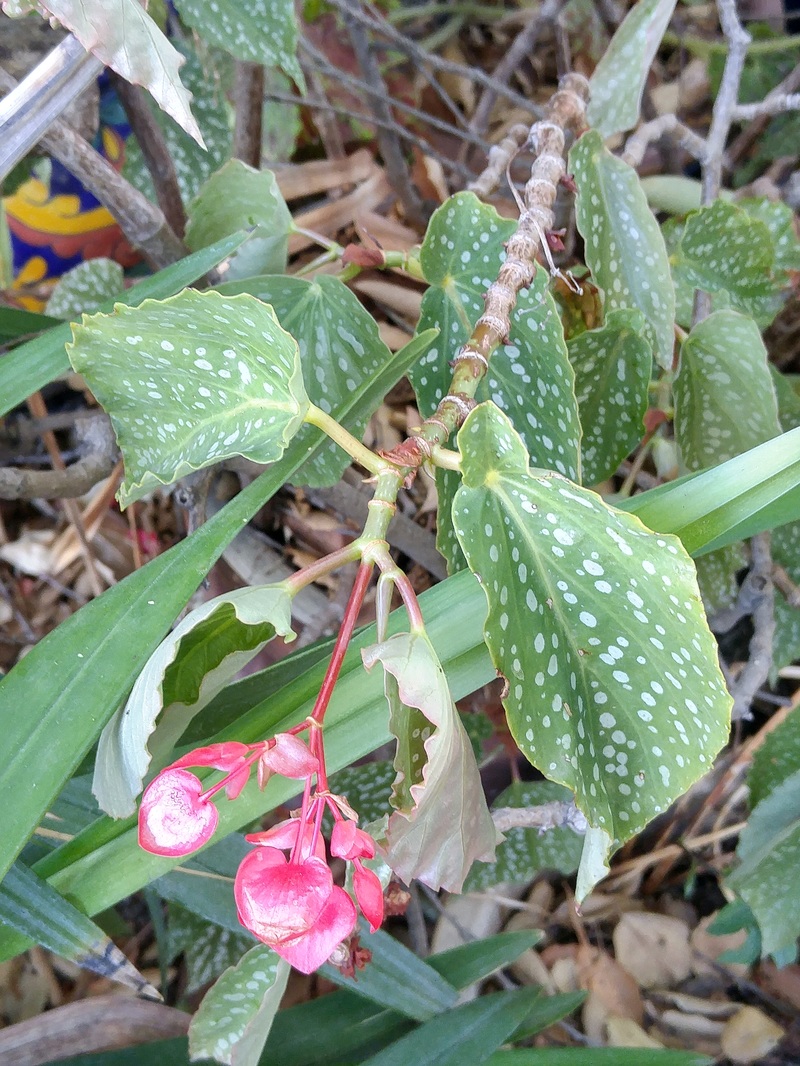 Then I moved on to other begonias that needed trimming. 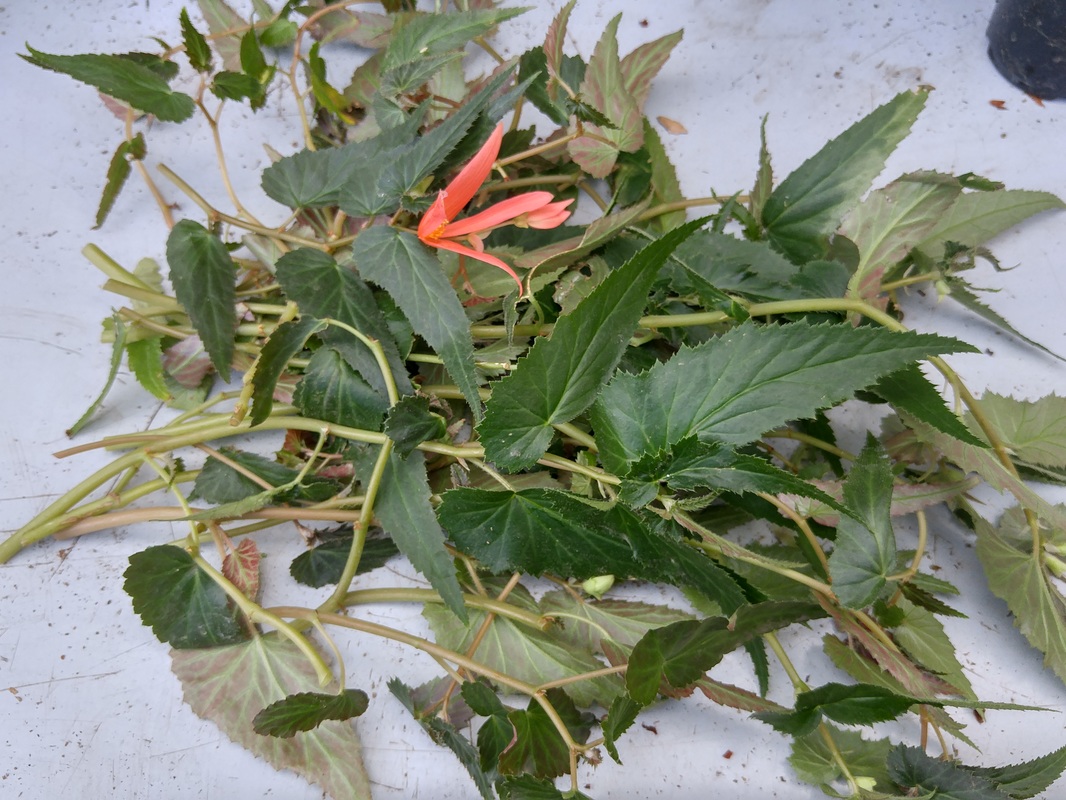 The pile of trimmings from one of the hanging-basket begonias. This will turn into lots of new plants for sharing! 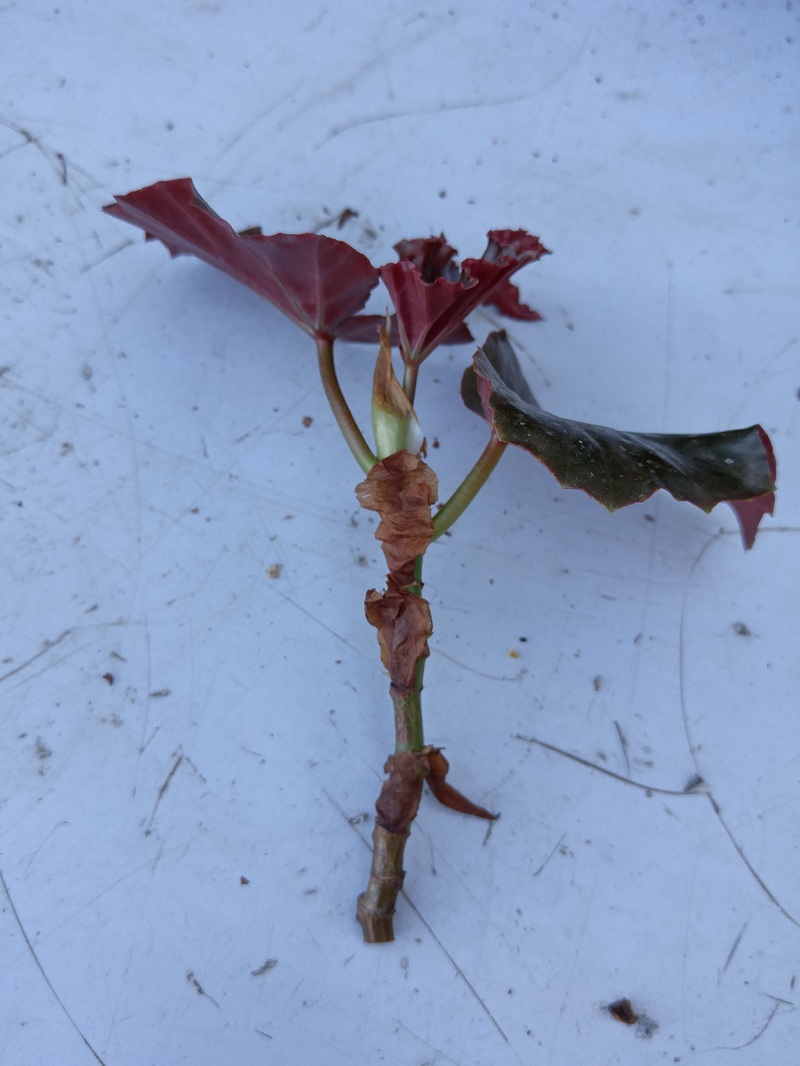 Cutting trimmed to 4 nodes and 3 top leaves. The bottommost big leaf could also be removed, since the center newest leaf is large enough to accomplish photosynthesis. You always want to leave at least 2 "mature" leaves, in case one gets broken or damaged or dies before roots form. 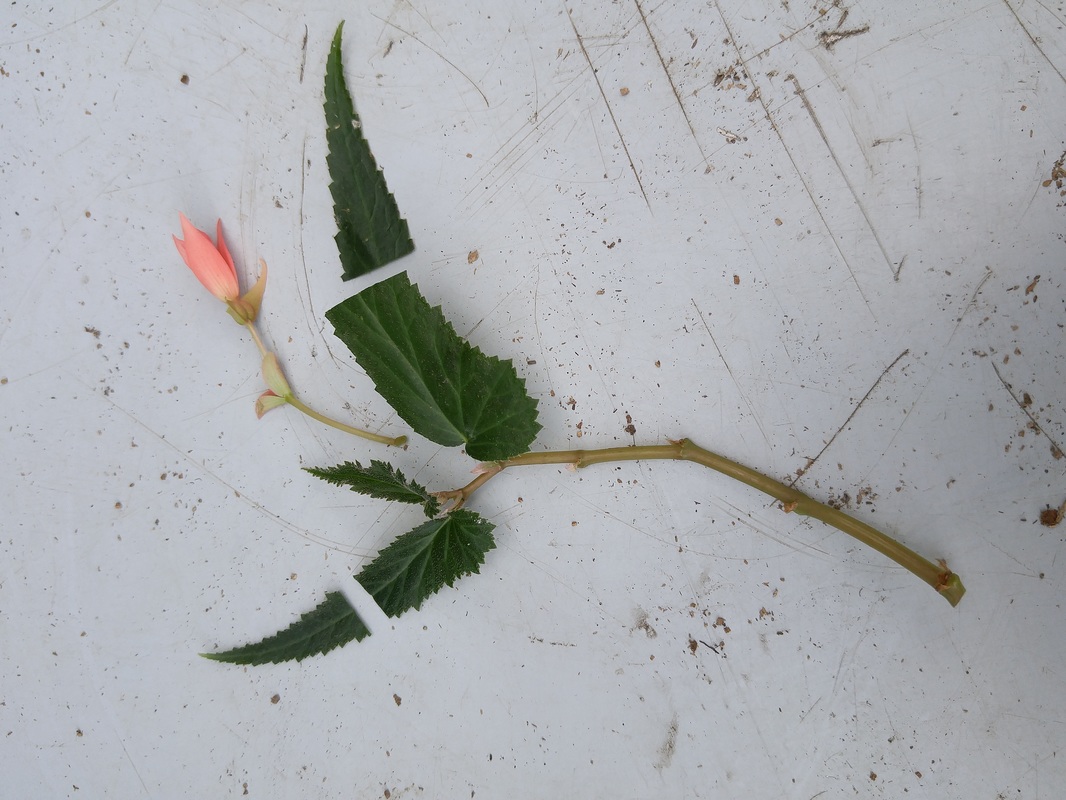 Another cutting showing the blossom removed and leaves cut in half, and stem with 4 nodes. Note the tiny amount of stem left below the bottom node to preclude rotting. 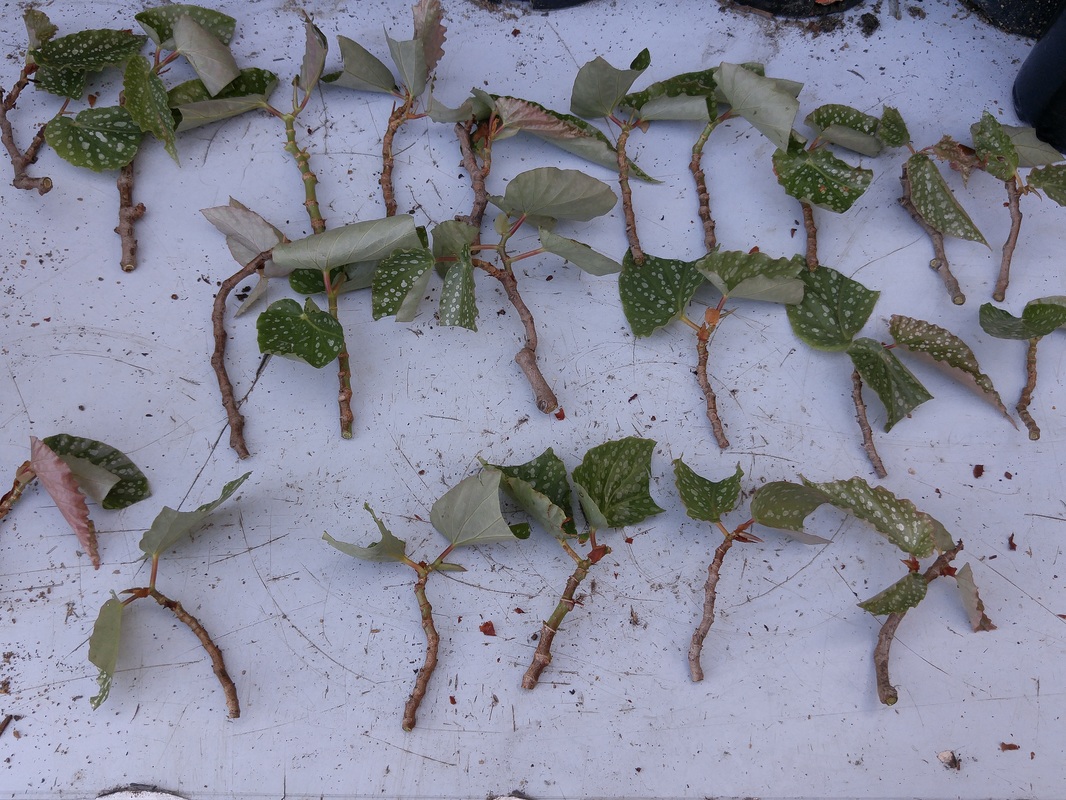 Lots of cuttings ready for potting up! 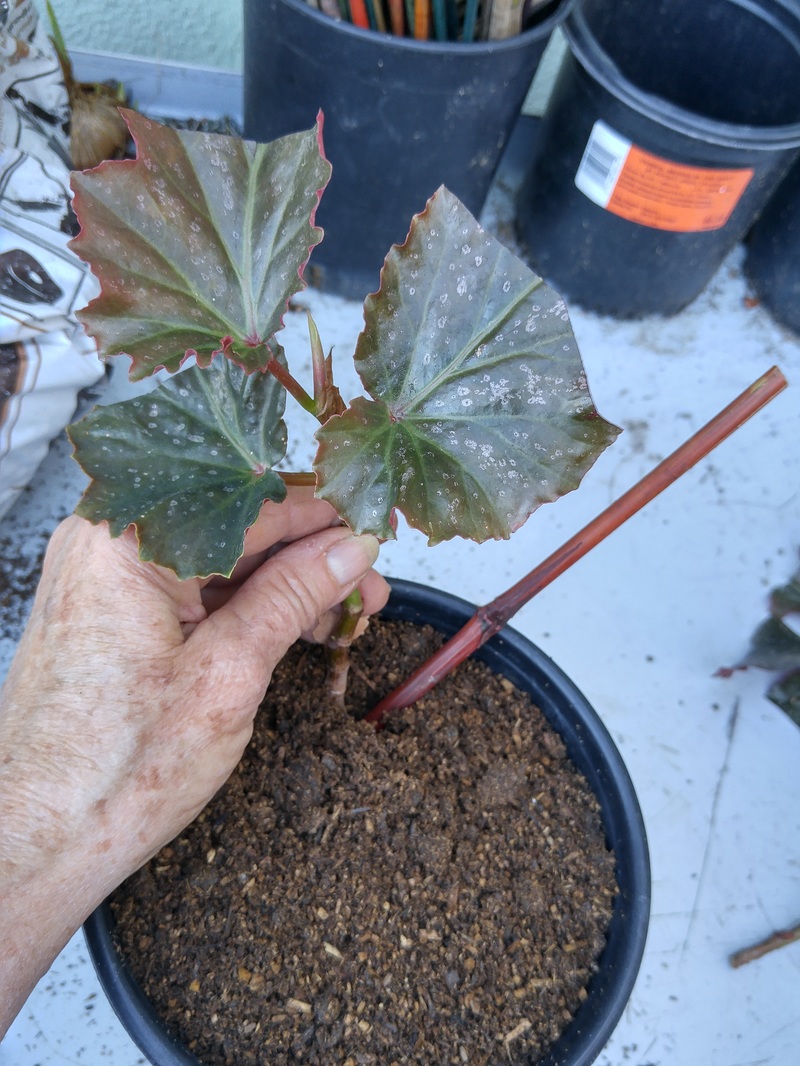 Pencil-sized bamboo stake poked hole, then helps nudge cutting into the hole. 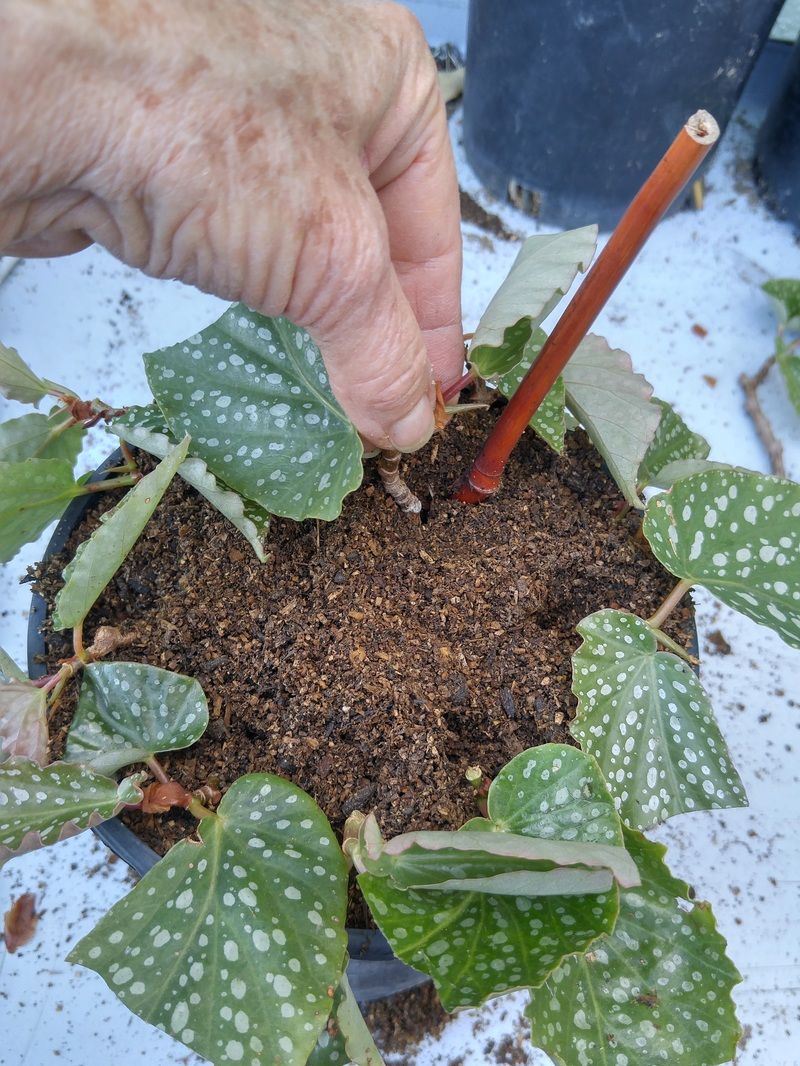 Inserting cuttings around the edge of the pot, about 1" from the edge and from each other. 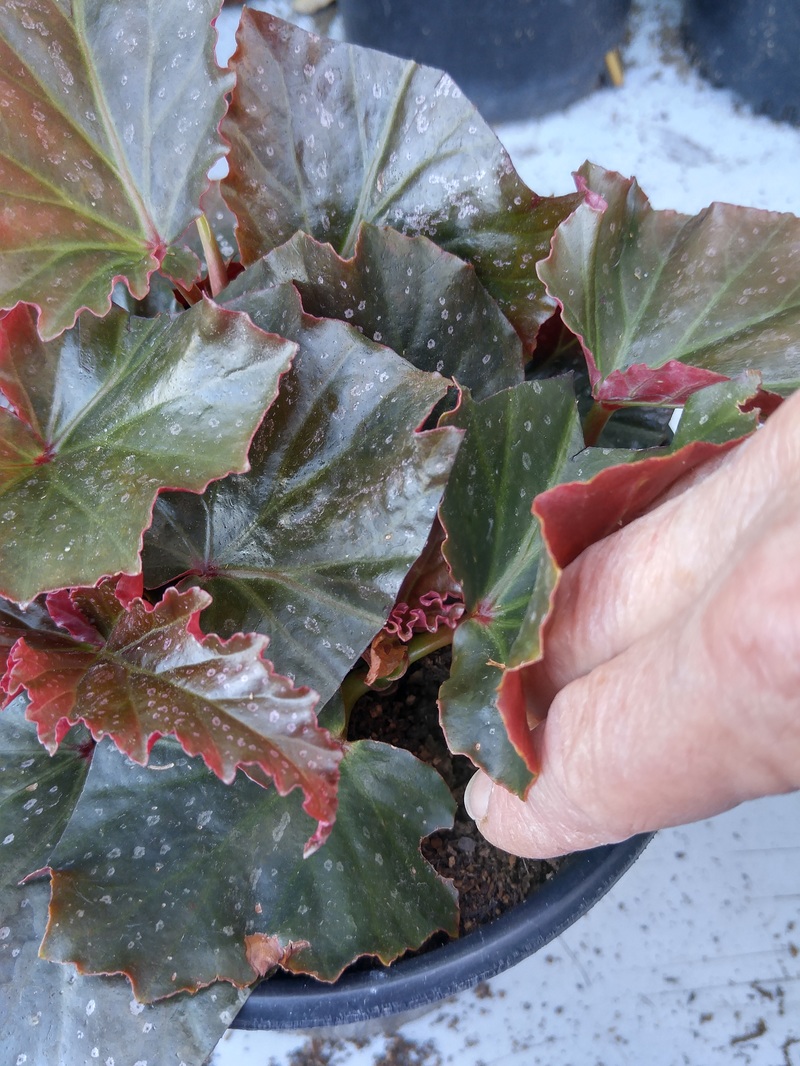 Pressing potting mix around the edge and between the center cuttings. If you placed enough potting mix into the pot initially, pressing it down should leave only 1" of space for watering. 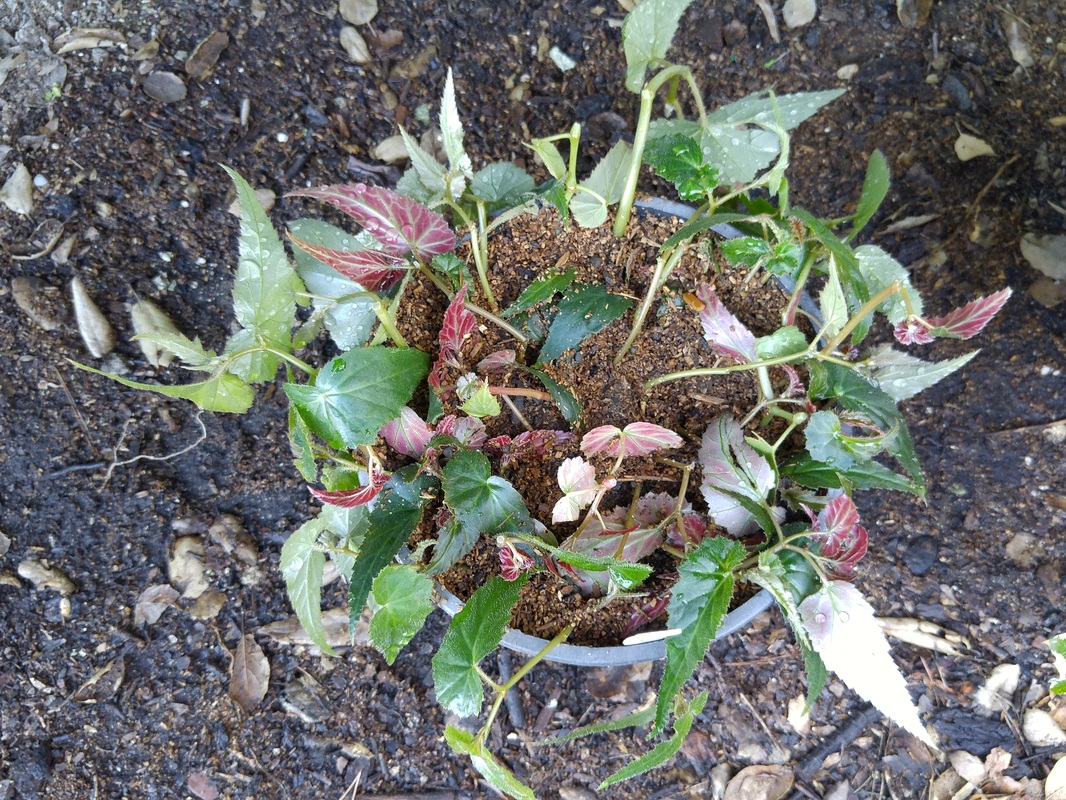 Potful of cuttings ready for watering and growing new roots! | Propagation from cuttings is an easy and fun technique for gardeners to accomplish year-round, depending on the timing most appropriate for a particular kind of plant. Now’s a good time for begonias. Two of my hanging-basket begonias looked straggly, with bare foot-long bare stems hanging down and a few blooms appearing at the end of foliaged tips. I knew that if I just left them to continue to grow, the bare stems might or might not – probably not - sprout new leaves. But, because they’re actively growing now, it’s a great time to snip them and root the cuttings. Of course, once I’d done this with the two hanging-basket begonias, I started examining the three upright begonias on my patio and, finding more lanky growth, starting snipping those as well. Ultimately I ended up with clippings from five different begonia plants that resulted in 7 gallon pots with about 12 in each pot – potentially 84 new plants if they all rooted. How’s that for an economic boon? This technique is the same for whatever kind of cutting you collect – from walks in the neighborhood (take cuttings only from public areas) as well as your own garden or from a friend. If it’ll be several hours before you can actually pot them up, take cuttings as lengthy as possible to allow for the natural retraction of plant fluids from the cut since it’s no longer able to pull those fluids from the roots. For example, cutting a 20” length means you’ll be able to make perhaps 3 6” cuttings (after recutting off 2” of the base) to root, with at least a single 6” viable tip. Here’s how to produce your own bargain bounty.
|
|
3 Comments
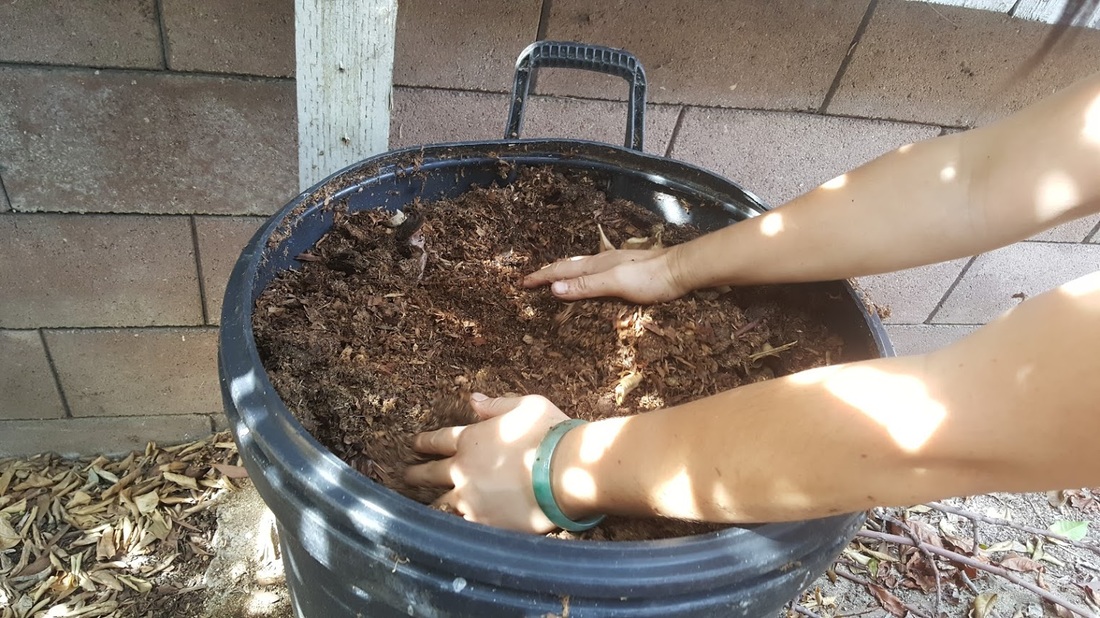
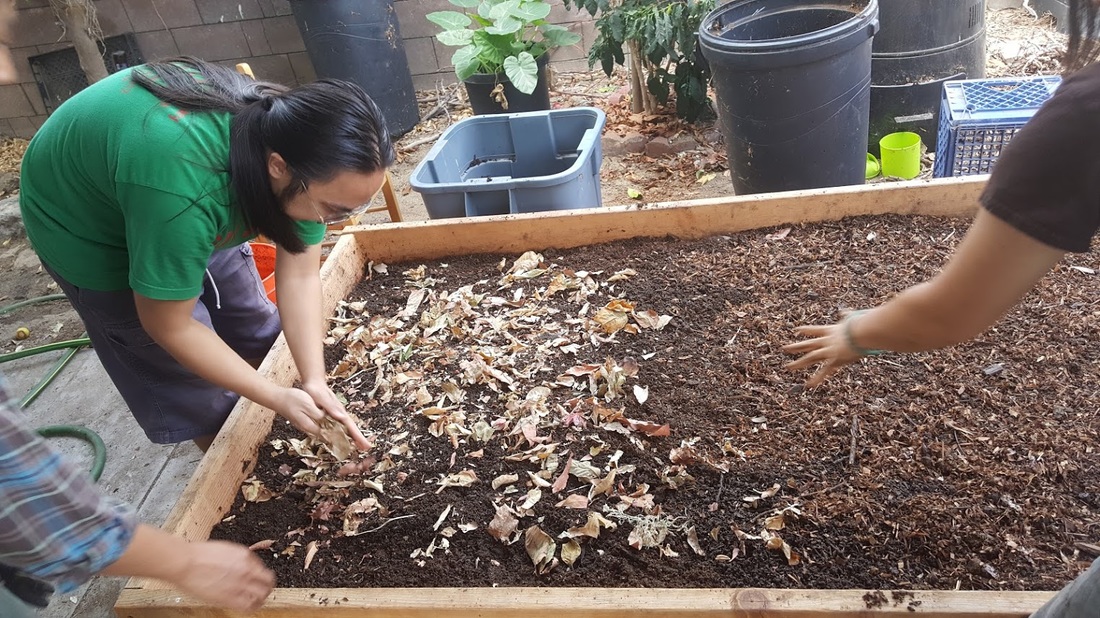
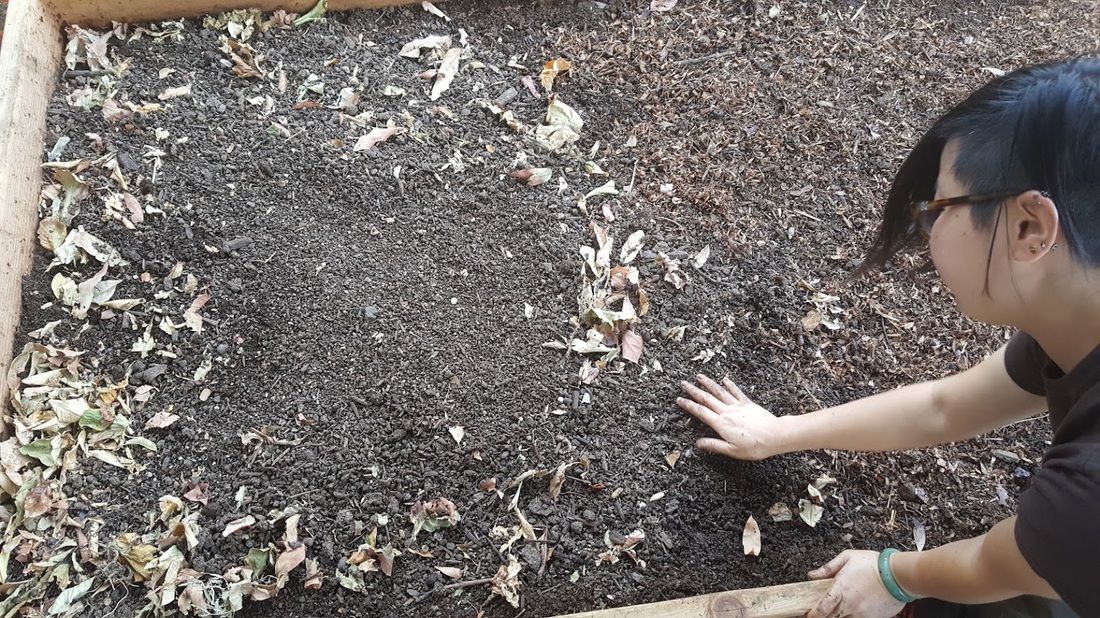
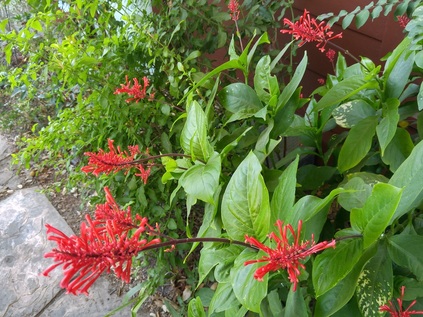 Odontonema strictum - Firespike - "sparkles" now in fall. Odontonema strictum - Firespike - "sparkles" now in fall. What a wonderful reprieve, air temperatures in the mid-70s and low-80s promised for at least the next week! With soil temperatures still very warm, it’s the perfect time to transplant everything – seedlings, plants, shrubs and trees – so they’ll have a good month or two to develop well-established root systems before shutting down for the winter.
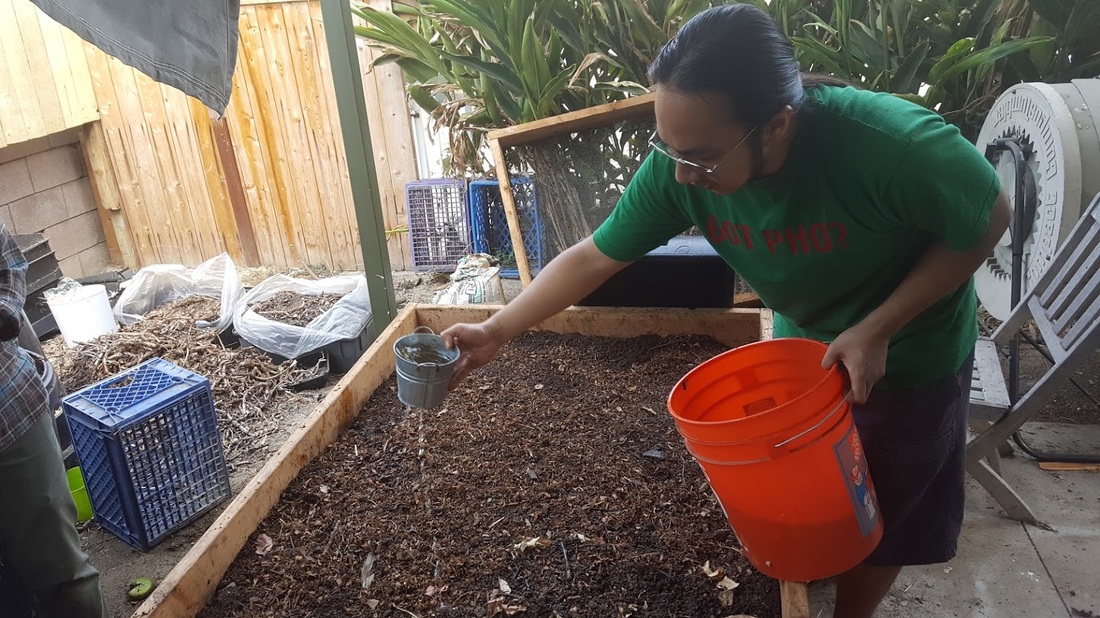
This is why fall is a better time to garden than spring, when plants must hurry to get established before weather turns hot and they get stressed, and then they must produce their flowers and fruit which stresses them even the more – and we have to fertilize and water them just to keep them going! So, what to do in the garden now during this blissfully mild weather? Let me count the ways. For more extensive details, see October’s Monthly Tips. Edibles – Veggies and Fruits Plant garlic now so it’ll develop a strong root system over the winter, and leaf production can begin early in the spring, resulting in a large head next summer. Planting in the spring, even with rich soil, will produce only medium- or small-sized cloves. Renovate strawberry beds away from where potatoes, tomatoes, eggplants, and peppers have grown within the last three years. Incorporate rock fertilizers, compost, and cottonseed meal. Water well. Wait two to four weeks so the microorganisms can meld everything together, which will heat up the soil and then cool down again, then transplant strawberries one foot apart so the crown is just above the soil level. Plant asparagus crowns at least six inches deep, and mulch them heavily with manure so winter rains (hope, hope!) can slowly wash the nutrients down into the root zone. Harvest white potatoes now, being careful not to cut or bruise them. You can also leave them in the soil for harvest through the winter, but don’t water them or they’ll sprout again in spring. Harvest winter squash, pumpkins, and decorative gourds when the vines are dry and the rinds are hard and resist easy puncture by a fingernail. Cut the stems rather than breaking or tearing them, and leave two inches of stem attached to the squash to lessen the chance of spoilage. Clear the soil under trees by pulling back the mulch, discarding fruit mummies, and moving leaves to the compost pile as soon as they fall. This will open up the soil surface for rain (hope, hope!) to easily penetrate. Give one last deep watering to grapevines and deciduous trees to make them more cold-hardy. Feed all overwintering plants with a no-nitrogen, high-phosphorus, high-potassium fertilizer to help them become cold-hardy. When you carve your Jack O’Lantern, be sure to toast -- don't toss -- the pumpkin seeds. Separate the seeds from the stringy pulp by washing the seeds well. Spread them on a cookie sheet and sprinkle lightly with salt if desired. Toast them for three or four minutes at 375 degrees, stir to turn them, and toast another two or three minutes until they're evenly golden. Cool them to room temperature, and enjoy! Ornamentals – Flowering Plants and Trees Use a spade or sharp knife to separate large clumps of perennials, or gently pull apart individual plants after loosening the clump from its surrounding soil. Discard the old, unproductive sections. Trim the foliage of young growth to four or six inches. Dig in compost, replant, and water in well. Trim roses after their last flush of blooms, but hold off on severe pruning until they're fully dormant, in January. Feed them with a no-nitrogen, high-phosphorus, high-potassium fertilizer to help them harden off. Fertilize cool-season grass lawns. Lower the blade height on your lawn mower to encourage short, bushy growth. Knock down water basins around trees and shrubs, and turn the soil to loosen it so water can penetrate more easily, and not puddle. General Garden Care Help overwintering plants harden off by changing your irrigation schedule. Cooler weather slows evaporation from the soil and transpiration from plant foliage, so irrigation is needed less often. Decrease the number of times -- but not the length of time -- you water. For example, water once every three weeks instead of once a week, but still water for half an hour each time. This change will still provide water down to the full root zone while allowing for longer periods for the soil to dry in between waterings, and it doesn't encourage new, frost-tender growth. 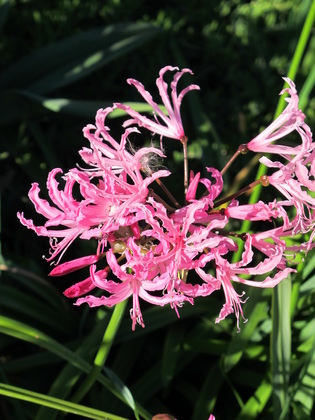 Pink nerine naturalize wonderfully in my garden after Fall bloom. Bloom time is extended because bulbs are planted in each of 17 levels up a ramp, with those getting the most sun blooming first, and the ones getting the least sun blooming last. Pink nerine naturalize wonderfully in my garden after Fall bloom. Bloom time is extended because bulbs are planted in each of 17 levels up a ramp, with those getting the most sun blooming first, and the ones getting the least sun blooming last. Now’s the time to purchase and plant first-quality bulbs for spring bloom. These include alliums, amaryllis, anemones, brodiaeas, crocuses, daffodils, freesias (so fragrant!), fritillarias, galanthus, baby glads, glory-of-the-snows, grape and Dutch and wood hyacinths, Dutch irises, ixias, leucojums, lycoris, montbretias, narcissus, nerine, paperwhites, peonies, ranunculus, scilla, snowdrops, sparaxis, tigridia, tritonia, triteleia, tulips, dog¬tooth violets, watsonias, and winter aconites.
No Bargains Whether purchasing bulbs at a local vendor or through mailorder and online catalogs, there are bargains and then there are ways to waste your money in the name of economy. Waiting to purchase bulbs when they go on sale is a waste for two main reasons: 1. Bulbs that have been sitting in store displays have been slowly losing vitality because they’ve been too warm for too long. 2. Bulbs that have been overlooked by previous buyers are smaller and less vigorous. Even at bargain prices, these will provide less than mediocre results. Better to spend less on premium-quality and get great results! Which to Choose? Choose big, plump bulbs, as these have the most stored food and will produce the largest and most numerous blooms over the longest period of time. They cost a bit more, but they'll provide a great deal more pleasure when they bloom. Especially fragrant freesia cultivars include Athene, Allure, Demeter, Excelsior, Golden Wave, Mirabel, Pink Westlind, Snowdon, and Welkin. If you like having blooms in the lawn, these are good for naturalizing, and the ripening foliage following bloom won't interfere with mowing the lawn: Chionodoxa, eranthis, muscari, ornithogalum, and puschkinia. Don't forget to buy some bulbs just for indoor forcing color from Thanksgiving through January. Good choices include amaryllis, crocus, freesias, lily-of-the-valley, paperwhites, and tulips. To Chill or Not to Chill? Store the bulbs in a cool, well-ventilated area until you're ready to plant them. Chill crocus, daffodil, hyacinth, narcissus, and tulip bulbs in a paper bag on the lowest shelf in the refrigerator -- at about 40 degrees -- for at six to eight weeks. Use a paper -- not plastic -- bag since the bulbs are alive and must breathe. Keep chilling bulbs away from ripening fruit like bananas and apples, since the ethylene gas being released as they ripen will destroy the flower-developing hormones in the bulbs. Planting Enrich the soil where the bulbs are to be planted with compost, bone meal, and granite dust or wood ashes (but not from charcoal briquettes used in the barbecue, which contain harmful chemicals). Also, add some nitrogen, as it is easily washed from the soil by winter rains (hope, hope!), and bulbs need a small but continuous supply all winter long for strong growth of the foliage and the bloomstalk. For a long-lasting spring display, plant some early, mid-season, and late-blooming bulbs every other week through mid-December, and again beginning in late January. Depth of planting also affects when the bulbs will bloom. Shallower plantings will bloom sooner. Deeper plantings will bloom later. If you want everything to bloom for one spectacular display, plant the bulbs at the same time and at the same depth. If you prefer color over several months' time, plant bulbs every several weeks, and vary the planting depths each time you plant. This makes them perfect for planting in containers. Saffron Crocus Plant autumn-blooming saffron crocus now. Each corm produces from one to three flowers, and about six corms should provide sufficient saffron -- just the three tiny red stamens in each bloom -- for each cooking or baking recipe. Two Excellent Online Sources For bulbs that don’t require special cooling attention because their climates of origin are closer to our own, there are two wonderful online resources:
|
Categories |

 RSS Feed