Gardening In LA
  • Home
  • About
  • Services
    • Garden Coaching
    • Speaking
    • Photography
    • Writing >
      • List of Articles
  • Blog
  • News
  • Monthly Tips
    • January
    • February
    • March
    • April
    • May
    • June
    • July
    • August
    • September
    • October
    • November
    • December
  • Events
    • Submit Your Garden Events
    • Botanical Gardens' and Other Organizations' Garden Events
  • Jobs
  • Web Links
  • Newsletter

Tomato Variety Choices

3/27/2017

0 Comments

 
Picture
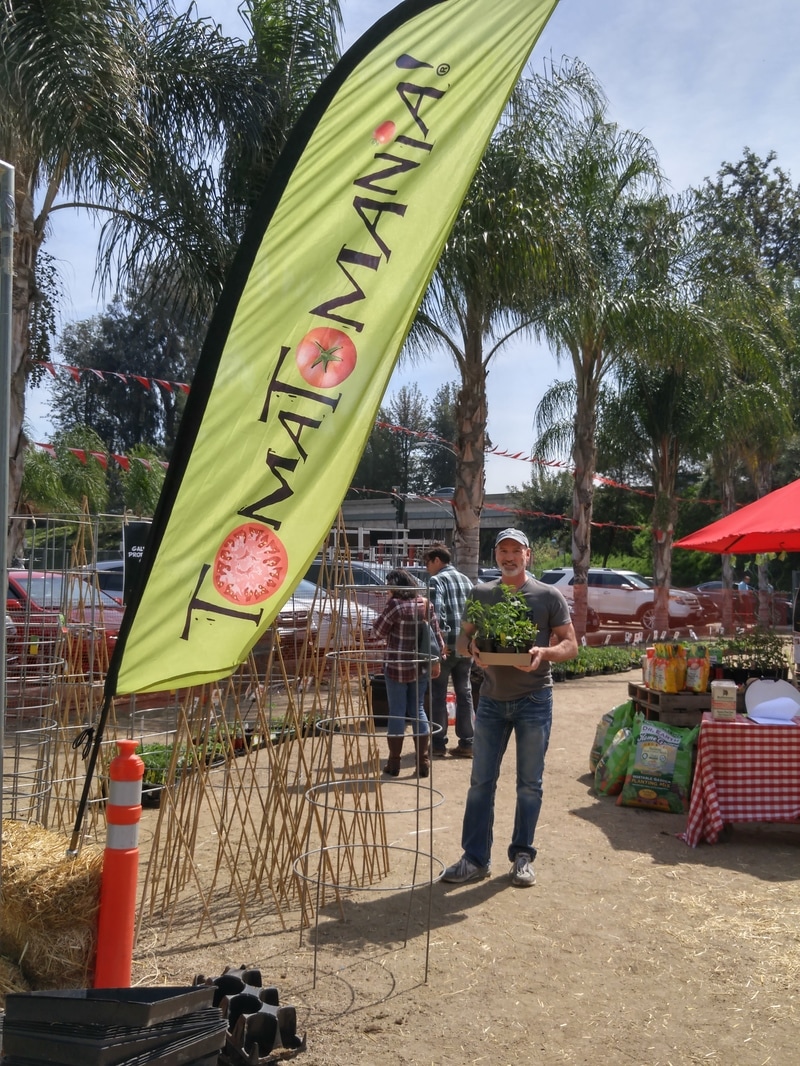
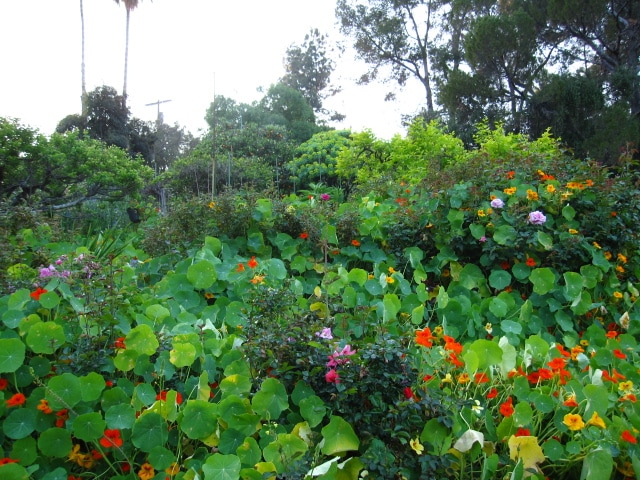
Many varieties will continue to be available at Tapia Brothers.
Picture
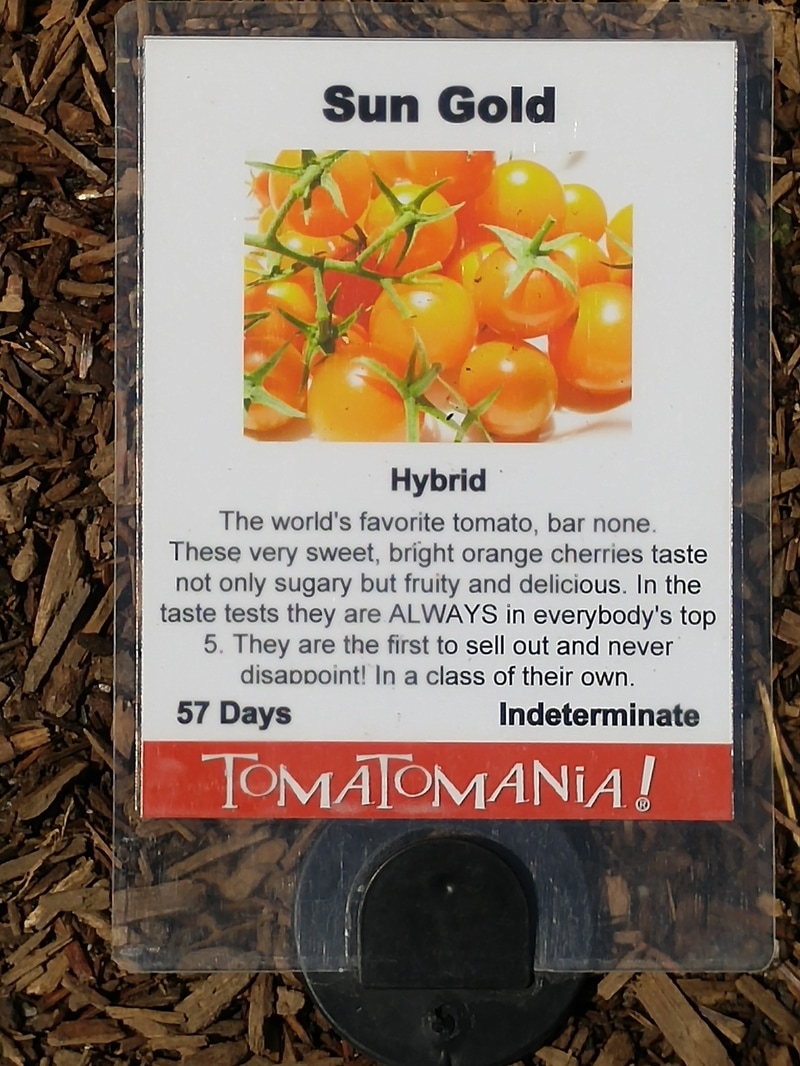
Detailed information provided for each variety.
Picture
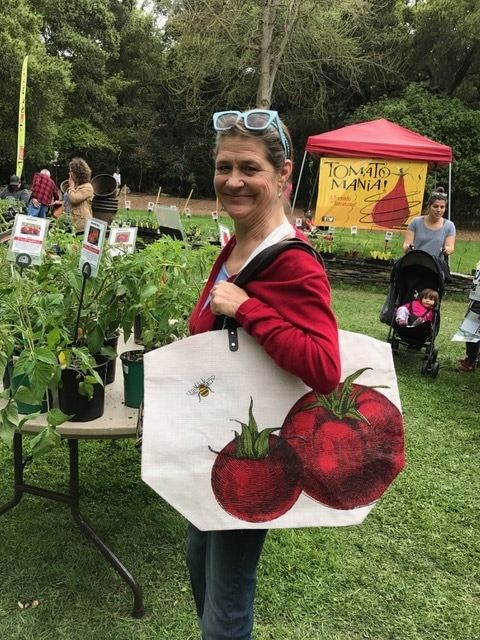
At Descanso, an appropriately tomatoey carry bag! Thanks to Mark Donofrio for his photo!
​     So many tomato varieties to choose from, between online, mailorder catalogs, and local resources!  Even big-box stores carry some organically grown and heirloom varieties! 
     I asked several tomato experts who had worked with me at two local Tomatomania events what their favorites were that they’d grow again this year, and which new ones they’d try for the first time.  Here’re their lists, so you can perhaps try some of them as well!
 
“Best Tomato Flavor” is Relative
    Everyone will have what they consider to be their favorite tomato, or at least what they’re trying to remember from their childhood or just last year.  But, like with restaurants, movies, and other of Life’s preferences, your friend’s favorites may taste awful or at least boring to you, making you wonder why they even bothered growing it.  That magic balance of sweet and acid is what determines each our own “best.” 
 
The Lists
     Steve Gerischer grows these every year in Glassell Park:  Cherokee Purple, Lizzano (for containers), Genuwine, Juliet (for sauce), San Marzano (for sauce), and Sungold.  New this year, he’ll try Piglet Willy’s French Black (the name fascinates him), and Viagra (anything with that name has to be tried….).
     Laura Moore loves these in her coastal garden:  Black and Brown Boar, Carmelo, Jaune Flaumme, Old Yellow Candy Stripe, Orange Paruche, Sun Sugar, Sweet Tangerine.  This year, she’ll try Brandywine Joyce’s Strain, Clementine, Harless Creek Gold, Katana, Mirabelle Blanche, Oh Happy Day, and Viagra.
     Andy Vaughn annual favorites in his South Bay garden include Black Cherry, Black Krim, Brandy Boy, and Copper River.  This year, he’ll try Tesse’s Land Race and Thunder Mountain.
     Scott Daigre, Mr. Tomatomania himself, will grow these this year in Ojai:  Carbon, Juliet, Lucid Gem, Russian Queen, Summer of Love, and Thunder Mountain.
     My summer garden in Pasadena always includes Ace, Big Rainbow, Black Krim, Brandywine, Carmelo, Celebrity, Cherokee Purple, Green Zebra, Odoriko, Stupice, and Sungold. 
     Over the years, I've tried many varieties.  I usually grow them for three years to make sure that I either consistently liked them or that they didn’t perform as well as my other favorites:  Amazon Chocolate, Anana Noir, Arkansas Traveler, Aunt Ginny’s Purple, Aunt Ruby’s German Green, Beefsteak, Better Boy, Black Pear, Black Prince, Black Zebra, Brandywine, Brandywine Red, Champion, Costoluto Fiorentino, Costoluto Genovese, Dona, Early Girl, Gardeners Delight, German Giant, Giant Belgium, Gold Nugget, Green Grape, Hawaiian Pineapple, Health Kick, Heartland, Hillbilly, Isis Candy, Italian Sweet, Japanese Oxheart, Jetsetter, Jubilee, Lemon Boy, Mammoth German Gold, Marizol Purple, Marmande, Matt’s Wild Currant, Momotaro, Mr. Stripey, Nyagous, Old German, Oxheart, Paul Robeson, Pineapple, Principe Borghese, Prudens Purple, Rainbow, Red Current, Red Pear, Riesentraube, Rutgers, Siletz, Sugar Snack, Summer Cider Apricot, Sun Sugar, Tommy Toe, Yellow Currant, and Yellow Pear.
    
Tomato Planting Tips
     Please see my March 7, 2017 blog of planting tips!
Direct link = http://www.gardeninginla.net/blog/planting-tomatoes
 
Remaining Tomatomania events in Southern California
March 31 & April 1 - Otto and Sons Nursery, Fillmore
April 1 - Ojai Valley School, Ojai
April 5 & 6 - Surfas Culinary District, Culver City
April 8 - Santa Barbara – location to be determined.
See www.Tomatomania.com for more information.
0 Comments

Salvaging Lettuce and Greens When They Bolt (Go to Seed)

3/18/2017

3 Comments

 
Picture
Lettuce bolts at different stages, even within the same variety.
Picture
Bolting Bok Choy
Picture
Note the white sap exuding from where the leaf has been ripped from the elongated stem.
Picture
Fill dishpan with water. Leaves discarded at left were too mature or bug-munched so will go to the compost pile.
Picture
Press down the leaves so all get submerged.
Picture
After third rinse, transfer leaves into collander to drain.
Picture
Transfer leaves into ziplock bags.
Picture
Press out as much air as possible, and seal the ziplock. Refrigerate or give to friends!
Picture
If you choose to let the lettuce set its seed, it'll look like this with tiny blossoms blooming over a 3- or 4-week period.
Picture
You'll want to tie paper bags over the entire seedhead so mature seed won't fall to the ground before the rest of the seed matures. Don't use plastic bags because they'll retain moisture and rot the seed. When the stem is crispy dry, it's ready to break off and store the whole bag-and-all where it'll stay dry until fall when you'll crush and scatter the seeds in the garden.
​     Finally, cooler weather, back into the low-to-mid 70s with even some rain promised for later this week.  MUCH nicer for transplanting all those tomatoes you’re hopefully purchasing at all the plant sales all over Southern California!
     That couple of weeks of 80+ temperatures resulted in many of my lettuces and spinaches and bok choys bolting – sending up those long stalks, flowering, and setting seed.  Here’s how I was able to continue harvesting individual leaves from each plant up until they were just too bitter.
 
Salvaging Bolting Greens For More Eating
  1. This process will extend the harvest by up to two or three weeks for each plant, since you’re taste-testing each plant as it begins to move into its reproductive stage of life.  Each plant – even of the same variety – will be different in how soon or late it becomes inedible, so you’ll want to deal with each plant separately.
  2. As each plant begins to elongate its central stem, taste one of the mature-but-not old leaves.  If it still tastes fine, you know you can harvest the entire plant, and remove each leaf from the elongated stem.  If the leaf tastes too bitter, pull the plant and toss into the compost pile.
  3. As you strip away each lettuce leaf, you may see white sap exuding from the tear at the stem.  This is a cue that the leaf may be bitter-tasting.
  4. Soak the harvested leaves for about 20 minutes.  I like to use a large dishpan so the leaves have lots of room to move.  Depending on the size of the harvest, I may have to use several dishpans.
  5. The leaves will float, so push them under the water several times so the entire leaves can absorb the water. 
  6. Try not to disturb the dirt particles that have settled to the bottom of the container.
  7. Transfer leaves to another clean rinsing container, removing any debris from the garden.
  8. Repeat with clean water two more times.
  9. This three-time process accomplishes two things – it displaces any bitterness with clean water, and it crisps the leaves.
  10. Transfer leaves to colanders to drain.  No need to spin or otherwise dry further – the residual water drops will keep the leaves crisp when refrigerated.
  11. Transfer leaves into ziplock bags.  I like to sort different leaves – lettuces, spinaches, beets, bokchoys – and sizes so I’ll have many choices when I’m preparing different recipes or combining salads.
  12. Fill each bag as fully as the leaves allow without crushing or stuffing tightly.
  13. Gently press most of the air out of each bag, and press the ziplock.  No need to remove all of the air, however.  This mostly-vacuum environment will extend the refrigerated life of all the leaves.
  14. Use this soaking process for all greens from the garden, whether or not they're bolting!
    
Letting Plants Bolt So You Can Save Seed
     Of course, another option is to let individual plants continue their bolting process so you’ll have seeds to use for next year’s crop.  The only caveat is to save seeds from non-hybrid varieties if you want to get the exact same plant you grew.  If it’s a hybrid variety, the seed will germinate into many variations of what you grew this time – sometimes a good thing but many times not what you were expecting. 
     But who knows – you might invent something new!
3 Comments

Planting Tomatoes

3/7/2017

5 Comments

 
Picture
Double-stacked tomato trellises are anchored both with uprights and between plants. One year, without the anchoring poles, the whole row blew down!
Picture
My nasturtium "ocean".
Picture
August Pride peach blossoming.
Picture
Fragrant freesia in brilliant yellow.
Picture
First calla lily.
Picture
'Mary Lou Heard' rose.
Picture
Sky-Blue bearded iris with clear-yellow chasmanthe.
Picture
Coral rose.
Picture
Cooke's Pakistan mulberry blossoms.
Picture
Stock.
     With these 80-degree daytime temperatures, I hope you're inspired to start planting your spring and summer garden.  I already have six different varieties of tomatoes in their beds.  My nasturtium groundcover has literally turned my hillside garden into an ocean of green, with blooms popping up amongst 5-inch-round leaves, thanks to all that rain!  Other bloomers – including fruit trees -- are brightening the greenery.
     Since the first sturdy tomato seedling varieties appeared at local nurseries, I’ve been planting my “usual suspects” that I grow every year – Sungold, Celebrity, Early Girl, Ace, Cherokee Purple, Black Krim, Brandywine; I’ll add Green Zebra, Stupice, Dona, Carmello and Green Grape as I find them. 
     I’ll also add new ones to see how they do. I usually give varieties new to me at least three chances – if they do well for 3 years, they’ll perhaps replace one of my “usuals”.  In the meantime, there’s a lot of good eating!
     I always purchase two plants of each variety, and plant them in separate holes, because sometimes one doesn’t survive, and I want to make sure I get some of each of those fruits.  So far, one Pink Brandywine and one Early Girl have given up, so I’ll purchase stronger plants.
     Tomatomania is always an excellent source of many, many varieties (some locations offer more than 200!), and tomato experts on hand to help you decide.  See http://tomatomania.com/events/ for upcoming locations in your locale.  I’ll be at Tapia Brothers on 3/19, and Descanso on 3/25.
     Because tomatoes are heavy feeders and drinkers, I recommend these steps in planting:
  1. Incorporate manure and compost into the entire growing bed (tomato roots can extend 4 feet to the side and down).
  2. Provide soaker hoses or drip irrigation or buried 5-gallon buckets with bottom holes. Keep soil evenly moist – like a wrung-out sponge – for the entire growth period.When plants are fully developed during hot weather, this may require an inch of water per day, depending on your soil type.
  3. Provide sturdy trellises to corral extensive foliage and support fruit for the full life of the plant.“Determinant” varieties will grow to 3 or 4 feet tall so one trellis will usually suffice.“Indeterminant” varieties may extend to 8 or 10 feet high, so I stack a second trellis on top of the first one.In addition, I stake one corner of my trellises both with uprights and between plants for support while growing and during our Santa Ana winds in fall when the plants are huge and full of fruit.I’ve done this ever since the year that the winds blew down my whole row of plants following my deep watering.
  4. Dig holes and turn soil a full handtrowel deep and around – about 6-8 inches.
  5. Roughen up the plant’s rootball to “inspire” or “threaten” the plant to develop new vigorous roots.If the container-grown media is very loose, like peatmoss or vermiculite, shake most of it into the hole to mix with the dirt to create a more moisture-holding mixture.
  6. Remove any leaves along the stem, leaving only the topmost 3 leaves.
  7. Place the plant rootball at the bottom of the hole, and hold the stem upright by its top 3 leaves.Gather the soil back around the stem, and fill the hole so only the top 3 leaves are showing.Roots will develop all along the stem for a stronger plant.However, be aware that tomatoes are the only plants that do this, so use this deep-planting technique only for tomatoes.
  8. Arrange remaining soil into a short berm about 4 inches away from the stem and foliage.This will be its initial watering hole to direct water down to the rootzone.
  9. Water the plant in well, filling the hole three times as the water disappears into the soil.Then, also water the area around each plant to a distance of another foot or two.You want that entire surrounding area to be well-irrigated so roots will want to extend out there, providing more nutrition and moisture for the growing plant.
5 Comments

    Archives

    March 2023
    February 2023
    January 2023
    December 2022
    November 2022
    October 2022
    September 2022
    August 2022
    July 2022
    June 2022
    May 2022
    April 2022
    March 2022
    February 2022
    January 2022
    December 2021
    November 2021
    October 2021
    September 2021
    August 2021
    July 2021
    June 2021
    May 2021
    April 2021
    March 2021
    February 2021
    January 2021
    December 2020
    November 2020
    October 2020
    September 2020
    August 2020
    July 2020
    June 2020
    May 2020
    April 2020
    March 2020
    February 2020
    January 2020
    December 2019
    November 2019
    October 2019
    September 2019
    August 2019
    July 2019
    June 2019
    May 2019
    April 2019
    March 2019
    February 2019
    January 2019
    December 2018
    November 2018
    October 2018
    September 2018
    August 2018
    July 2018
    June 2018
    May 2018
    April 2018
    March 2018
    February 2018
    January 2018
    December 2017
    November 2017
    October 2017
    September 2017
    August 2017
    July 2017
    June 2017
    May 2017
    April 2017
    March 2017
    February 2017
    January 2017
    December 2016
    November 2016
    October 2016
    September 2016
    August 2016
    July 2016
    June 2016
    May 2016
    April 2016
    March 2016
    February 2016
    January 2016
    December 2015
    November 2015
    October 2015
    September 2015
    August 2015
    July 2015

    Categories

    All

    RSS Feed

© 2015 Yvonne Savio. All Rights Reserved.                                                                                                                                                         Web Design by StudioMAH.