Gardening In LA
  • Home
  • About
  • Services
    • Garden Coaching
    • Speaking
    • Photography
    • Writing >
      • List of Articles
  • Blog
  • News
  • Monthly Tips
    • January
    • February
    • March
    • April
    • May
    • June
    • July
    • August
    • September
    • October
    • November
    • December
  • Events
    • Submit Your Garden Events
    • Botanical Gardens' and Other Organizations' Garden Events
  • Jobs
  • Web Links
  • Newsletter

FIGS, FIGS, FIGS!

8/27/2016

7 Comments

 
Picture
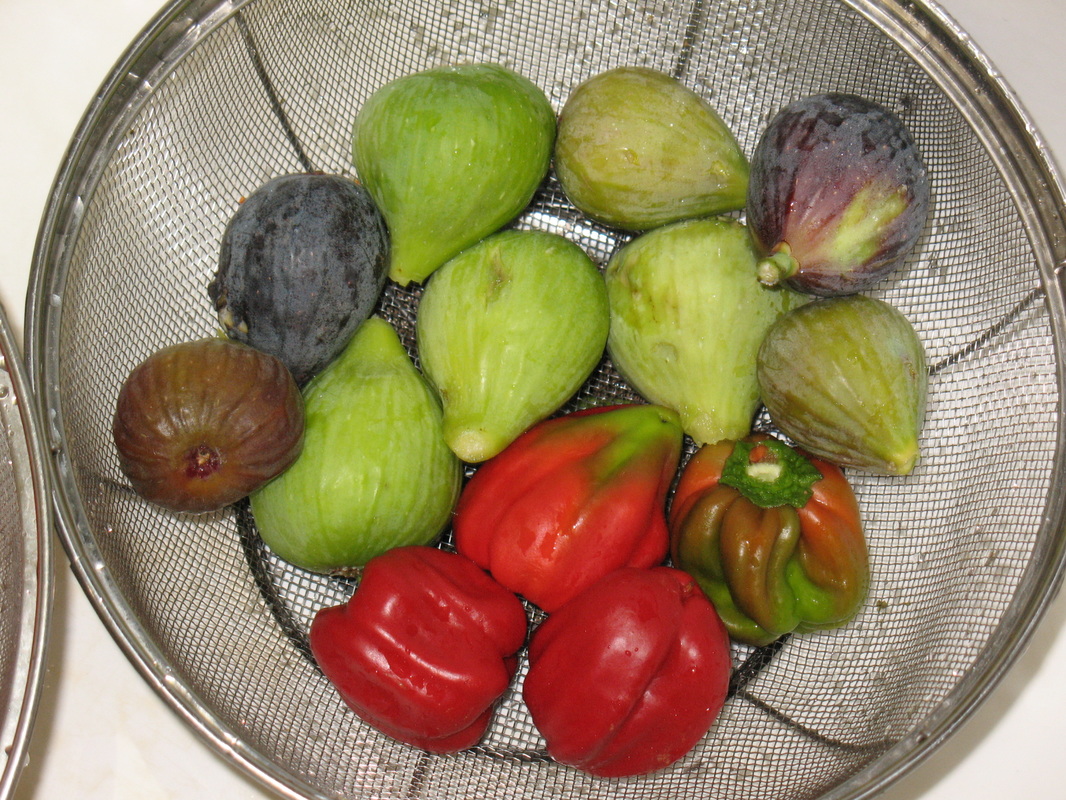
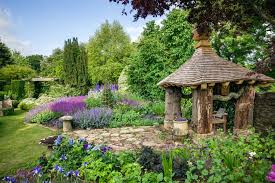
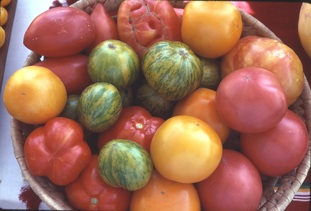
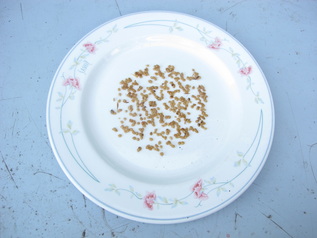
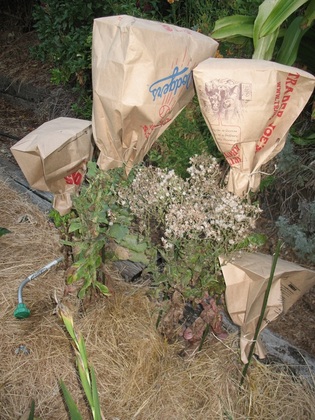
Black Mission and several green-skinned varieties with rose- and honey-colored- and greenish-white flesh.
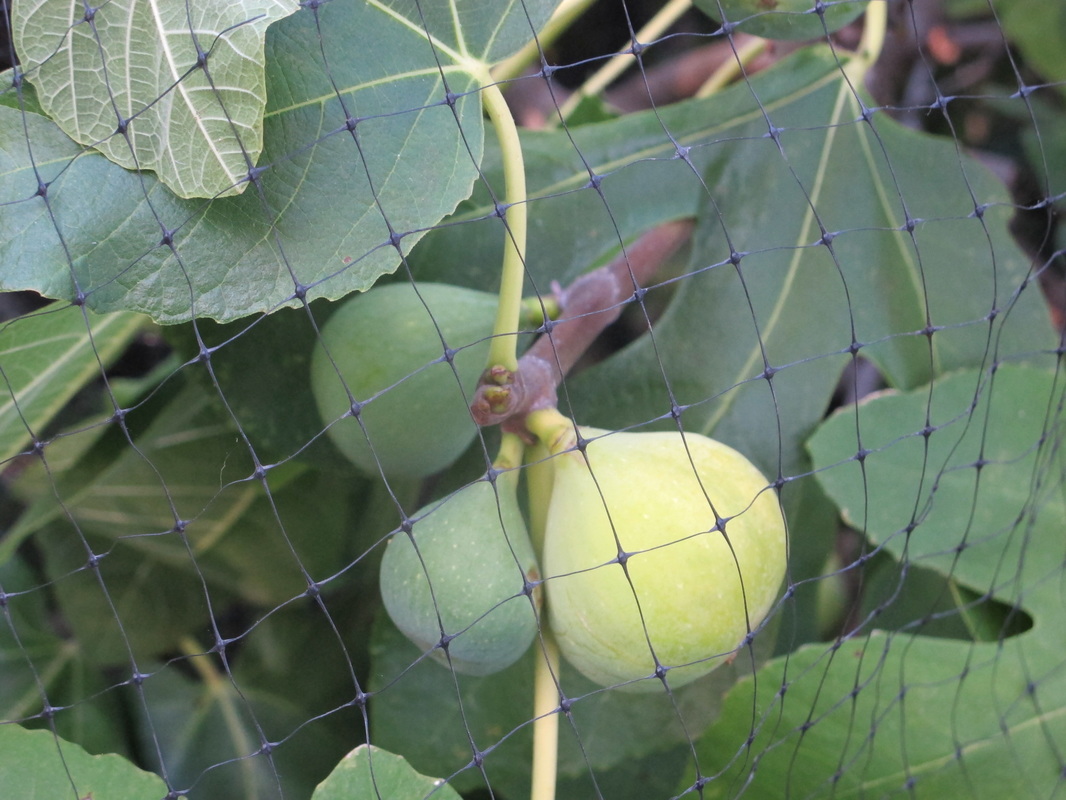
Picture
Bird netting with ripening fruit.
Picture
Fig branches each corralled with netting and a hole for harvesting.
Picture
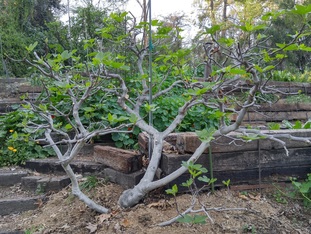
Back in early Spring, when the foliage was just emerging, the separate branches (each its own variety of the green-skinned varieties) are spaced far enough apart to facilitate separate netting and harvesting.
Picture
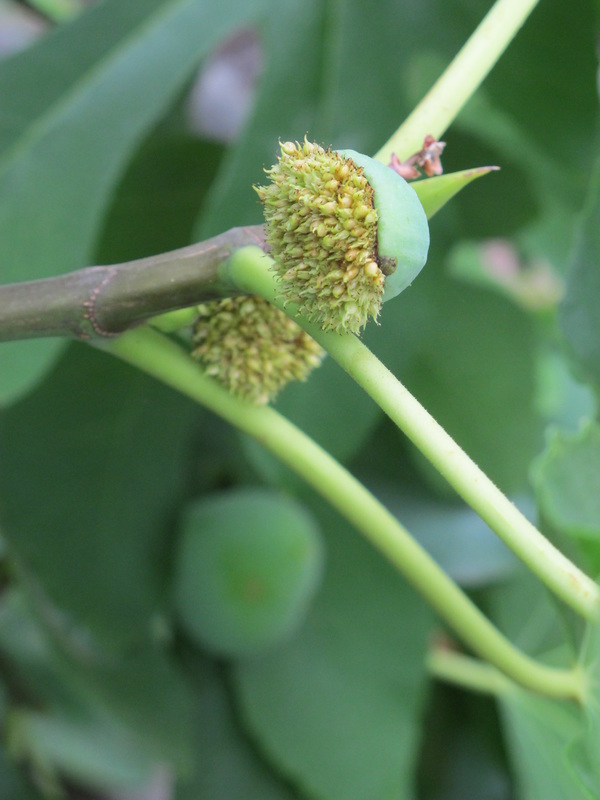
Sometimes fruit does weird stuff - this one's turned itself inside out.
Picture
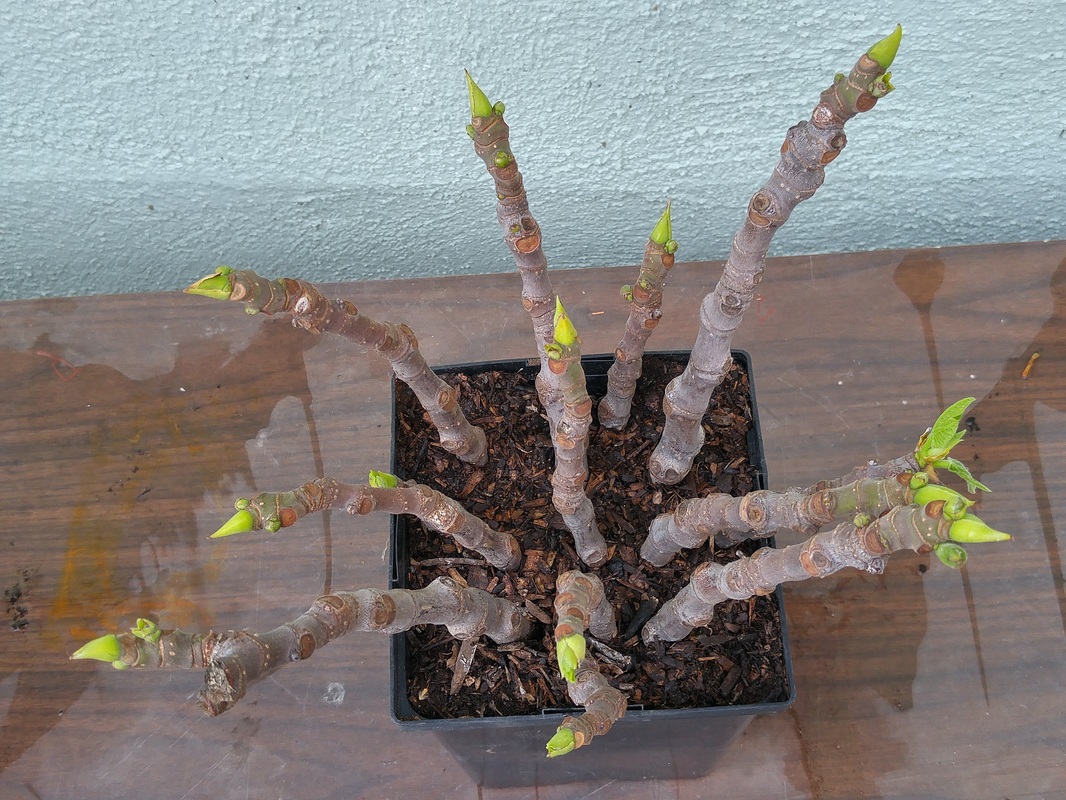
Fig cuttings are easy to root. Best to start in early Spring, when the energy is flowing in the cuttings, rather than in Fall when the energy is waning in preparation for going dormant.
     I do love my figs. As a child, we had two varieties – Brown Turkey and Black Mission.  I preferred the Brown Turkey for its size and sweetness, but the fuzzy skin irritated my mouth after eating a dozen or so, so I pryed them open and snarfed up the flesh from the inside, tossing the empty skin down under the tree to become composted nutrition that precisely matched what had been in the fruit. 
     I loved munching my way through the garden – figs, tomatoes, berries, apples, peaches, nectarines, plums, feijoas, persimmons, cucumbers and even beans and squash.  Carrots and beets needed a bit more attention since they needed to be washed first.  Talk about freshly harvested and enjoying not-even-five-minute-old deliciousness!
     My Dad, with all his mechanical wizardry, had devised all sorts of blue jay deterrents, from buzzers to revolving stakes with pie-tins hanging, a veritable repurposed menagerie, two or three types each summer as they all worked for maybe 3 weeks before the birds “learned” that there was nothing else keeping them from their snacking. 
     When I returned home and took over the garden, birds were no longer the problem, but squirrels were – especially when I discovered that one neighbor was putting out nuts to attract them!  I tried everything on the market, including inflatable owls and those big-eye balloons, but stopped short of fox urine and motion-started water sprays. 
     One year, I tied white-plastic grocery bags around small groups of fruit, figuring that if the critters couldn’t see the developing fruit and their changing color, they wouldn’t forage.  That worked for one time around.
     Finally, I used bird netting.  For a couple of years when the trees were small, I tried to cover each entire tree with one net.  Of course, this was terribly awkward trying to get the netting over the whole tree without snagging on individual branches, so it left many openings for the critters to sneak in.  And removing the netting after a couple of months (from early ripening to final harvest) was a real problem because the branches and foliage had grown into and through the netting. 
     Ripping was the only way to get the netting off of the trees.  So I ended up with bits and pieces of the netting, some in large sections.  But, this ended up being a inspired boon to my next approach. 
     By this time, my pruning had resulted in several distinct branching groups on each tree, which matched perfectly with the larger pieces of netting to corral the fruit and be anchored with a some twist-ties at the bases of the branches that the squirrels couldn’t simple unravel. 
     For access to the fruit for harvest, I chose a section on the downside of a group of branches – literally in mid-air – and ripped a hole barely large enough for my fist grasping one fruit.  I figured that this harvest-hole placement wouldn’t allow access by squirrels from a nearby branch because their weight would drag them away from the hole.  It worked! 
     The end-of-harvest removal of the netting is still somewhat laborious because the branches and leaves have indeed grown into the netting.  But, for figs this isn’t a big issue since I do my after-harvest summer pruning at the same time that I’m removing the netting. 
     I’ve been using this method for three years now, and relishing every single fig and peach and nectarine and persimmon as I choose precisely when to harvest each and every one.  Yay!
     And my collection of fig varieties now includes, besides rooted cuttings from that old Black Mission, Peter's Honey and three green-skinned varieties from my father-in-law with greenish-white flesh, red flesh, and honey-colored flesh.  This month, I'll also plant two more - Conadria and Celeste - that I rooted from cuttings I got at last February's California Rare Fruit Grower's Pasadena chapter scion exchange.   Yum!
7 Comments

PRINCE CHARLES’ HIGHGROVE ORGANIC GARDEN

8/16/2016

3 Comments

 
Picture
Picture
One of the garden views from the house.
Picture
The fountain garden.
Picture
The manicured perennial garden, with the Prince's favorite rest spot.
Picture
The Prince collects big pots.
Picture
Originally a black-and-white garden, now full of color.
Picture
The view on the other side of the house. The statuesque Leland Cyprus has since blown down.
Picture
The Prince instructed the gardeners to "adopt" a topiary and prune it however he'd like.
Picture
Transition from the manicured garden through the wildflower landscape through the gate to the shady gardens.
Picture
Broad wildflower landscapes are scythed by hand after collecting seeds.
Picture
Brilliant red Flanders poppies honor WWII veterans.
Picture
Initially a respository for dead trees, the area has become a jungle celebrating their breakdown into thick mulch. The treehouse was enjoyed by the newest generations of youngsters.
Picture
Sweet pea trellis offers a shady walk.
Picture
The mossy fountain supplies bees with constant moisture.
Picture
The production gardens.
Picture
Tetbury's market square, where the Prince sells produce from his farm.
Picture
The shop in Tetbury.
    Earlier this Spring, in May, we traveled to England to partake of the Champagne Garden Tea Tour at Prince Charles’ Highgrove estate. I'd read his book and was of course most interested in viewing his organic garden and farm, especially the composting facilities.
     But, because this was a champagne tour, it focused on the more publicly civilized aspects of the extensive garden.  Although we never got close to the “working” part of the garden, we did indeed visit many of the nooks and crannies and approaches to gardening that the Prince is renowned for being such a truly hands-on gardener passionate about sustainability.   It was fascinating. 
     Although we visitors can’t take photographs, many are available online, so I’ve pulled some of those to illustrate where we went. 
     If you anticipate planning a trip to The Royal Gardens at Highgrove (https://www.highgrovegardens.com/), be aware that reservations are usually filled many months ahead, and you must arrive at the estate guard house only 15 minutes ahead of your scheduled tour -- and you’re not allowed to wait there if you arrive early. 
     We’d arrived an hour early by taxi from the Kemble train station a half-hour away, and had to take the taxi back into the nearby town of Tetbury, 10 minutes away, until we’d be allowed to enter the Prince’s property. 
     To avoid paying the Kemble taxi again, we thought we’d utilize a Tetbury taxi.  But, as we enjoyed our pasties and tea at a tea shop, we found that the three local taxi companies were either on vacation or didn’t respond. 
     Luckily, a local resident in the shop heard of our plight and volunteered to take us to Highgrove at our assigned time.  Of course, he had never been there and didn’t really know where it was, so we got a very roundabout trip to Highgrove through surrounding countryside and arrived almost too late to be allowed on our assigned tour! 
     Following our tour, Highgrove called a taxi that they always deal with to take us back to the Kemble train station, so at least that end of the day went smoothly. 
     Even when you plan as much as you can, there’s always some new adventure….
     So, on to our Highgrove tour!


3 Comments

SOME TOWARD-THE-END-OF-SUMMER GARDENING TASKS

8/9/2016

0 Comments

 
Picture
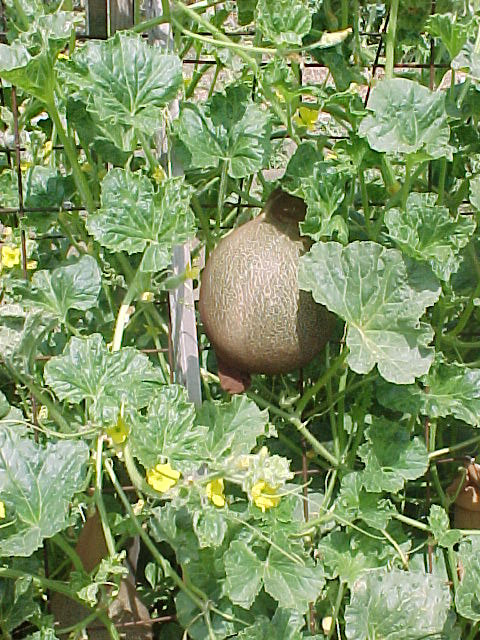
Huell Howser's favorite repurposed household tool -- my using old pantyhose tied to a trellis to hold melons up off of the soil and away from pests.
     Sick of tomatoes and squash and beans and cucumbers and the heat? Here’re some things to help your garden limp to the end of the summer before you start thinking about starting the fall and overwintering garden.  (Yes, it's coming!)   
     Lift melons off the soil surface get them away from moist soil and crawling pests.  Boards, cans, or plastic baskets from strawberries or cherry tomatoes serve well. 
     When Huell Howser came to my garden (see https://blogs.chapman.edu/huell-howser-archives/2004/09/04/californias-green-103-green-gardener/), his favorite repurposed household tool was my using old pantyhose tied to trellises to hold melons up off of the soil -- see photo at left.  The mesh of the pantyhose allows the melon (or squash or watermelon or whatever vine fruit you're using it on) to grow unimpeded while protecting it from pests.
     Stop watering melon plants the week before they'll be ripe to allow the sweetness to concentrate and to minimize fruit-cracking problems.
     Fertilize tasseling corn and other vegetables that are still setting -- beans, cucumbers,  eggplants, tomatoes, etc.--for increased yields.  Plants appreciate this extra boost in food to use immediately in maturing their fruits.  But during our extra-hot weather, be sure to water the plants well first so the fertilizer won't "burn" the roots.
      Continue to keep vine vegetables (especially beans, cucumbers, squash, and tomatoes) picked, whether or not you will use the harvest that day.  If many fruits are allowed to overmature on the plant, they’ll “think” they’ve accomplished their reproductive duty and won’t put out any more blossoms for more fruit.  
     But if you have kept plants well-picked and fertilized, and fruit set has stopped, suspect hot weather.   Fruit set will begin again about ten to fourteen days after the temperature stays below 85 to 90 degrees.
     Harvest fruits and vegetables as early in the day as possible, especially if they are not to be eaten that day or will be refrigerated.  Research at the University of California, Davis, has found that the six hours before sunrise is the best time to harvest because it’s the coolest.  As soon as the sun hits the fruits or vegetables, the pulp temperature begins to rise, and even shading them will not delay the temperature rise for long.  Each five degrees lower temperature when the fruit is picked will extend shelf-life for another three days. 
     Tomatoes, in particular, develop more chilling injury -- that telltale graininess and mushiness -- when they are cooled after being harvested when thoroughly warm.  That’s why you shouldn’t refrigerate tomatoes!
     As vine crops reach the tops of their trellises, pinch off the lead vine; the side shoots will take over the major growth and food production.
     Pinch off the last blossoms of eggplants, peppers, melons, squashes, and tomatoes.  Plant energy will then be spent maturing fruit that's already set, instead of setting more fruit that won't ripen sufficiently before fall cold (yes, it's coming!).
     Feed and water bramble fruits and strawberries.  The size of next summer's fruit is determined this month and next--the more fertilizer and irrigation, the bigger the berries will be next spring.  Propagate bramble fruits by bending the cane tips to the soil surface and burying one or two nodes an inch or so deep. 
     Remove tree suckers and watersprouts -- the long shoots that grow straight up from the trunk base (sucker) or a branch (watersprout). 
     Keep tree trunks -- especially of young trees -- painted with light-color, matte-finish, indoor latex paint to protect them from sunscald.  This will continue into the winter for deciduous trees, as well.
     Stop  feeding trees later this month, or the resulting tender new growth will be damaged by winter frosts.  The gradually cooling weather and lack of additional nitrogen fertilizer during September, October, and early November will help harden exuberant summer growth to withstand winter's cold.
     Feed azaleas, camellias, and rhododendrons an acid fertilizer for the last time this year, to help them set buds for early spring bloom.  Continue feeding begonias, fuchsias, and summer annuals.  Container plants and water-lovers such as baby's tears, coleus, and fuchsias may need daily irrigation during hot weather.  Feed mums until their buds begin to show color and open.      
     Increase bloom size of chrysanthemums and dahlias by removing half of the new buds.  
     Prolong fuchsia blooms by picking off the faded flowers, yellowed leaves, and fruits.  Trim back stems to force side branching and flowering, and fertilize and water them well. 
     Prune summer-blooming shrubs when they've finished flowering. 
     Shape hedges for the last time this season. 
     Continue gently shaping roses after pruning suckers, unwanted branches, and  spent blooms; cultivate manure, bonemeal, and cottonseed meal into the top three inches of soil, and water deeply. 


0 Comments

Saving Seeds From Non-Hybrid Vegetables

8/3/2016

0 Comments

 
Picture
Tomato bounty - Yum!
Picture
"Wet" Seed Saving. The first fermenting - yucky and stinky!
Picture
The yuck scooped off. Lots of pulp left, ready for the 2nd fermenting.
Picture
After the 2nd fermenting - no more yuck, but some coating on the surface of the water. All the viable seeds have sunk to the bottom.
Picture
Rinse before 3rd fermenting. Only a bit of pulp remaining.
Picture
After the 3rd fermenting. No more spoilage, just viable seeds at the bottom.
Picture
After 3rd fermenting, all water poured off.
Picture
Seeds completely rinsed off.
Picture
Seeds drying on china or glass plate. When completely dry, package in paper packet and label. Ready to share with friends!
Picture
"Dry" Seed Saving. Early lettuce bolting. Other varieties still edible.
Picture
Lettuce flowers - some already dry, some just opening, others not yet ready.
Picture
Because lettuce seeds mature over a long period of several weeks, I've covered them with paper bags so they don't scatter all over the garden. When the stalks are completely dry and crispy -- they'll snap sharply instead of bending -- I'll break them off and store them (still in the bags) in my garage. When I'm ready to sow them (or the seeds that did scatter in the garden will germinate), I'll just grab handfuls from the bag and scatter them onto the nursery beds. The chaff will just serve as a bit of mulch to hold moisture and help the seeds germinate.
     Now that veggies have been maturing nicely in our gardens, and you’ve been tasting the differences between varieties, you may have decided that you’d really like to harvest your own seeds to grow next time around.  This is a great idea, as long as you’re thinking about the non-hybrid varieties.  These are the ones that “come true” to what you ate.  Hybrid varieties revert to the qualities of one of the parents or grandparents – completely different from what you ate and thought you were saving.
     The other critical factor is that you must let the fruits ripen completely, so the genetic reproductive material is fully formed. 
     The procedures for saving the seeds are different for “wet” seed and for “dry” seed. 
     “Wet” seeds are the ones encased within pulp like tomatoes and cucumbers and melons or a moist stringy coating like squash and pumpkins; these must be fermented before saving.  The wet pulp surrounding the seeds contains anti-germination chemicals and potentially viruses that will affect the next generation’s plants and fruit.  Because this pulp is tightly bound to the seed – you can’t just wash it off – it must be fermented off.
     “Dry” seeds are loose within the fruit, like dried beans, peas, peppers, lettuce; these must be allowed to get crispy dry before harvesting.  Before that, residual moisture may still be in the seeds and they will spoil later when stored.
 
Here are the steps for each procedure.
 
“Wet” Seed-Saving Procedure
     The cleansing and fermenting process for wet seed is simple, but it takes several days and is quite stinky, so do it outdoors.
  1. Let the fruits that you’ve chosen for seed-saving mature completely, to the point where they’re almost falling off of the plant and spoiling.
  2. Use a in a gallon-sized glass or stainless steel bowl.The fermenting process becomes acidic, so plastic container may not be able to withstand the process.
  3. Squish flesh into mush, crushing any clumps.
  4. Fill the bowl about half-way with water and thoroughly mix the mush and water.
  5. Set the uncovered bowl in a warm, shady outdoor location far away from windows and doors.As it ferments, it will stink strongly, and since the process will be repeated over several days, you won’t want to have to endure the unpleasant smell.
  6. As the mixture ferments, a bubbling, whitish-gray-black puffy substance will rise to the surface with the spoiled pulp.It will look foamy and smell awful.This is exactly what should be happening.
  7. After about 3 days, when the foaming seems to have stopped and the top surface has a whitish coating, this first stage of the fermenting process is done.
  8. Scoop off the floating yucky stuff on top.This will also include some of the unviable seeds. The viable seeds will have sunk to the bottom of the bowl, so it’s easy to differentiate which to get rid of, and which to keep.
  9. Pour off the remaining water, leaving only the viable seeds at the bottom.
  10. Transfer the viable seeds to another gallon-size glass or stainless steel bowl.
  11. Rinse the viable seeds to remove remaining pulp.
  12. Repeat the fermenting process again – fill bowl half-way with water, set outside, let ferment.
  13. Repeat until no more bubbling substance forms on the surface of the water after a couple of days.This means that the seeds are fully cleaned of all potential viruses.For me, this usually means going through 3 fermenting and rinsing cycles.
  14. Transfer the viable seed to a plastic, china, or plastic-coated paper plate for the clean seeds to dry. Don't use a napkin or other soft paper or fabric surface, as the seeds will stick as they dry.
  15. Place the plate in a room-temperature spot out of direct sun to dry.As the seeds dry, gently break apart any clumps, so each seed dries completely by itself.
  16. When seeds are thoroughly dry, usually after a week, put dried seeds into a paper (not plastic) seed packet. Date and label the packet, and store it in a cool, dry, dark location. An interior closet is ideal - anywhere with minimal fluctuation of temperature, light, or moisture.
 
“Dry” Seed Saving Procedure
     This is a really simple process, since most of the moisture is already removed from the seeds.
  1. Harvest seed pods that are fully mature, when the pod or seedstalk is completely dry and crispy.
  2. As the pod or seedstalk approaches maturity, you may want to corral the drying pea or bean pods or seedstalk of lettuce and others that might easily scatter by tying a paper bag around the seedhead.Don’t use a plastic bag because it will hold in moisture.
  3. Snap off dried pods and seedstalk into paper bags.
  4. For beans and peas, you may want to remove seed pod chaff for more convenient seed storage.For lettuce, no need to sort out the seed -- just shake the loose seedheads over the seed-starting soilmix or nursery bed.
  5. Date and label the seed-storage bag, and store it in a cool, dry, dark location. An interior closet is ideal - anywhere with minimal fluctuation of temperature, light, or moisture.
0 Comments

    Archives

    January 2023
    December 2022
    November 2022
    October 2022
    September 2022
    August 2022
    July 2022
    June 2022
    May 2022
    April 2022
    March 2022
    February 2022
    January 2022
    December 2021
    November 2021
    October 2021
    September 2021
    August 2021
    July 2021
    June 2021
    May 2021
    April 2021
    March 2021
    February 2021
    January 2021
    December 2020
    November 2020
    October 2020
    September 2020
    August 2020
    July 2020
    June 2020
    May 2020
    April 2020
    March 2020
    February 2020
    January 2020
    December 2019
    November 2019
    October 2019
    September 2019
    August 2019
    July 2019
    June 2019
    May 2019
    April 2019
    March 2019
    February 2019
    January 2019
    December 2018
    November 2018
    October 2018
    September 2018
    August 2018
    July 2018
    June 2018
    May 2018
    April 2018
    March 2018
    February 2018
    January 2018
    December 2017
    November 2017
    October 2017
    September 2017
    August 2017
    July 2017
    June 2017
    May 2017
    April 2017
    March 2017
    February 2017
    January 2017
    December 2016
    November 2016
    October 2016
    September 2016
    August 2016
    July 2016
    June 2016
    May 2016
    April 2016
    March 2016
    February 2016
    January 2016
    December 2015
    November 2015
    October 2015
    September 2015
    August 2015
    July 2015

    Categories

    All

    RSS Feed

© 2015 Yvonne Savio. All Rights Reserved.                                                                                                                                                         Web Design by StudioMAH.