
It's getting late to transplant anything because of our impending hot weather. However, if you really need to add something to your garden now, do your transplanting in the late afternoon or evening so plants have the whole night to begin to recover before they're hit with a full day of sun and heat. Water the transplants in well and provide shade from the intense mid-day through afternoon sun for several weeks. Keep soil around transplants moist for at least a month until they're well-established. Mulch transplants to lessen evaporation so your irrigation water lasts longer.
Here are more step-by-step details to enable the plants or trees to thrive:
Here are more step-by-step details to enable the plants or trees to thrive:
- Let the plant or tree sit in the exact spot where it’ll be transplanted for 1-2 weeks. Because of the heat, be sure to keep it well watered, and provide a drip pan to hold the water that drains so it can be reabsorbed as the rootball needs.
- Do the transplanting on a day that the temperature will be less than 90 degrees, and begin in the late afternoon – about an hour before dusk. This will assure that the plant or tree will have the entire evening through early morning to resettle in before it’s hit with the sun.
- Dig the hole, and fill with water so the soil another foot down is thoroughly soaked. Dig the hole only as deep as the rootball, but three times as wide.
- Remove the plant or tree from its pot.
- Rough up the rootball to assure that the roots will move out into their new home soil instead of continuing to grow as if constrained by the pot. The amount of roughing up depends on a couple of points:
- Tiny plants like in 6-packs can be prodded with fingers to gently loosen the soil mix so roots can easily redirect themselves into new planting bed.
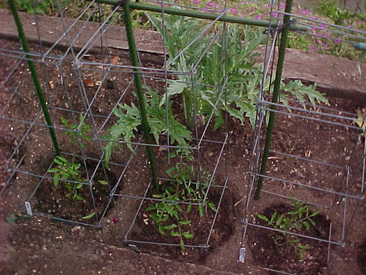
- Small plants in 4” containers like tomatoes or perennials can be completely loosened of their potting mix, especially if it’s very well draining. This mix should be incorporated into the soil from the hole as a “half-way” mixture for the roots to grow into. In addition – this is where my Master Gardener students gasp in horror – ripping off the roots dangling more than 3” will also foster much new root growth (rather than trying to stuff all those extraneous roots into the new hole, which will foster crooked and compacted root growth).
- Larger shrubs and trees in one- or 5-gallon size containers can have the outer inch or two of soil removed and mixed into the soil from the hole. The object is to remove the potting mix down to where you can see many fresh roots so they’ll have direct access into the new hole. Also, trim any crooked roots so the newly-initiated roots will be able to grow straight into their new home soil.
- Tiny plants like in 6-packs can be prodded with fingers to gently loosen the soil mix so roots can easily redirect themselves into new planting bed.
- Stabilize the plant or tree in the planting hole so that the plant is barely above the soil line it was grown in the container. It will sink down when watered in; it’s important that its final sinking is still at the same level it grew at.
- Spread the roots around the entire hole area for future access to nutrients and moisture.
- Fill in the soil, prodding with fingernails to fill all gaps between existing roots.
- When half full of soil, fill with water to help release air pockets.
- Continue filling soil into the entire hole.
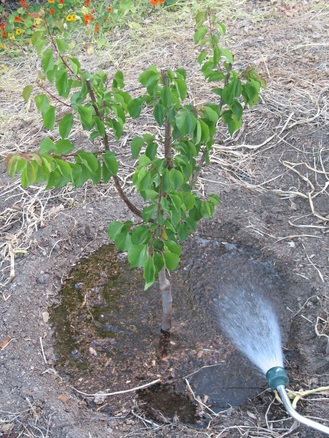
- Form a berm as a water catchment basin to assure that the entire area is deeply watered to encourage roots to grow further out as well as down. For the tomato plant or perennial or shrub, 18 inches wide is fine. For the larger tree, the diameter should be more like three to four feet across.
- Fill the berm with water – leave it running for a full five minutes to assure that it’s sunk deep into the soil.
- Sprinkle the foliage – both tops and undersides – to help the plant or tree retain moisture during this transplanting process before it can get its roots reconnected in the soil and functioning properly.
- The next day, fill the berm with water again for another five minutes. This water will sink deeper, below where the initial water went. Sprinkle the foliage again.
- Repeat a week later, to keep the soil profile moist, and the foliage clean.
- Purchase and use a soil moisture probe each week, so you’ll water only when the plant or tree needs it.
 RSS Feed