Gardening In LA
  • Home
  • About
  • Services
    • Garden Coaching
    • Speaking
    • Photography
    • Writing >
      • List of Articles
  • Blog
  • News
  • Monthly Tips
    • January
    • February
    • March
    • April
    • May
    • June
    • July
    • August
    • September
    • October
    • November
    • December
  • Events
    • Submit Your Garden Events
    • Botanical Gardens' and Other Organizations' Garden Events
  • Jobs
  • Web Links
  • Newsletter

Saving Seeds From Non-Hybrid Vegetables

8/3/2016

0 Comments

 
Picture
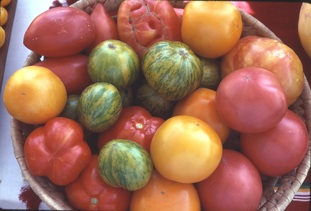
Tomato bounty - Yum!
Picture
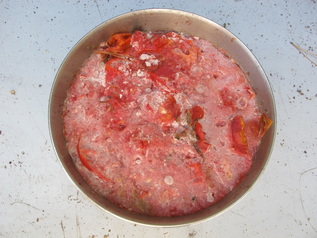
"Wet" Seed Saving. The first fermenting - yucky and stinky!
Picture
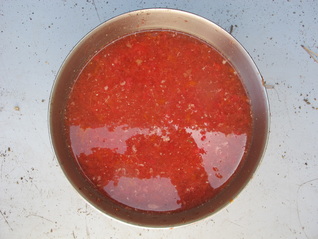
The yuck scooped off. Lots of pulp left, ready for the 2nd fermenting.
Picture
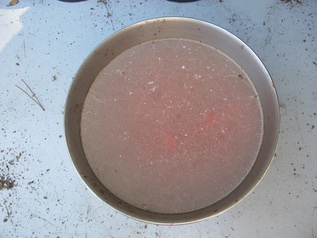
After the 2nd fermenting - no more yuck, but some coating on the surface of the water. All the viable seeds have sunk to the bottom.
Picture
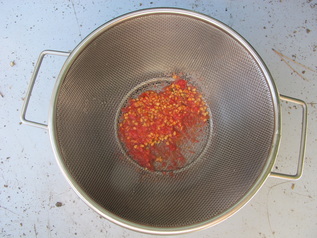
Rinse before 3rd fermenting. Only a bit of pulp remaining.
Picture
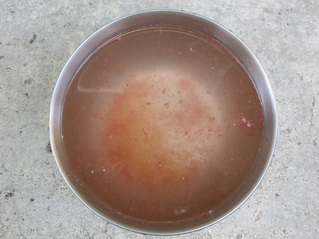
After the 3rd fermenting. No more spoilage, just viable seeds at the bottom.
Picture
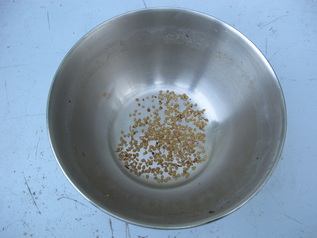
After 3rd fermenting, all water poured off.
Picture
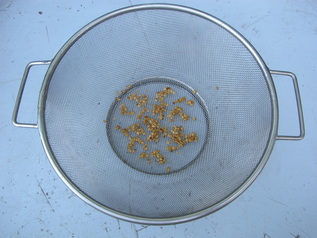
Seeds completely rinsed off.
Picture
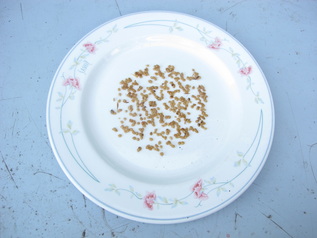
Seeds drying on china or glass plate. When completely dry, package in paper packet and label. Ready to share with friends!
Picture
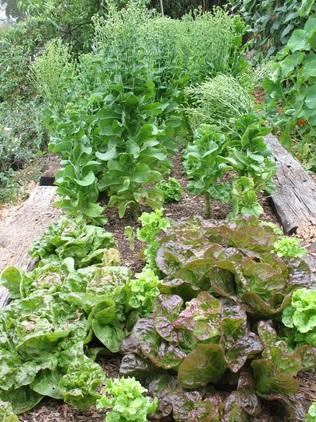
"Dry" Seed Saving. Early lettuce bolting. Other varieties still edible.
Picture
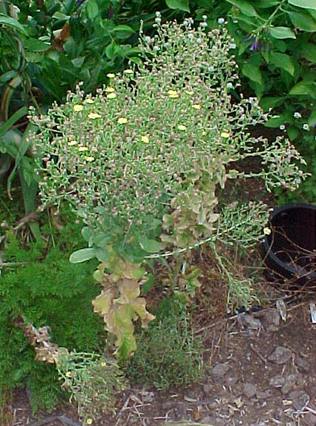
Lettuce flowers - some already dry, some just opening, others not yet ready.
Picture
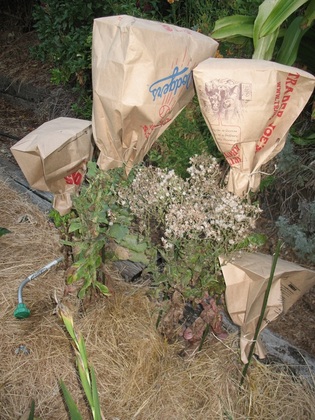
Because lettuce seeds mature over a long period of several weeks, I've covered them with paper bags so they don't scatter all over the garden. When the stalks are completely dry and crispy -- they'll snap sharply instead of bending -- I'll break them off and store them (still in the bags) in my garage. When I'm ready to sow them (or the seeds that did scatter in the garden will germinate), I'll just grab handfuls from the bag and scatter them onto the nursery beds. The chaff will just serve as a bit of mulch to hold moisture and help the seeds germinate.
     Now that veggies have been maturing nicely in our gardens, and you’ve been tasting the differences between varieties, you may have decided that you’d really like to harvest your own seeds to grow next time around.  This is a great idea, as long as you’re thinking about the non-hybrid varieties.  These are the ones that “come true” to what you ate.  Hybrid varieties revert to the qualities of one of the parents or grandparents – completely different from what you ate and thought you were saving.
     The other critical factor is that you must let the fruits ripen completely, so the genetic reproductive material is fully formed. 
     The procedures for saving the seeds are different for “wet” seed and for “dry” seed. 
     “Wet” seeds are the ones encased within pulp like tomatoes and cucumbers and melons or a moist stringy coating like squash and pumpkins; these must be fermented before saving.  The wet pulp surrounding the seeds contains anti-germination chemicals and potentially viruses that will affect the next generation’s plants and fruit.  Because this pulp is tightly bound to the seed – you can’t just wash it off – it must be fermented off.
     “Dry” seeds are loose within the fruit, like dried beans, peas, peppers, lettuce; these must be allowed to get crispy dry before harvesting.  Before that, residual moisture may still be in the seeds and they will spoil later when stored.
 
Here are the steps for each procedure.
 
“Wet” Seed-Saving Procedure
     The cleansing and fermenting process for wet seed is simple, but it takes several days and is quite stinky, so do it outdoors.
  1. Let the fruits that you’ve chosen for seed-saving mature completely, to the point where they’re almost falling off of the plant and spoiling.
  2. Use a in a gallon-sized glass or stainless steel bowl.The fermenting process becomes acidic, so plastic container may not be able to withstand the process.
  3. Squish flesh into mush, crushing any clumps.
  4. Fill the bowl about half-way with water and thoroughly mix the mush and water.
  5. Set the uncovered bowl in a warm, shady outdoor location far away from windows and doors.As it ferments, it will stink strongly, and since the process will be repeated over several days, you won’t want to have to endure the unpleasant smell.
  6. As the mixture ferments, a bubbling, whitish-gray-black puffy substance will rise to the surface with the spoiled pulp.It will look foamy and smell awful.This is exactly what should be happening.
  7. After about 3 days, when the foaming seems to have stopped and the top surface has a whitish coating, this first stage of the fermenting process is done.
  8. Scoop off the floating yucky stuff on top.This will also include some of the unviable seeds. The viable seeds will have sunk to the bottom of the bowl, so it’s easy to differentiate which to get rid of, and which to keep.
  9. Pour off the remaining water, leaving only the viable seeds at the bottom.
  10. Transfer the viable seeds to another gallon-size glass or stainless steel bowl.
  11. Rinse the viable seeds to remove remaining pulp.
  12. Repeat the fermenting process again – fill bowl half-way with water, set outside, let ferment.
  13. Repeat until no more bubbling substance forms on the surface of the water after a couple of days.This means that the seeds are fully cleaned of all potential viruses.For me, this usually means going through 3 fermenting and rinsing cycles.
  14. Transfer the viable seed to a plastic, china, or plastic-coated paper plate for the clean seeds to dry. Don't use a napkin or other soft paper or fabric surface, as the seeds will stick as they dry.
  15. Place the plate in a room-temperature spot out of direct sun to dry.As the seeds dry, gently break apart any clumps, so each seed dries completely by itself.
  16. When seeds are thoroughly dry, usually after a week, put dried seeds into a paper (not plastic) seed packet. Date and label the packet, and store it in a cool, dry, dark location. An interior closet is ideal - anywhere with minimal fluctuation of temperature, light, or moisture.
 
“Dry” Seed Saving Procedure
     This is a really simple process, since most of the moisture is already removed from the seeds.
  1. Harvest seed pods that are fully mature, when the pod or seedstalk is completely dry and crispy.
  2. As the pod or seedstalk approaches maturity, you may want to corral the drying pea or bean pods or seedstalk of lettuce and others that might easily scatter by tying a paper bag around the seedhead.Don’t use a plastic bag because it will hold in moisture.
  3. Snap off dried pods and seedstalk into paper bags.
  4. For beans and peas, you may want to remove seed pod chaff for more convenient seed storage.For lettuce, no need to sort out the seed -- just shake the loose seedheads over the seed-starting soilmix or nursery bed.
  5. Date and label the seed-storage bag, and store it in a cool, dry, dark location. An interior closet is ideal - anywhere with minimal fluctuation of temperature, light, or moisture.
0 Comments


Leave a Reply.

    Archives

    March 2023
    February 2023
    January 2023
    December 2022
    November 2022
    October 2022
    September 2022
    August 2022
    July 2022
    June 2022
    May 2022
    April 2022
    March 2022
    February 2022
    January 2022
    December 2021
    November 2021
    October 2021
    September 2021
    August 2021
    July 2021
    June 2021
    May 2021
    April 2021
    March 2021
    February 2021
    January 2021
    December 2020
    November 2020
    October 2020
    September 2020
    August 2020
    July 2020
    June 2020
    May 2020
    April 2020
    March 2020
    February 2020
    January 2020
    December 2019
    November 2019
    October 2019
    September 2019
    August 2019
    July 2019
    June 2019
    May 2019
    April 2019
    March 2019
    February 2019
    January 2019
    December 2018
    November 2018
    October 2018
    September 2018
    August 2018
    July 2018
    June 2018
    May 2018
    April 2018
    March 2018
    February 2018
    January 2018
    December 2017
    November 2017
    October 2017
    September 2017
    August 2017
    July 2017
    June 2017
    May 2017
    April 2017
    March 2017
    February 2017
    January 2017
    December 2016
    November 2016
    October 2016
    September 2016
    August 2016
    July 2016
    June 2016
    May 2016
    April 2016
    March 2016
    February 2016
    January 2016
    December 2015
    November 2015
    October 2015
    September 2015
    August 2015
    July 2015

    Categories

    All

    RSS Feed

© 2015 Yvonne Savio. All Rights Reserved.                                                                                                                                                         Web Design by StudioMAH.