
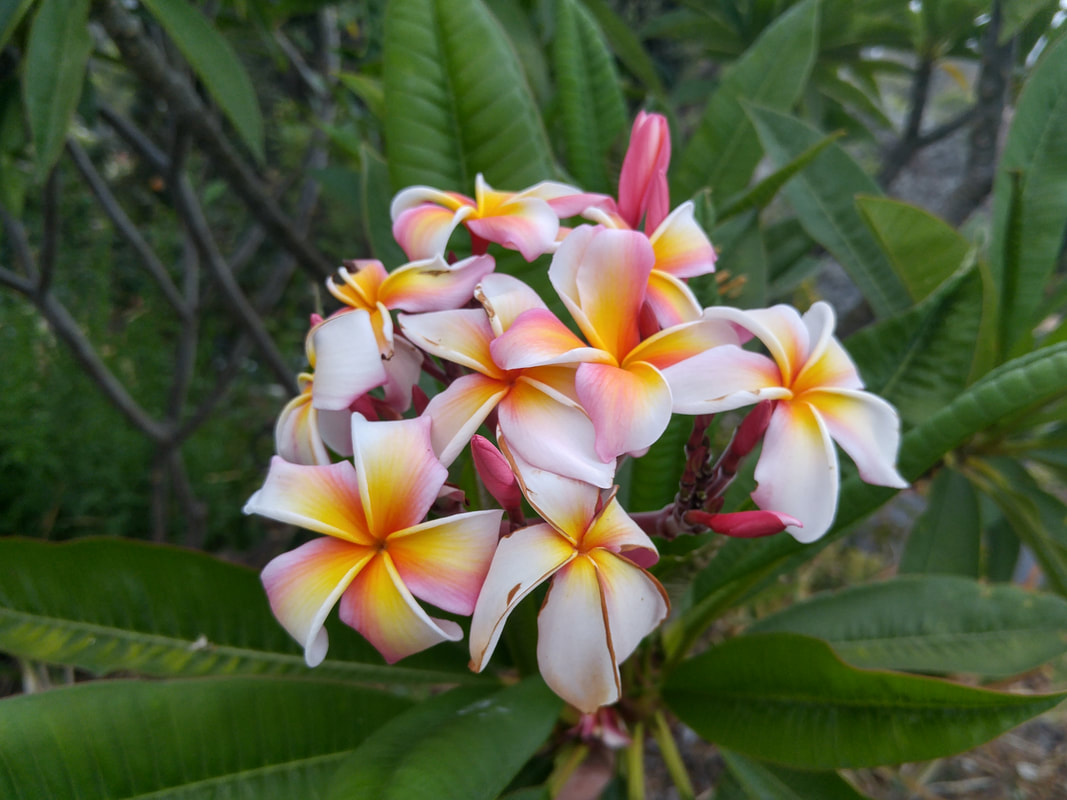
 My first plumeria, which I call Rainbow for its many stripes of color and powerful fragrance.  Bright pink plumeria 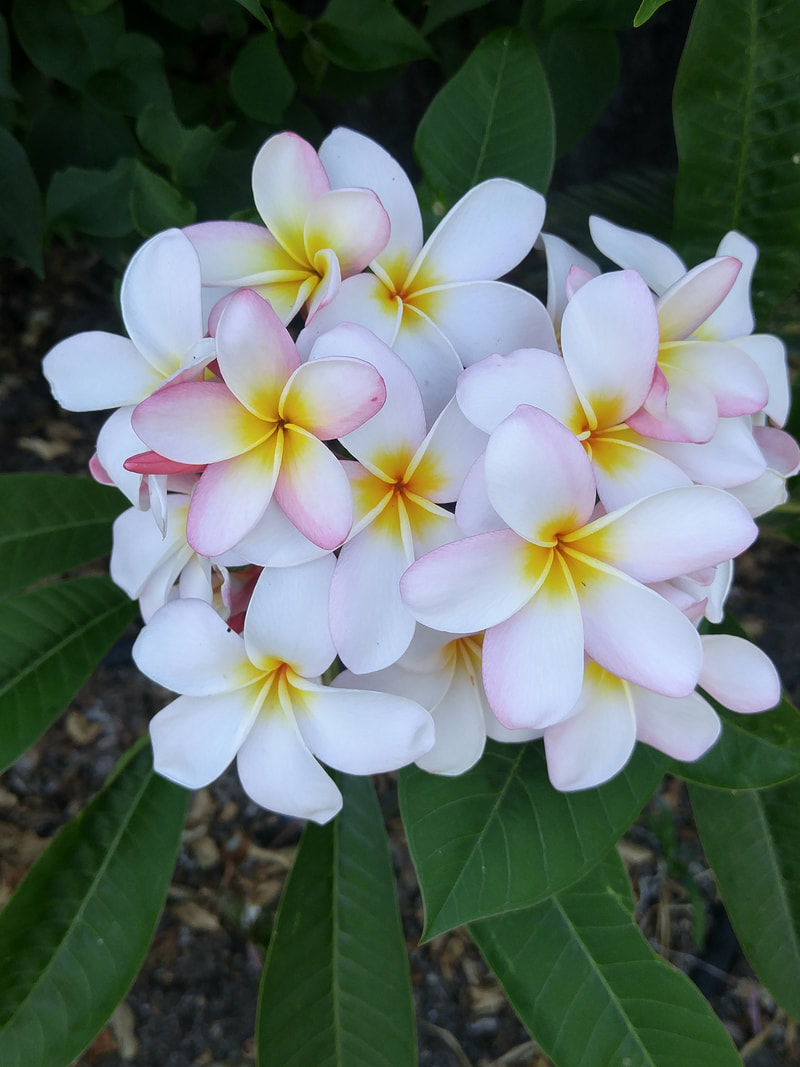 Mainly white with delicate nuances of pink and yellow. 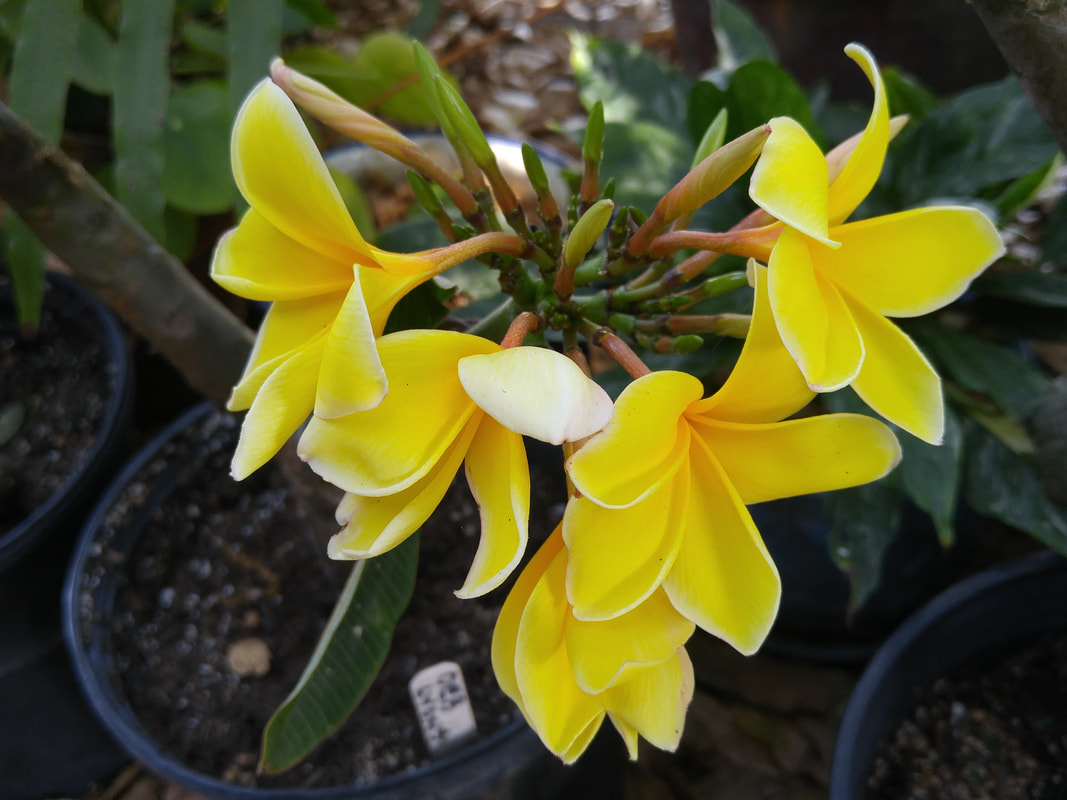 Brilliant yellow. 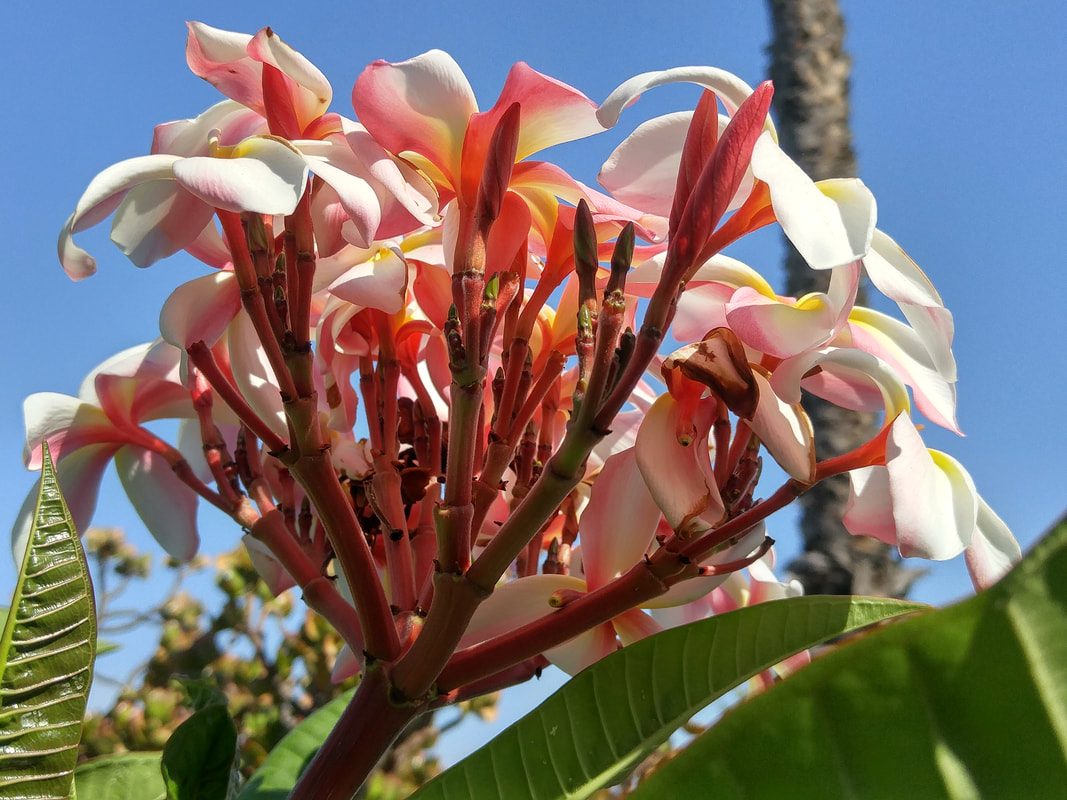 Time to prune, when I can see the bloom color only from below. 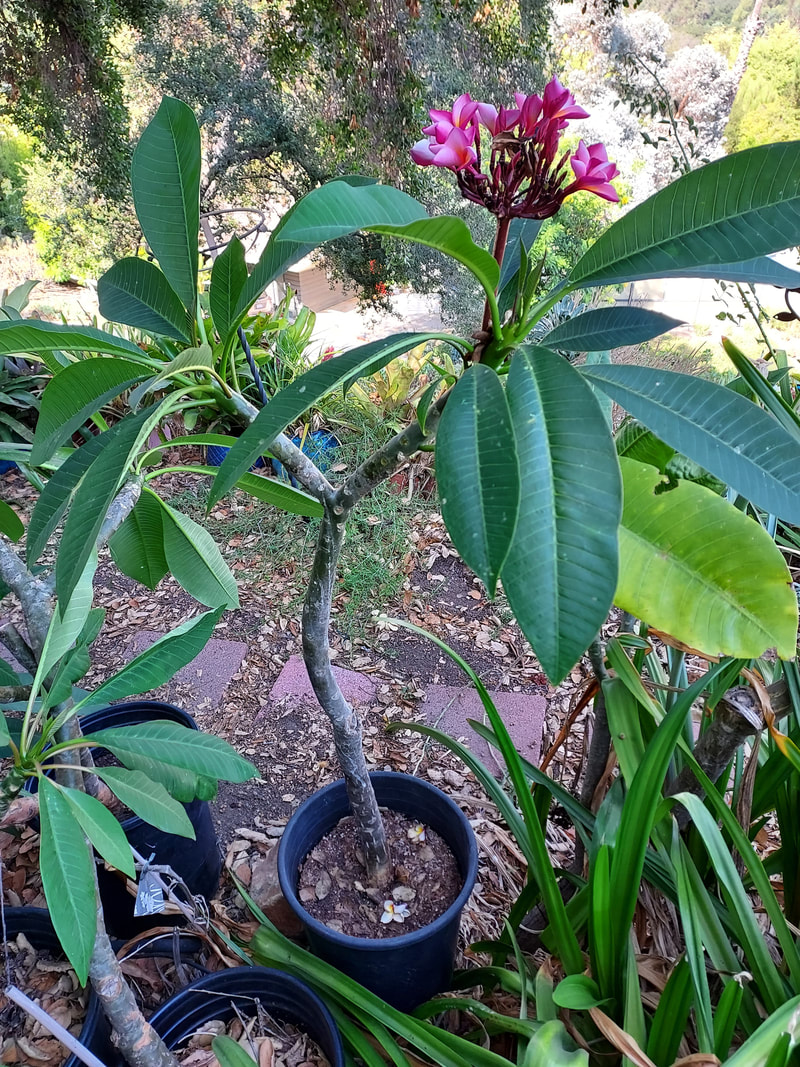 Possible cuts: each of the single branches, 1 foot below the "Y" joint, just above the previously-cut branch scar (barely visible on the right side of the trunk about 1 foot up from the soil level). 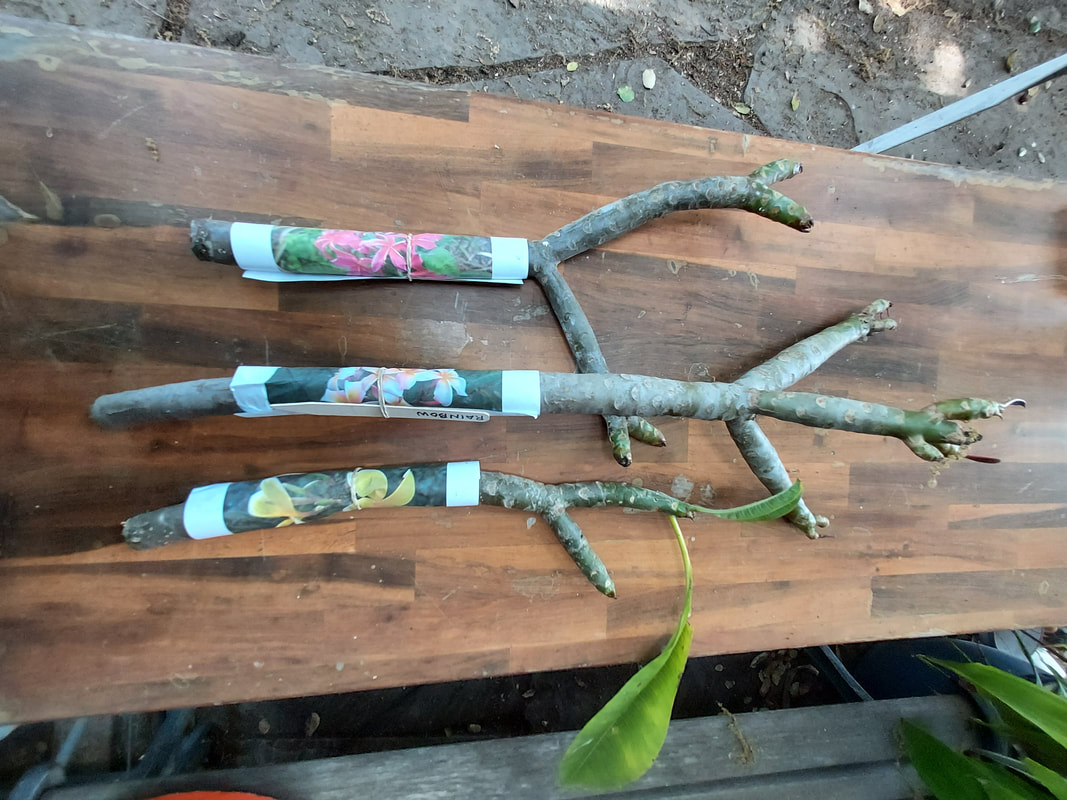 Laying the cuttings flat after the sap no longer runs. Also, avoid confusing cutting colors by rubber banding a photo onto the trunk. 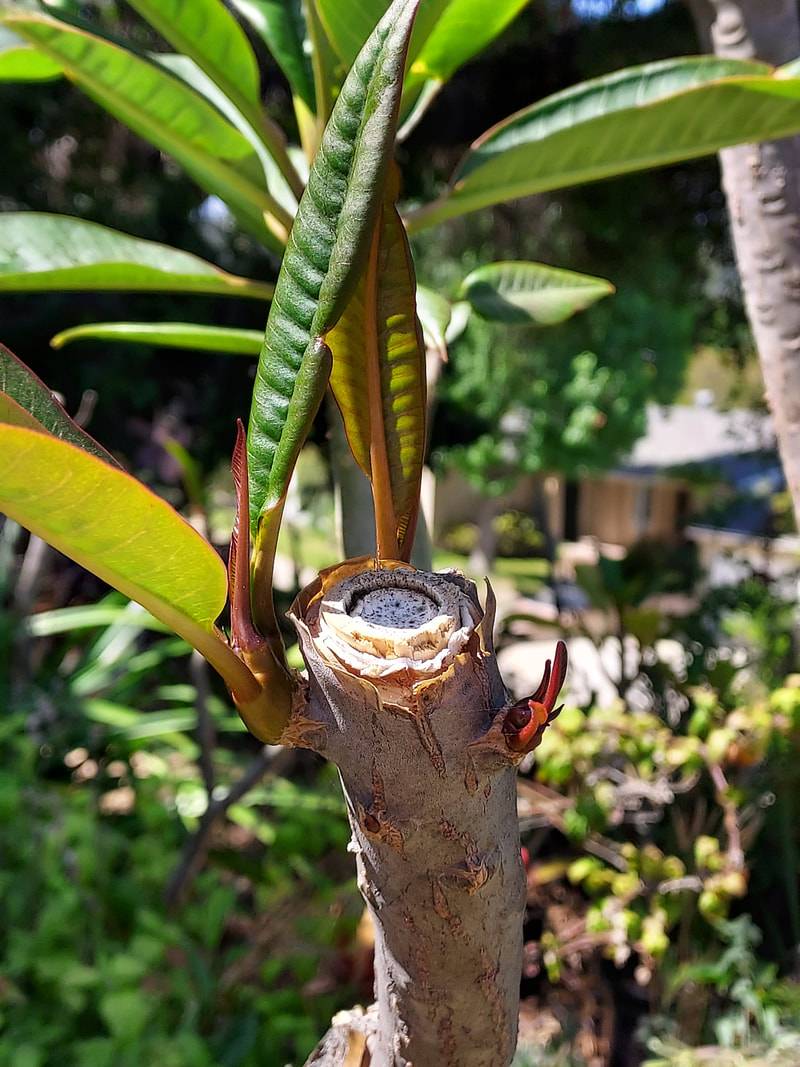 Original plant cutting calloused over and new shoots emerging. 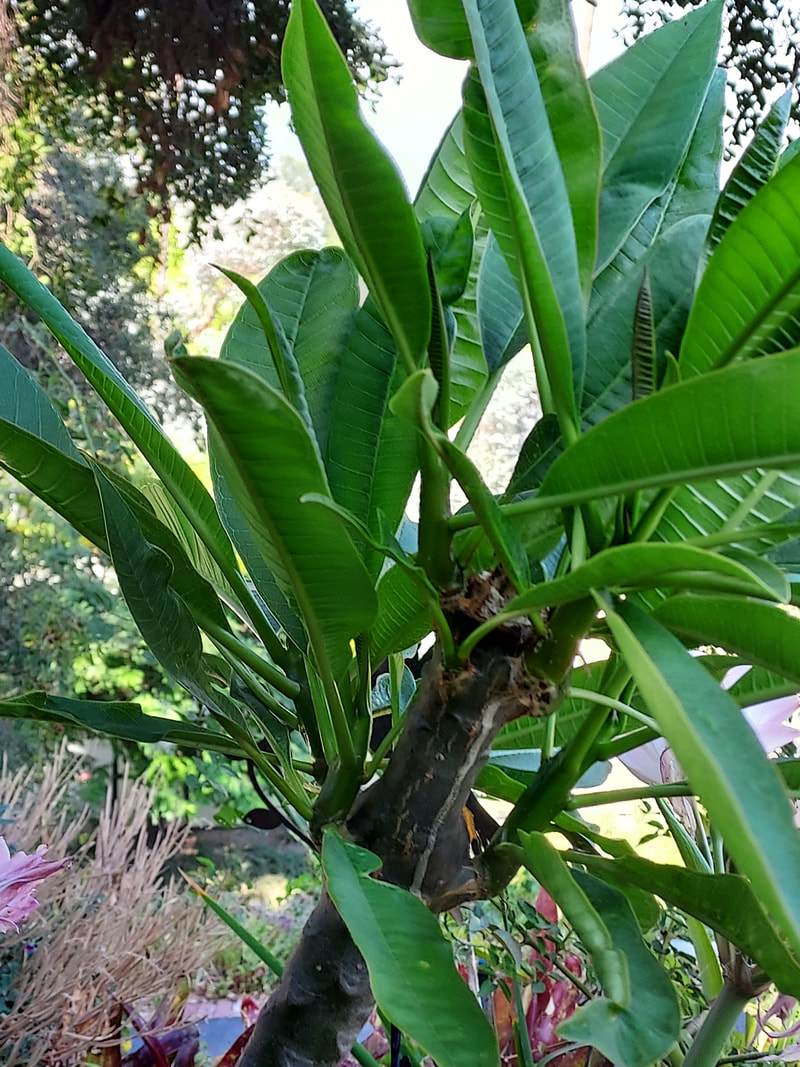 Lots of new shoots for future cuttings once they get to at least 1 foot in length.  Nicely branched plumeria that fell over, braking some branches, so I "evened out" the remaining ones, added supports, and calloused-then-potted-up the trimmed pieces. 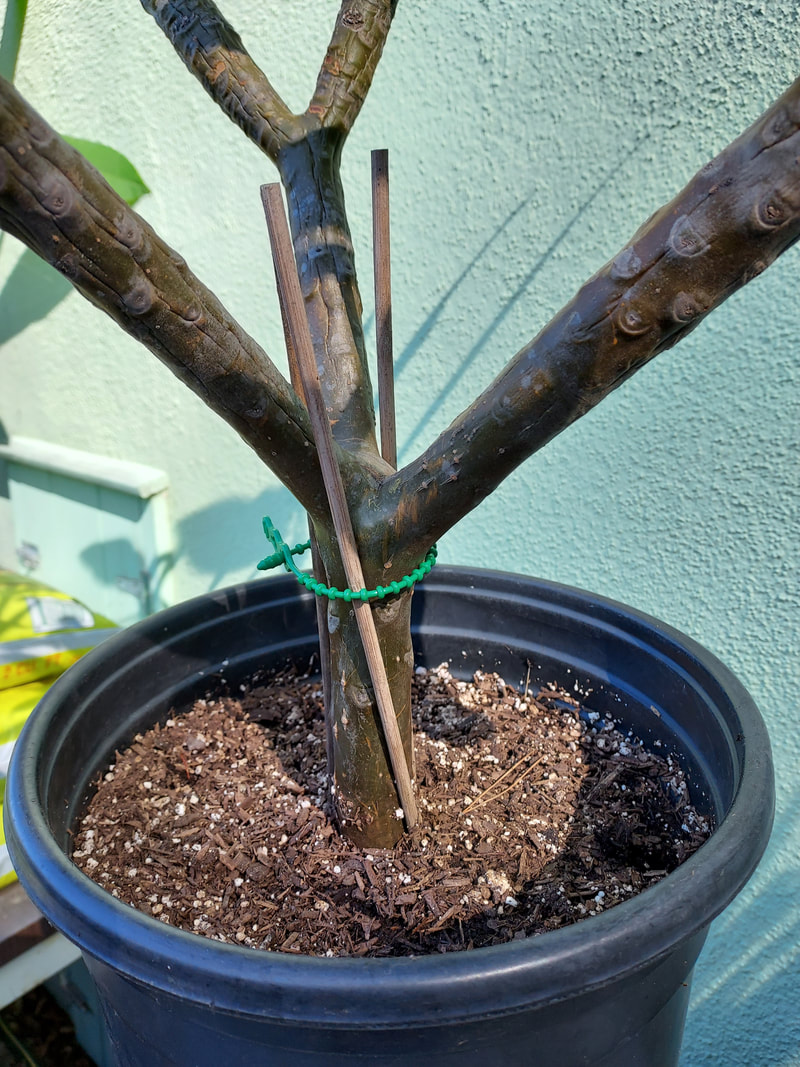 Bamboo stakes tightened with plastic ties stabilize the potted cutting. 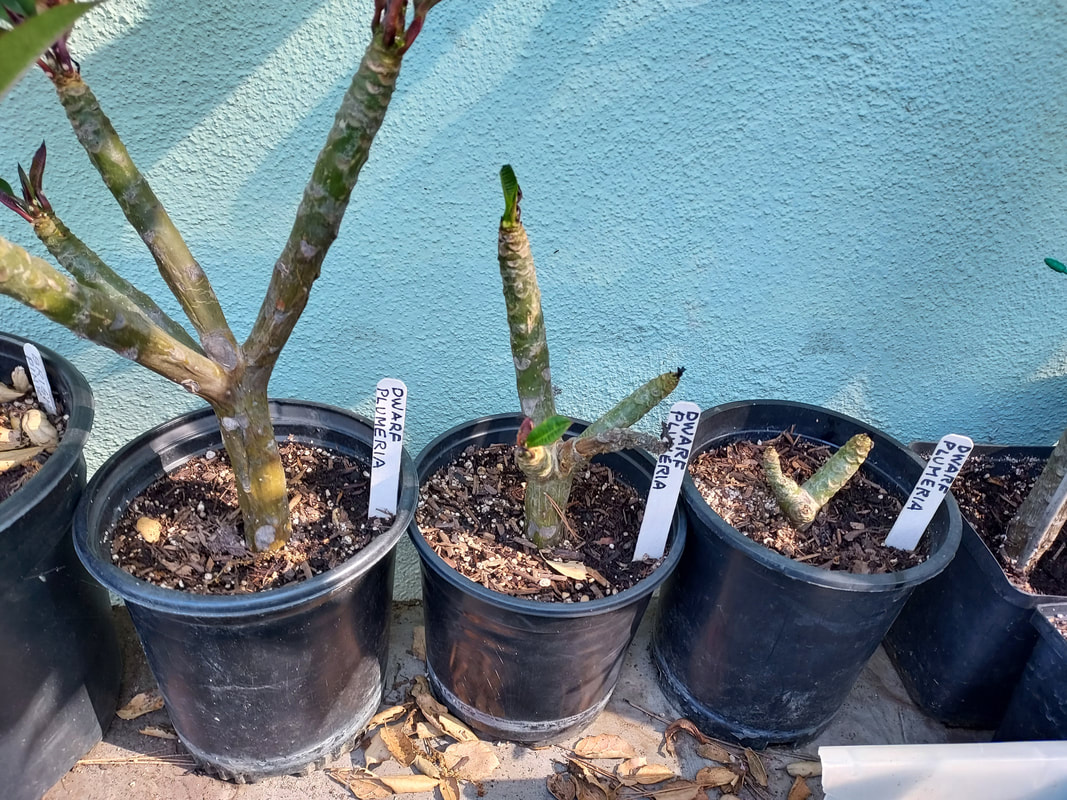 Shorter cuttings don't need additional staking. 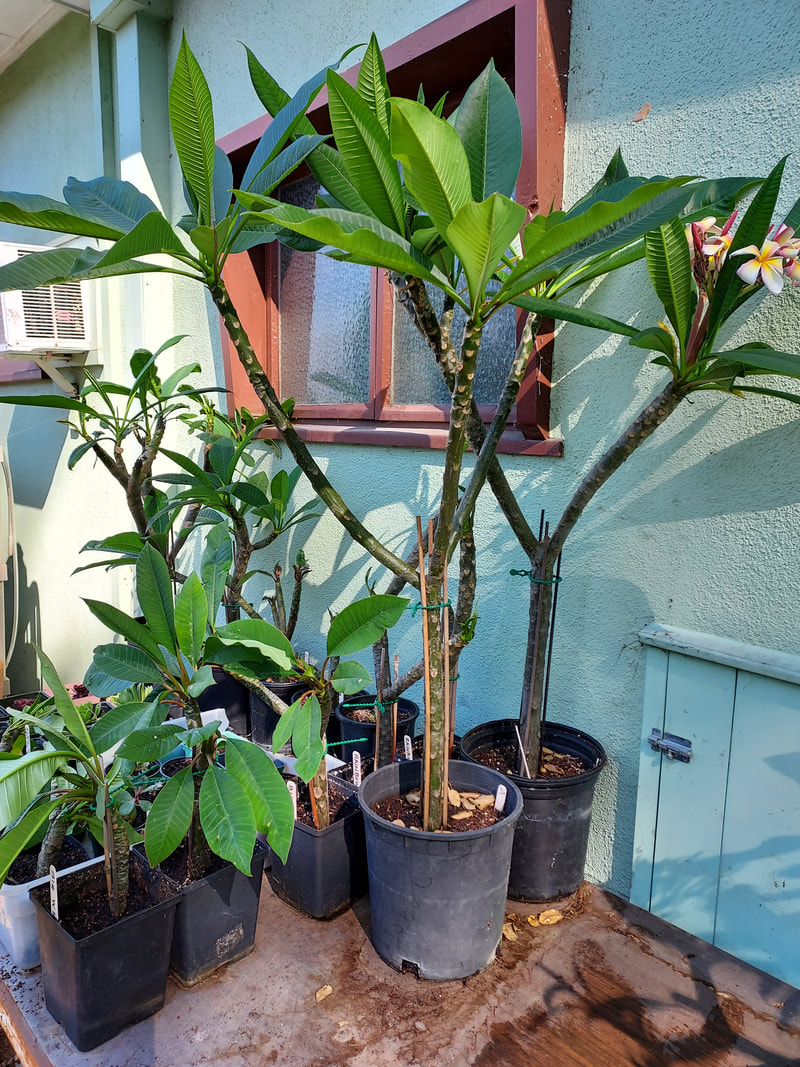 Collection of potted-up-and-hopefully-rooting cuttings. | I purchased my first plumeria “stick” many years ago at one of those big fairs. I was seduced by the many colors on the posters adorning the booth’s walls, and the promise that this mere leafless stick could become a real live plant with exquisite blooms and fragrance. At only $5 each, I decided to splurge and give one a try. I asked the vendor which might be the easiest to grow and have the most fragrance. I went home with the one that ultimately produced multi-colored blossoms and intoxicating fragrance that I call Rainbow. Over the years, it’s branched many times and I’ve enjoyed its many yearly blooms and fragrance. I also was pleased that it thrived in my garden’s all-day direct sun and needed very little water. But when it grew so tall that I could see only the bottoms of the bloom clusters, I knew I’d have to trim it back. Although I’d propagated many kinds of plants over the years, I didn’t know whether I had to cut the plumeria branches at the base of their branching, or whether I could also cut in the middle of their 2-foot-long branches – whether they’d resprout or die back completely. So I did both. Luckily, both techniques worked. So, I “evened out” my trimmings on the original plant so the branching would produce blooms on each of its remaining branches at about the 4-foot height, guaranteeing many more years of enjoyment and more cutting possibilities for future “sticks” to pass along to gardener friends and at plant sales. Cutting the branch straight across is necessary for a clean cut. This will enable the main plant to resprout new leaves from the top surfaces. Even with some dieback, the new leaves covered the unattractive spots. The base of the cut branch must be allowed to callous over completely before potting it up to root. Keep it in the shade, laid flat so the cut edge is completely open to the air so it can callous completely, and leaves are allowed to have their upper surfaces upright so they can continue their limited photosynthesis. The sap will continue dripping for an hour or so, so you may want to put some newspaper or soil to catch the drips where they fall. It may take up to three weeks for the callous to completely dry and form a seal that’ll be impervious to water. So don’t try to rush the process or pot it up too soon. I did initially pot up some branch cuttings as soon as I’d cut them, and while the leaves stayed perky for a couple of weeks, ultimately the branches did shrivel and rot without forming any roots. Once the branches are fully calloused, pot up the branches so the base – from which the roots will emerge – is about 2 inches above the bottom of the container. I use gallon-size pots for short branches perhaps a foot or so long. If the branches are multi-branched like in the shape of a “Y”, then I use a 5-gallon container and fill the potting mix to within an inch of the top. While the roots will develop only from the bottom calloused area, having the rest of the multi-branched trunk buried in potting soil stabilizes it. I’ve found that staking and tying the branch will help keep it stable through waterings and moving the container until sufficient roots develop to anchor the plant. Before I provided this support, even minor movement dislodged larger unbalanced Y-shaped branches, and I had to repot them up. So, now I provide this support at the very beginning when I pot them up initially. Once potted up, place the container in a location in bright light but out of direct sun. Water it several times to thoroughly moisten the potting mix and make sturdy contact holding the cutting in place. Water again perhaps once a week just to keep the potting mix barely moist so roots can get well established. |
|
14 Comments
Richard
8/7/2022 12:14:33 am
Thank you! This is very helpful (like the rest of your fantastic site/blog). I have become a huge Plumeria fan ever since a visit to Maui last year. In fact I am here right now on vacation reading your post amongst the stunning flora and fauna. I live in the north west corner of Pasadena and have nurtured a Plumeria cutting that I purchased last year to produce it's first bloom - I have a question that I was hoping you could help me with - do you recommend a particular fertilizer? Would appreciate any thoughts you might have.
Yvonne Savio
8/7/2022 10:36:46 pm
Hi, Richard -- Congratulations on being in Maui! I haven't used any fertilizer on my plumerias. I suppose any orchid food would be good. To encourage bloom, choose a fertilizer with the middle number being high.
Richard
8/13/2022 10:28:12 pm
Got it - thank you!
Gary
10/9/2022 07:34:49 am
Great article! Thank you for the specifics. I have a 4 foot plumeria growing in a container in West LA. Was wondering, is there a best time of year to prune? And, though I don't know that I will try to propagate the cuttings, have you found any particular time of year is best, here in SoCal? 2/10/2023 07:19:58 am
Are you lazy or busy? Sometimes buying each component and mixing up can be a difficult task for beginners. But thanks to today’s trend of the market. Yes, you can try out the ready-potting soil for indoor plants. It is easy and of course worthwhile. So, let’s dig into the best soil mix for indoor plants.
Anne Sanders
10/3/2023 02:37:55 pm
Will a plumeria root if it is a piece cut at both ends?
trip silva
7/10/2024 11:28:43 am
yes it will, just make sure ur putting it right side up. if you look at where it had leaves, the round part is the bottom. you should be able to tell from where the leaves were which side is up or down. middle cuts are better as they branch out more and make a more bushy and beautiful plant and therefore more tips and more likelihood of flowering.
Joe Gwinn
1/18/2024 01:36:41 pm
How are the bloom clusters at the top of the cutting should be handled?
MAURIE
2/24/2024 12:22:38 pm
I recently cut my first stick in half so it can branch for the first time. So now I have one long-ish stick to plant. Here's my question: Can I only plant the stick I cut off? Or can I cut this stick in half and plant two Plumerias? Or does a new propagation need the leaf node things on top?
trip silva
7/10/2024 11:26:07 am
you can cut it, as long as you have at least 8 inches(20cm), you're good. in fact, mid cuts are better as they will usually branch out more and are more likely to flower sooner.
Hii, this was very much informational! I too found a plumeria cutting this morning, and curious of its blooms colour, decided to propagate it. I am also documenting my journey at
Sarah
6/3/2024 09:53:45 pm
I would love to know where to purchase or ask for cuttings. I’m in Sierra Madre. I would love to start making my own leis 🌺🌸
Katie
6/20/2024 05:44:47 am
Thank you for posting this! I bought a (APHIS approved) plumeria “stump” (no shoots) and potted it in April. It’s mid-June and any changes have been minimal. It doesn’t look like it’s dying, it’s still green and firm so I don’t think I overwatered… but it’s just sitting there not doing much. Is this normal? It just started developing some bumps at the top which I’m hoping means new growth. How long should it take to get new growth?
trip silva
7/10/2024 11:32:42 am
i'm from new york, not LA, but it usually takes about a month to start seeing some roots. my technique to root is to use a small plastic bottle, and use something like perlite, vermiculite, or sand, as it's sterile, and you should see some roots around 4-6 weeks later. Leave a Reply. |
Categories |
 RSS Feed