Gardening In LA
  • Home
  • About
  • Services
    • Garden Coaching
    • Speaking
    • Photography
    • Writing >
      • List of Articles
  • Blog
  • News
  • Monthly Tips
    • January
    • February
    • March
    • April
    • May
    • June
    • July
    • August
    • September
    • October
    • November
    • December
  • Events
    • Submit Your Garden Events
    • Botanical Gardens' and Other Organizations' Garden Events
  • Jobs
  • Web Links
  • Newsletter

Propagating Begonias From Cuttings

10/29/2016

1 Comment

 
Picture
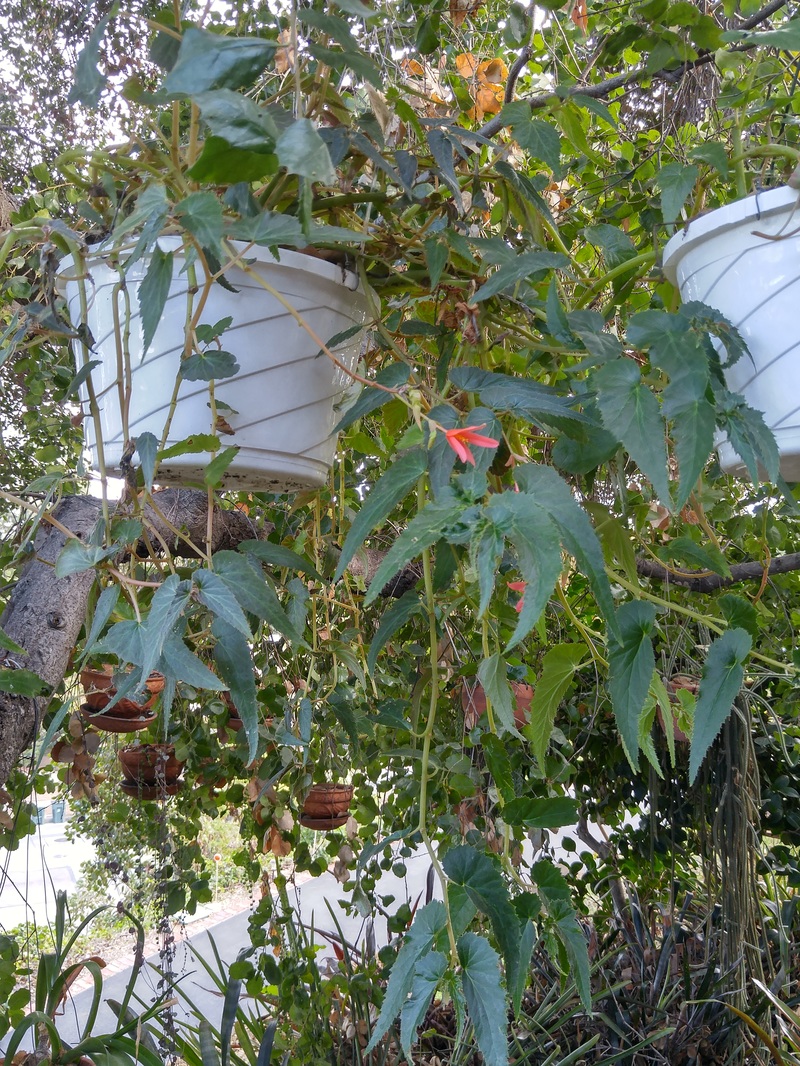
The straggly begonias that got me started on this propagation project.
Picture
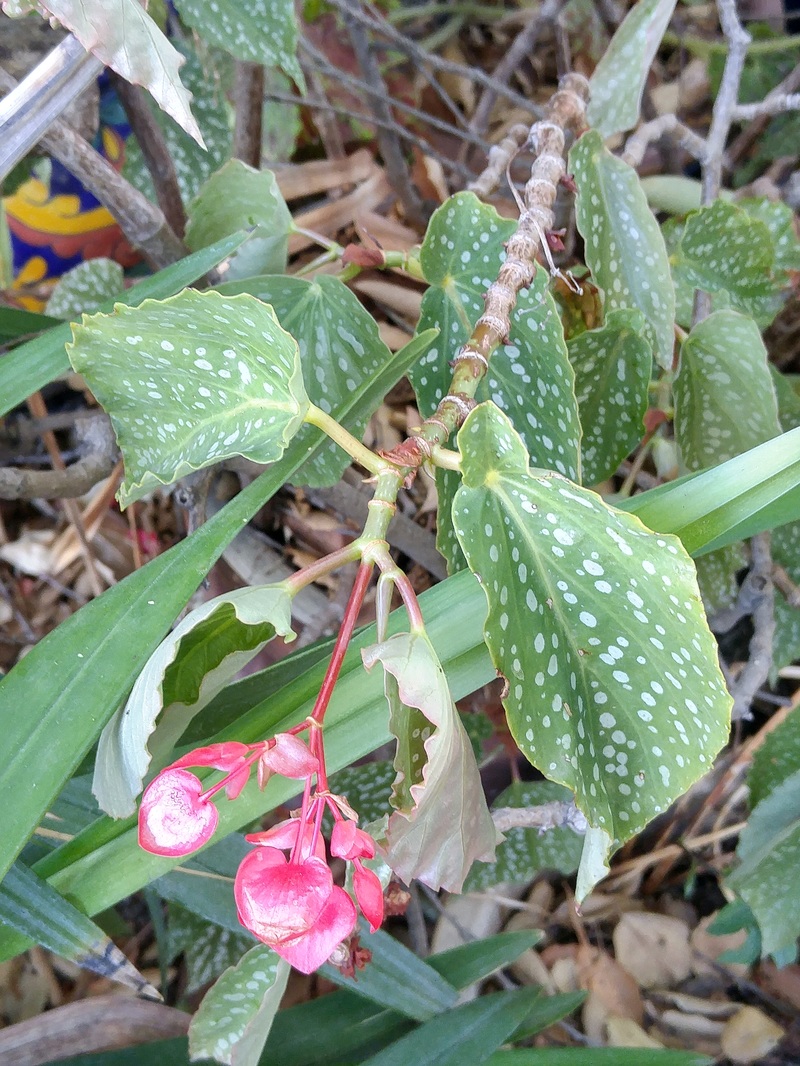
Then I moved on to other begonias that needed trimming.
Picture
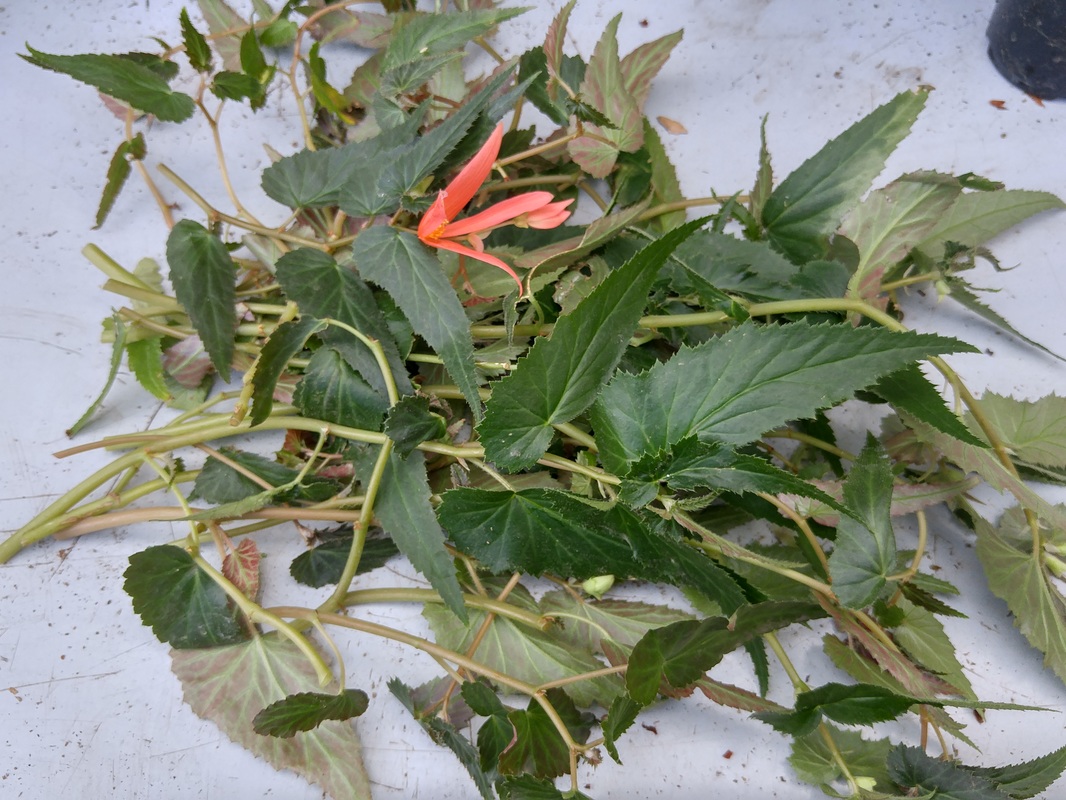
The pile of trimmings from one of the hanging-basket begonias. This will turn into lots of new plants for sharing!
Picture
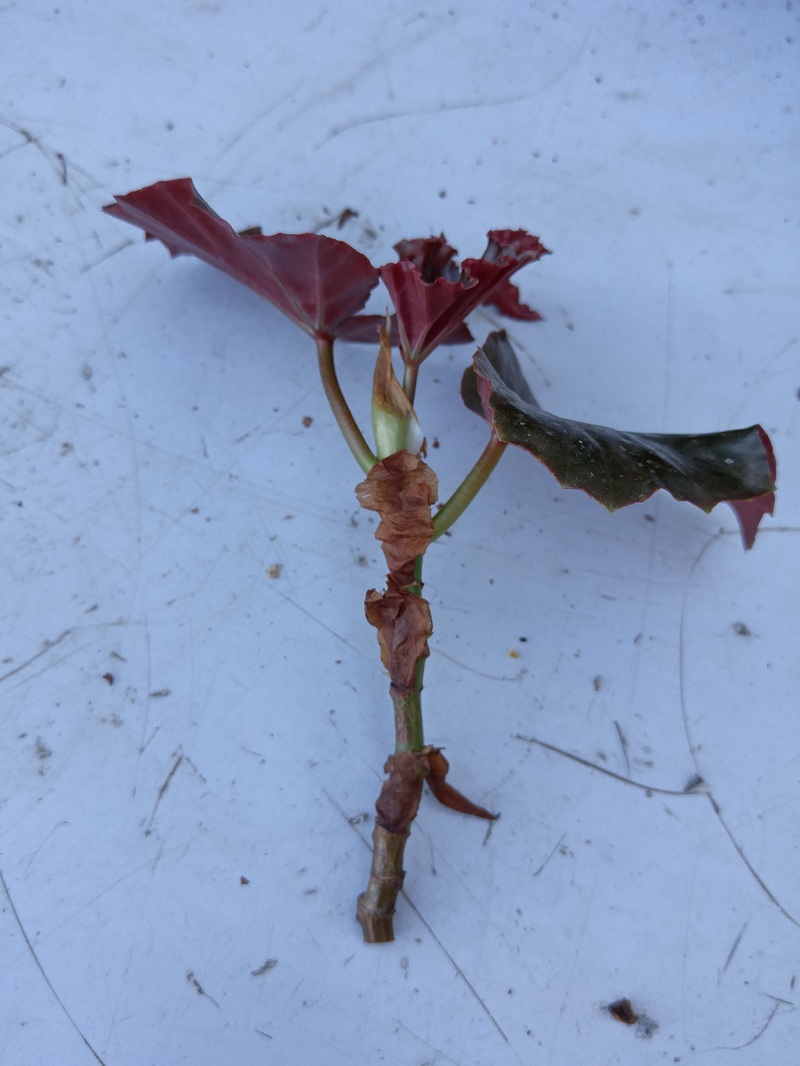
Cutting trimmed to 4 nodes and 3 top leaves. The bottommost big leaf could also be removed, since the center newest leaf is large enough to accomplish photosynthesis. You always want to leave at least 2 "mature" leaves, in case one gets broken or damaged or dies before roots form.
Picture
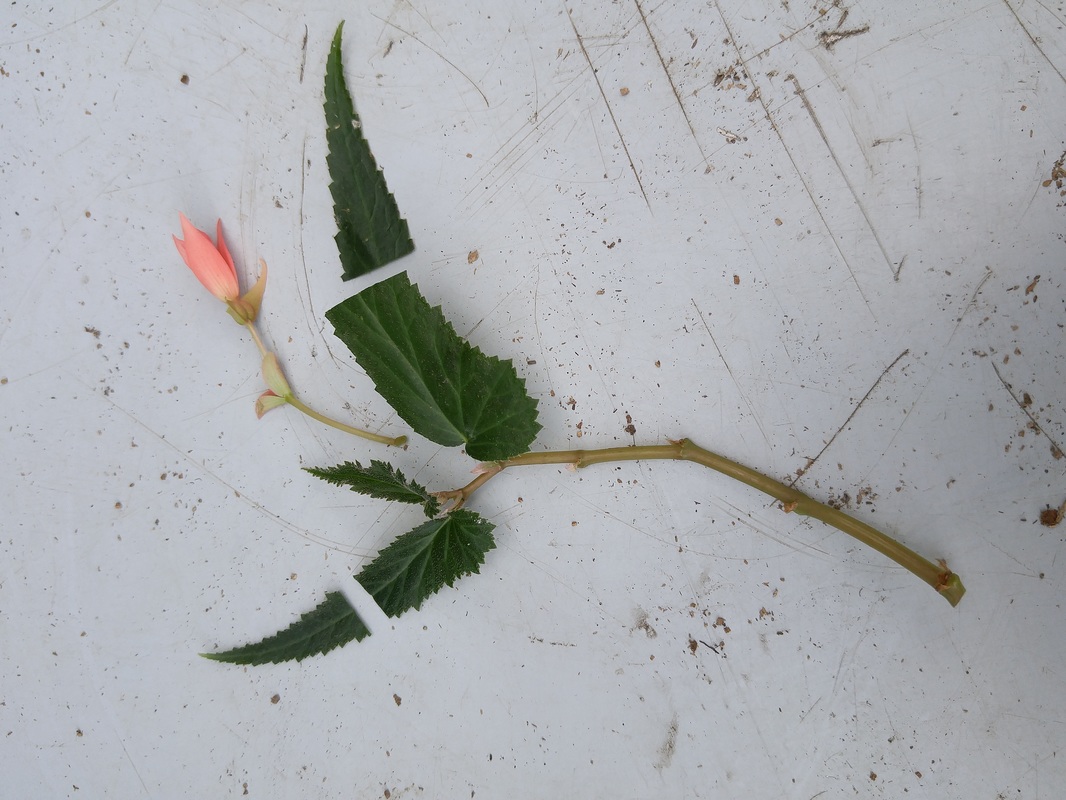
Another cutting showing the blossom removed and leaves cut in half, and stem with 4 nodes. Note the tiny amount of stem left below the bottom node to preclude rotting.
Picture
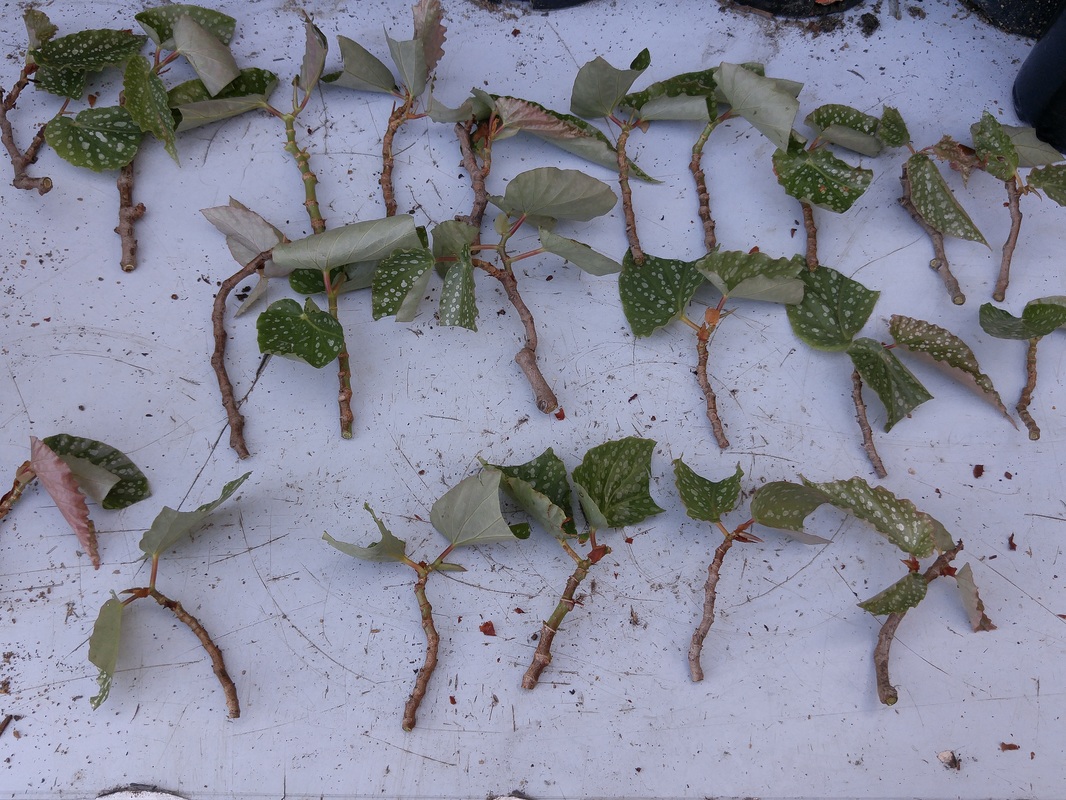
Lots of cuttings ready for potting up!
Picture
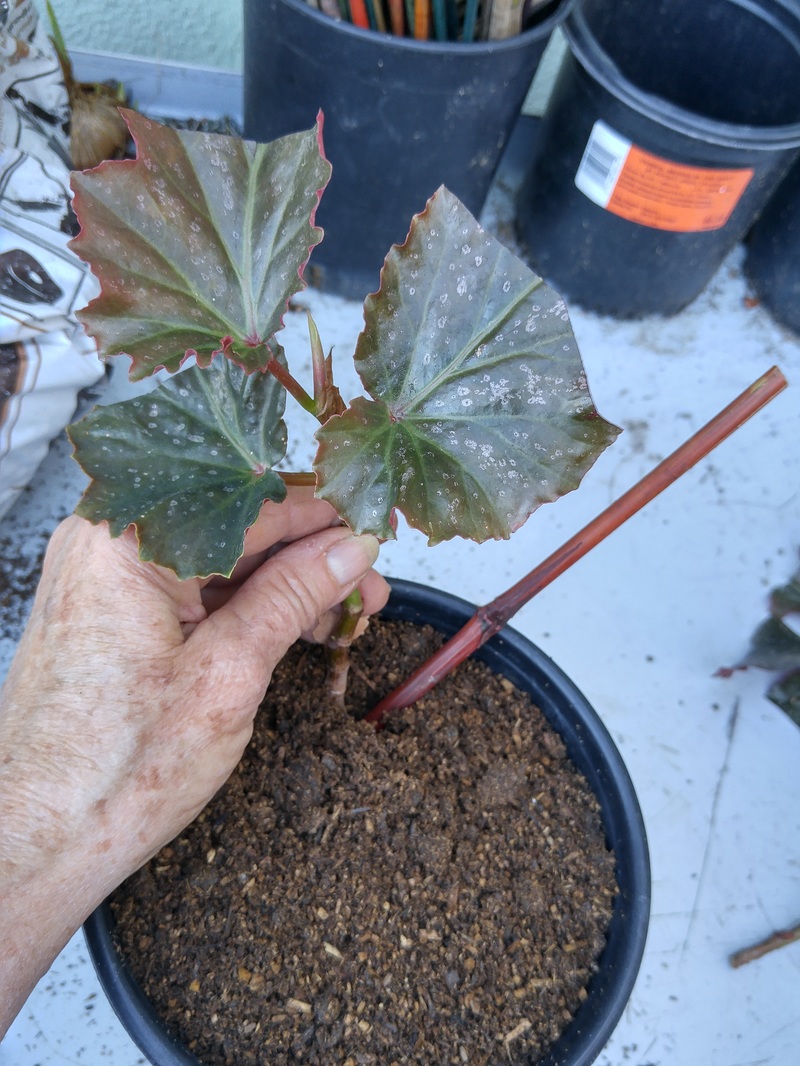
Pencil-sized bamboo stake poked hole, then helps nudge cutting into the hole.
Picture
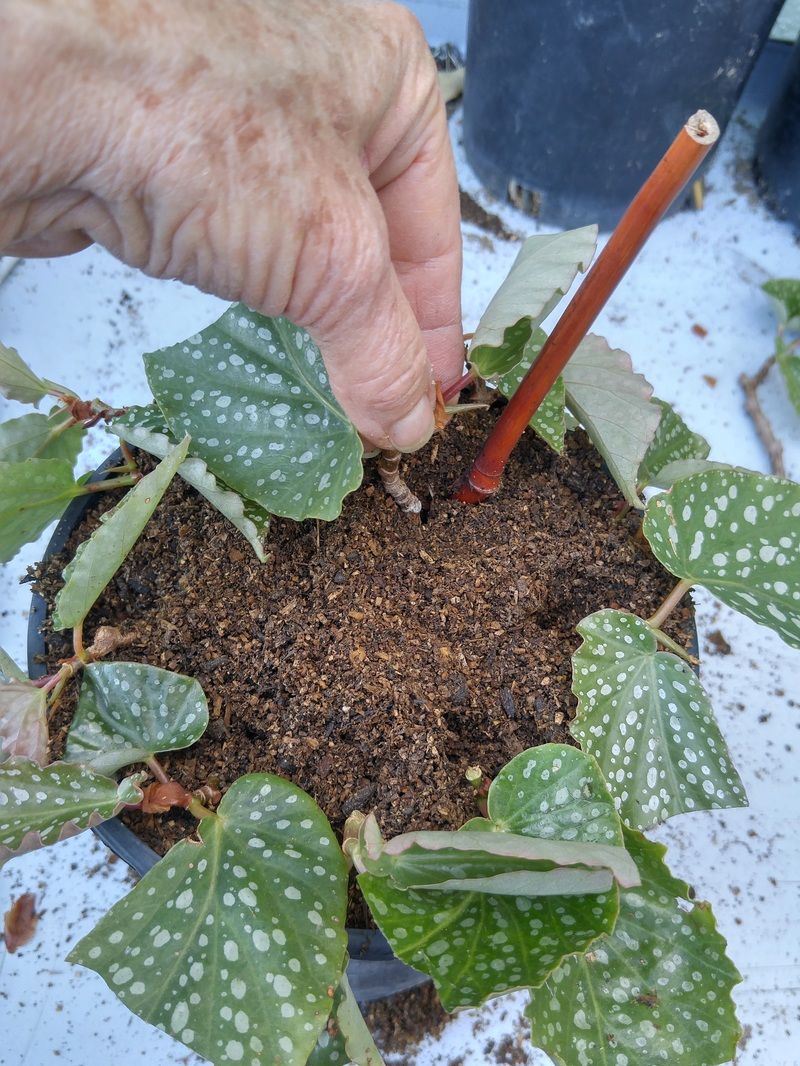
Inserting cuttings around the edge of the pot, about 1" from the edge and from each other.
Picture
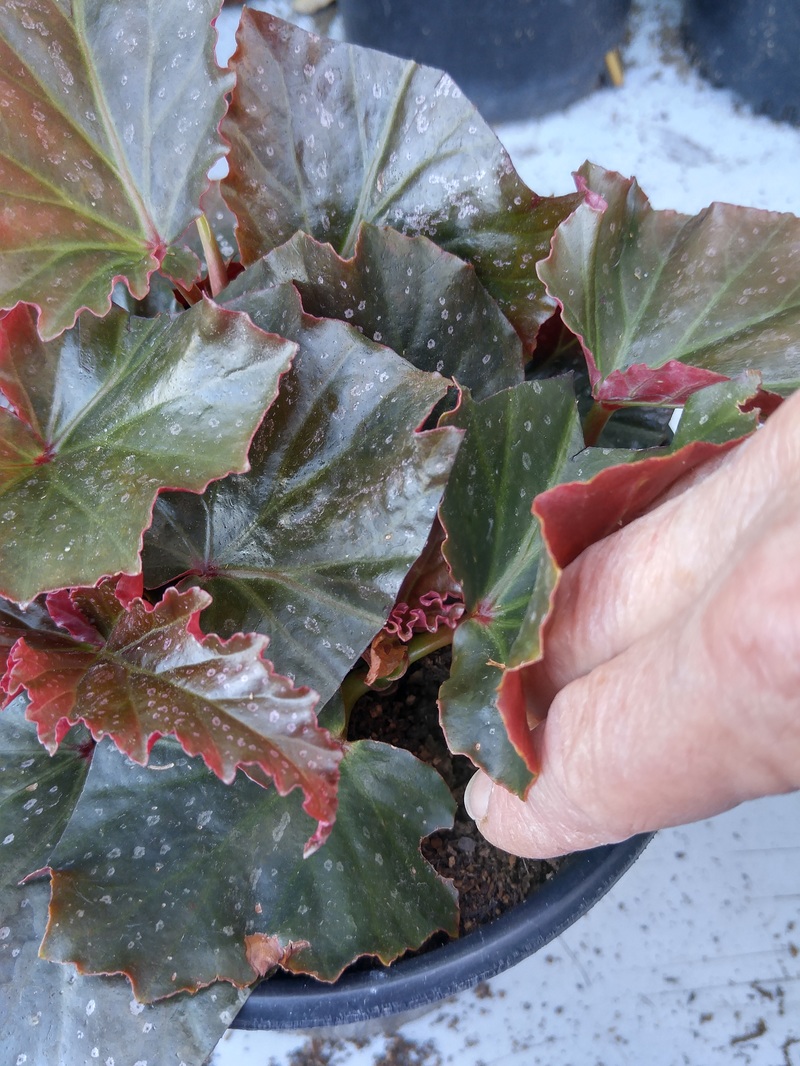
Pressing potting mix around the edge and between the center cuttings. If you placed enough potting mix into the pot initially, pressing it down should leave only 1" of space for watering.
Picture
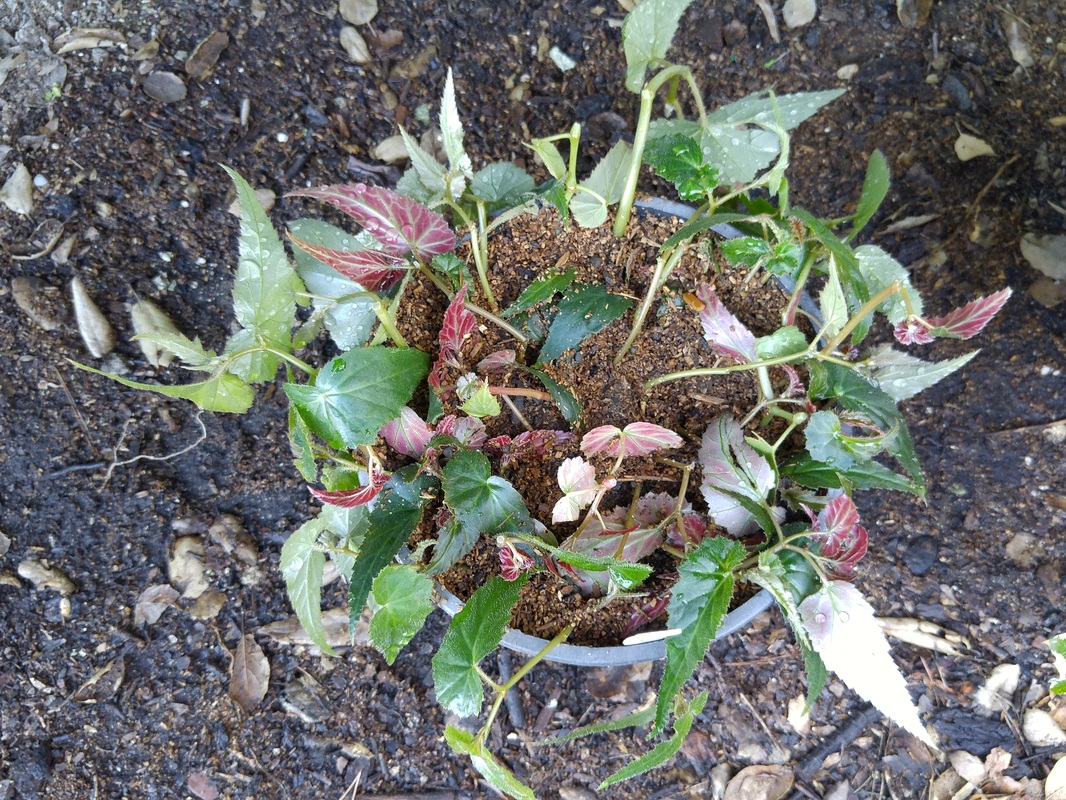
Potful of cuttings ready for watering and growing new roots!
     Propagation from cuttings is an easy and fun technique for gardeners to accomplish year-round, depending on the timing most appropriate for a particular kind of plant.  Now’s a good time for begonias.
     Two of my hanging-basket begonias looked straggly, with bare foot-long bare stems hanging down and a few blooms appearing at the end of foliaged tips.  I knew that if I just left them to continue to grow, the bare stems might or might not – probably not - sprout new leaves. But, because they’re actively growing now, it’s a great time to snip them and root the cuttings. 
     Of course, once I’d done this with the two hanging-basket begonias, I started examining the three upright begonias on my patio and, finding more lanky growth, starting snipping those as well. 
     Ultimately I ended up with clippings from five different begonia plants that resulted in 7 gallon pots with about 12 in each pot – potentially 84 new plants if they all rooted.  How’s that for an economic boon?
     This technique is the same for whatever kind of cutting you collect – from walks in the neighborhood (take cuttings only from public areas) as well as your own garden or from a friend. 
     If it’ll be several hours before you can actually pot them up, take cuttings as lengthy as possible to allow for the natural retraction of plant fluids from the cut since it’s no longer able to pull those fluids from the roots.  For example, cutting a 20” length means you’ll be able to make perhaps 3 6” cuttings (after recutting off 2” of the base) to root, with at least a single 6” viable tip.
     Here’s how to produce your own bargain bounty.
  1. Snip as low on the plant – nearest the roots – as possible where there’s new foliage emerging. This is to assure that the growing point in the node is active. Cutting lower on the plant – especially with woodier stems – runs the risk of hoping that dormant nodes will “wake up” and sprout, which isn’t likely.
  2. Snip just below the node with the foliage, so there’s only a tiny bit of stem protruding beyond the foliage. Leaving too big a piece will encourage rot that may extend down through the node to the base of the plant.
  3. Cut long strands with several offshoots into individual pieces, each having at least 4 nodes and a tip with 2 bits of foliage.
  4. Trim the stem from the bottommost node so only a tiny bit of the stem is left, as with #2 above.
  5. Leave the top 2 leaves, but snip off other leaves at the bases of each node with a fingernail or clipper, or gently pull it off. It’s ok if a tiny bit of the inner flesh is visible – this is the cambium layer from which the new roots will emerge.
  6. If the top two leaves are large, cut each one back by half, across the leaf. This will allow photosynthesis to continue but not drain the energy from the plant before new roots are established.
  7. Remove any developing blooms. You want the plant energy to go into establishing new roots, not continuing to bloom.
  8. Choose a container that’s deep enough to accommodate the full length of the stems of the cuttings.
  9. Gently overfill the container loosely with potting mix, taking care to not compact it. I prefer SuperSoil because of its consistently small particles.
  10. With a pencil-sized stick, poke a hole in the potting mix about an inch from the edge of the pot and down to the bottom of the container.
  11. Pull out the stick and gently insert the cutting into the hole so the foliage sits on top of the potting mix surface even with the top edge of the container. You may have to help prod the cutting down with the stick so it doesn't break.
  12. Continue poking holes and inserting the cuttings around the pot about an inch apart and then a couple in the center.
  13. Gently lift the foliage around the edge of the pot and press down the potting mix, and then around the cuttings in the center.
  14. Place the container in a brightly lit place with good air circulation but without direct sun.
  15. Water from the top of the container, refilling at least 3 times, to make sure that all the potting mix is thoroughly saturated.
  16. You’re done!
  17. Sprinkle the foliage, and water the container once a day for 3 days in the early morning, then every other day for another week.
  18. By then, the individual cuttings will either still be viable or have succumbed. Remove any decaying foliage from the surface, but don’t disturb the potting mix rooting zone.
  19. In another month, new top growth will be obvious, and roots may just have started. If frost threatens, move the container to an area with overhead coverage protection that still receives bright light. A bit of direct sun each day is ok, depending on the variety.
  20. When plants are well-leafed out and about 6 inches tall, you can check to see if they’re well-rooted enough to repot into larger individual containers. Gently knock the clump out of the container, and “tickle” away the potting mix to see how developed the roots are. Either pot up the ones that are well-rooted, or repot the ones that need more development back into the original container. And, check again in Spring, when new growth is obvious.
  
1 Comment
ADAIAH A. OPEÑA
1/26/2022 08:04:39 pm

Very good procedure. 👍

Reply


Leave a Reply.

    Archives

    January 2023
    December 2022
    November 2022
    October 2022
    September 2022
    August 2022
    July 2022
    June 2022
    May 2022
    April 2022
    March 2022
    February 2022
    January 2022
    December 2021
    November 2021
    October 2021
    September 2021
    August 2021
    July 2021
    June 2021
    May 2021
    April 2021
    March 2021
    February 2021
    January 2021
    December 2020
    November 2020
    October 2020
    September 2020
    August 2020
    July 2020
    June 2020
    May 2020
    April 2020
    March 2020
    February 2020
    January 2020
    December 2019
    November 2019
    October 2019
    September 2019
    August 2019
    July 2019
    June 2019
    May 2019
    April 2019
    March 2019
    February 2019
    January 2019
    December 2018
    November 2018
    October 2018
    September 2018
    August 2018
    July 2018
    June 2018
    May 2018
    April 2018
    March 2018
    February 2018
    January 2018
    December 2017
    November 2017
    October 2017
    September 2017
    August 2017
    July 2017
    June 2017
    May 2017
    April 2017
    March 2017
    February 2017
    January 2017
    December 2016
    November 2016
    October 2016
    September 2016
    August 2016
    July 2016
    June 2016
    May 2016
    April 2016
    March 2016
    February 2016
    January 2016
    December 2015
    November 2015
    October 2015
    September 2015
    August 2015
    July 2015

    Categories

    All

    RSS Feed

© 2015 Yvonne Savio. All Rights Reserved.                                                                                                                                                         Web Design by StudioMAH.