Gardening In LA
  • Home
  • About
  • Services
    • Garden Coaching
    • Speaking
    • Photography
    • Writing >
      • List of Articles
  • Blog
  • News
  • Monthly Tips
    • January
    • February
    • March
    • April
    • May
    • June
    • July
    • August
    • September
    • October
    • November
    • December
  • Events
    • Submit Your Garden Events
    • Botanical Gardens' and Other Organizations' Garden Events
  • Jobs
  • Web Links
  • Newsletter

TEN TOMATO TRANSPLANTING TIPS - ALSO FOR OTHER PLANTS

4/10/2018

0 Comments

 
Picture
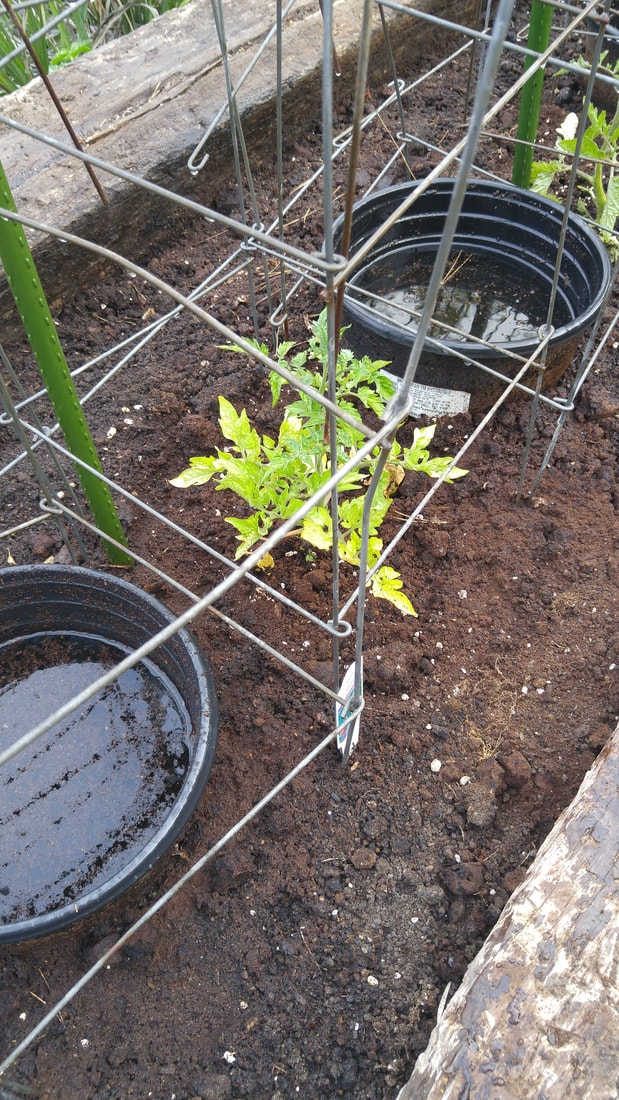
Tomato just transplanted, with watering berm 1' wide and 3" deep to be filled 3 times when planted and then once a week as the plant grows. On either side are 5-gallon plastic containers with holes in their bottoms to be filled with water at the same time as the plant is watered. This combination assures that the entire root zone and surrounding soil is kept moist (but not soggy) throughout the life of the plant. More water may be needed when we have our weeks-long 90+ degree heat spells in July and August. But by then, the root zones will be very deep and so the plants will thrive instead of just survive. Trellises are stacked on top of each other and anchored by the green stake in the corner and across several cages to support indeterminate plants getting 10 feet tall.
Picture
Dancy tangerine tree with lots of fruit. "Living mulch" of nasturtiums and correopsis keeps soil temperature and moisture moderated so more inviting for extensive root zones. Trunk is painted white with interior latex paint to reflect direct sun and preclude sunburn.
Picture
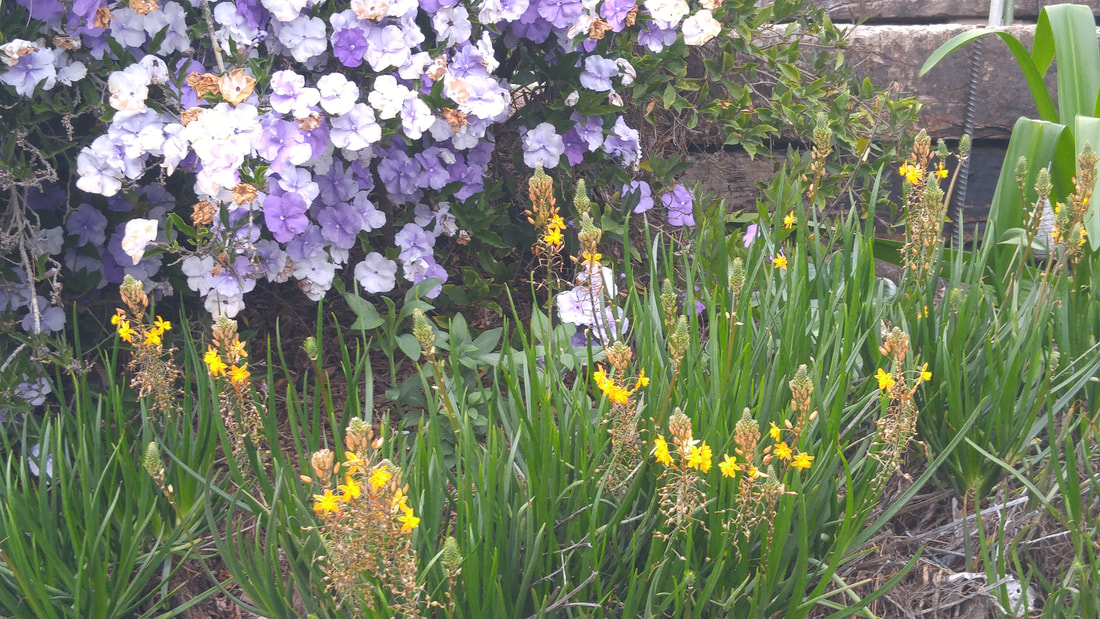
Three shades of purple on yesterday, today, and tomorrow; and orange and yellow bulbine.
Picture
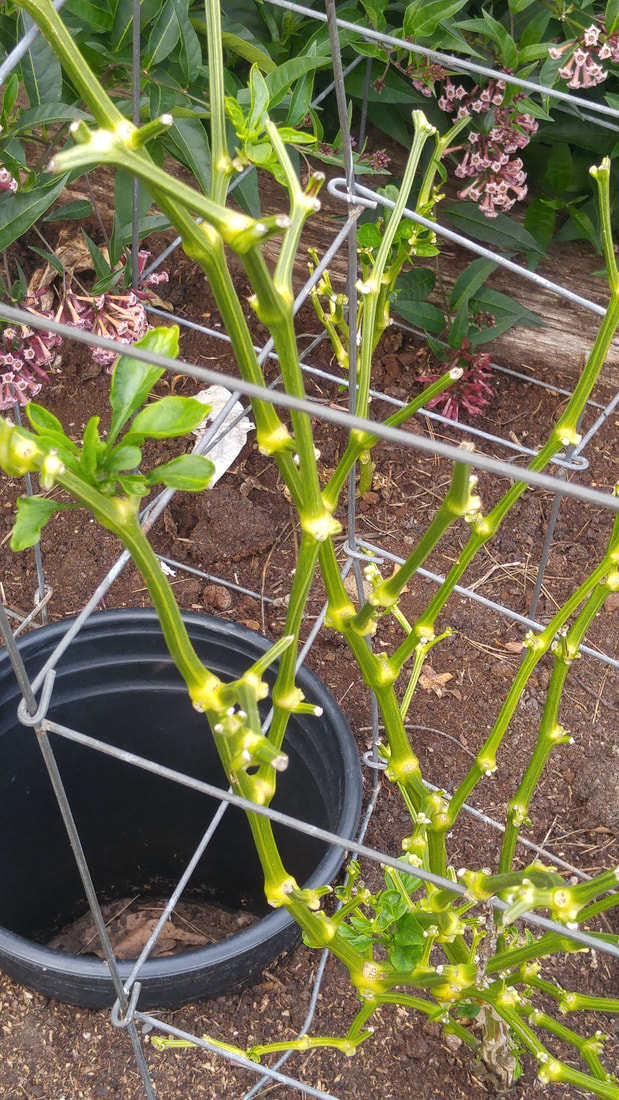
Overwintered pepper had lost all its leaves, but new ones are starting now that the weather and soil are warming up.
Picture
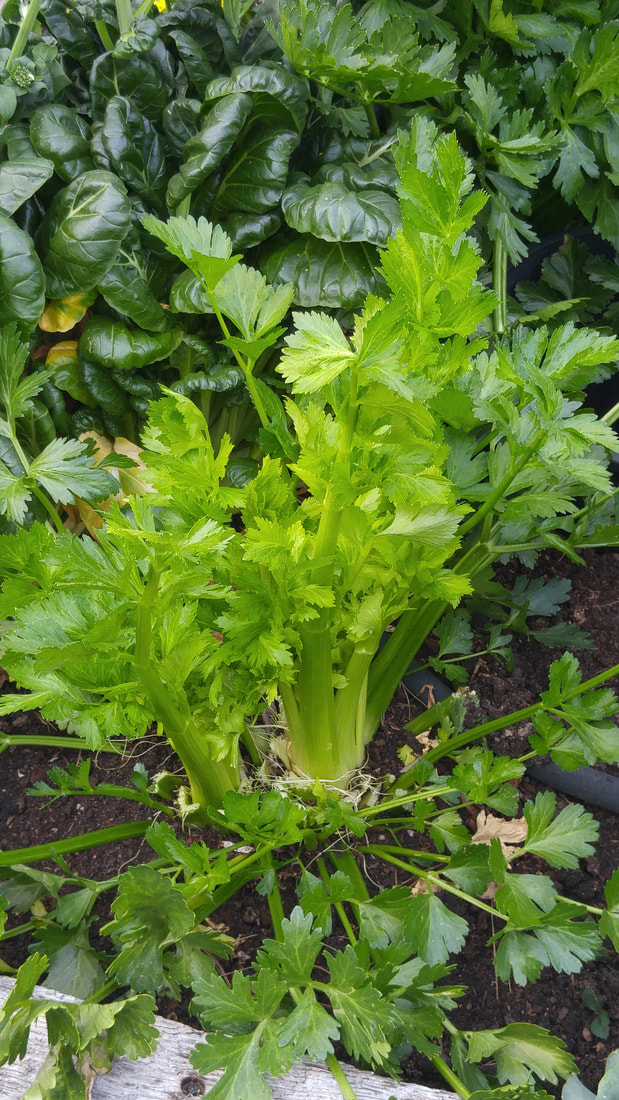
Celery harvested of its outer leaves, with inner leaves remaining to continue growing. Note two plants growing from basal plate of only one seedling. I left the outermost small leafstalks remain covering the soil to help retard evaporation and shade the soil.
Picture
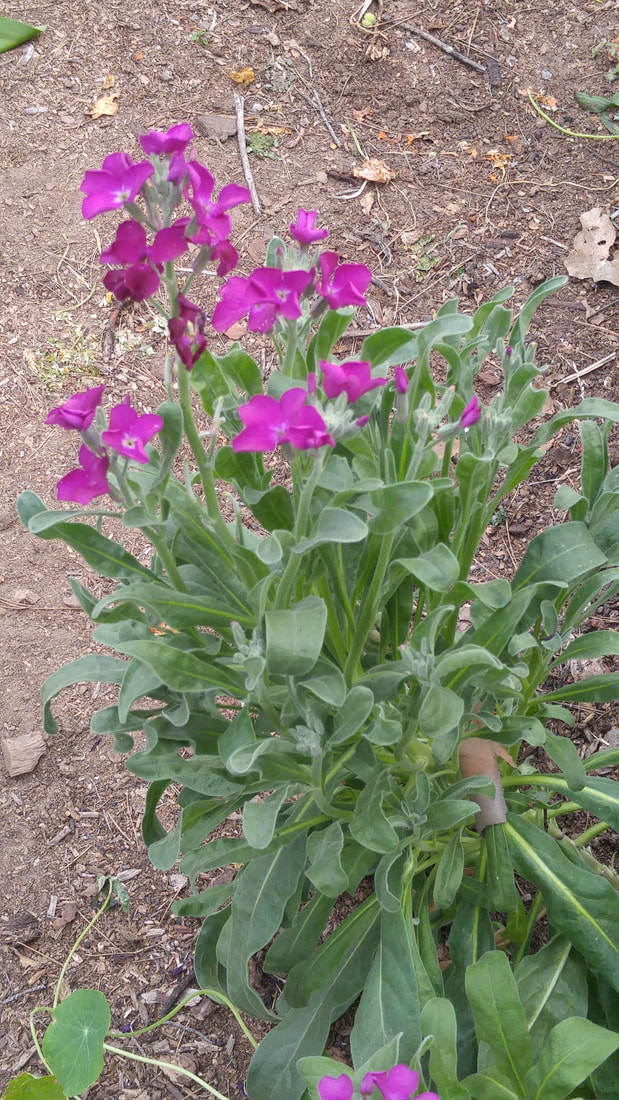
Species stock is a fragrant, single purple that prolifically - and welcomingly - scatters its seed. Seedlings are easy to pull up and transplant or share with gardener friends.
Picture
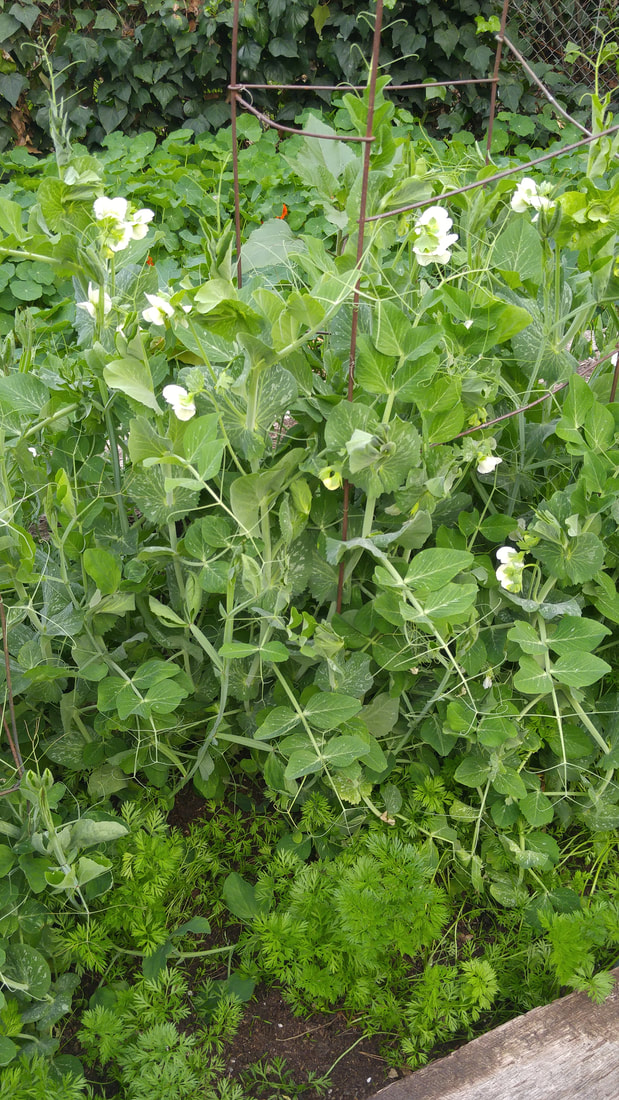
Edible peas setting their blossoms, with carrots at their bases.
Root Systems Determine the Health and Vigor of Plants and Their Yield.
  • Extensive root system will support healthy plants that produce lots of tomatoes over a full life of the plant.
  • Lack of nutrition, water, friable soil, and spread-out roots will result in weak plants and few tomatoes.

1.   Choose Strong Plants
  • 4” pot
  • 4-8” tall
  • At least 3 sets of leaves

2.   Acclimate Plants to Where They’ll Grow to Maturity
  • At least one week
  • Keep potting mix moist

3.   Prepare Soil
  • Ground
    • Turn soil and break apart clods at least 1 foot deep and 1 foot across to facilitate good root development into surrounding soil.
    • Preferable instead of containers because connected with the earth so doesn’t need so much attention, water, and fertilization.
  • Container – minimum of about 20 inches wide and deep
    • Use premium grade potting soil. 
    • Tomatoes need frequent attention, water, and fertilization.
  • Mix soil from the 1' hole with about 2 cups of manure and 2 cups of compost and 2 cups of coffee grounds

4.   Prepare Plant
  • With your thumbnail close to the stem, pinch off all leaves up to the top three or four.
  • This is ONLY for tomato plants – they’re the only plant that will develop roots along its stem.

5.   Plant
  • Vertical or horizontal?
    • Plant vertically (upright) to gain benefits of deep planting or if soil is lighter in texture so it’s no problem digging deeply
    • Plant horizontally (sideways) if soil is so heavy that you can’t dig deeply, or if the soil is so cold that it will delay plant roots from warming sufficiently to thrive. 
  • Holding the plant over the planting hole, massage/tickle most of the potting mix from the rootball to reveal new white roots.  Save the potting mix (see below).
  • Shake the tomato plant to remove most of the loose potting mix. Save the mix.
  • Remove any roots that dangle more than 3 inches down from the base of the stem, and toss them into the planting hole.
  • Mix the removed planting mix with the soil in the planting hole.  This creates a “half-way” mix of the potting mix that the plants have grown in with the soil in their new home where they’ll mature.  This way the roots can “remember” the particles of potting mix that they grew in as well as extend into the new amended soil.
  • Pull the mixed soil  to the sides of the planting hole.
  • For vertical planting, hold the plant suspended in the hole so that the 3” of roots hang down into the base of the hole, and the junction of the stem and roots is 2 inches below the level of the soil.
  • For horizontal planting, lay the plant in a 3” deep hole, holding the topknot of foliage upright above the soil level.
  • With your other hand, pull the soil mix into the hole around the roots until the hole is filled.  It'll mound above the original level since you've added the amendments.  
  • With your thumbs and forefingers (but not your whole hand), press the potting mix several times around the stem to anchor it but not compress the soil mix too much.
  • Form the remaining soil into a bowl about 1 foot wide around the stem as a watering basin.
 
6.   Water In
  • Fill the basin with water. 
  • Sprinkle the foliage to moisten it.
  • Repeat 2 more times.  Each time, the water will take a bit longer to sink down into the soil.  This is assuring that the soil is thoroughly saturated to the 1-foot depth and width of the loosened soil, and into the surrounding soil.
 
7.   Keep Soil Evenly Moist
  • Repeat this 3-times filling with water again in 3 days and again in another 3 days. This spreads the moisture even further out into surrounding soil, which will attract the roots as they develop further.
  • Repeat this 3-times filling with water every week or so as required by warming weather, and twice a week when air temperatures are consistently above 85 or 90 degrees.

8.   Install Trellis Immediately
  • Determinant variety - the plant will grow to only about 4’ in height so will need a trellis about that height.
  • Indeterminant variety – the plant will grow to perhaps 8 or 10 feet’ in height, so will need a heavier duty trellis and probably also stakes driven into the ground to keep the plant upright later in the summer when it's full of foliage and fruit and has just been watered.  I learned this one year when one of our Santa Ana winds blew my whole row of tomatoes over......

9.   Pluck Off Blossoms
  • Let the plant grow to about the second rung on the trellis – about 2’ – before allowing blossoms to set on the plant.  Until then, the initial growth is important to focus the plant's energy on establishing its extensive root system that will provide for a lot of fruit.  
  • If the plant is allowed to blossom and set fruit before it’s established its extensive root system, it won’t have the strength to produce much fruit or continue growing and bearing fruit to its full potential.

10.   Fertilize When Plants Have Set Their First Fruit
  • Setting blossoms and ripening fruit takes a lot of energy from the plant, so fertilize at half-strength each time you water.
 
This procedure is adaptable for every single plant you transplant into your garden, from tiny vegetable and flower seedlings to larger shrubs and trees -- just dig larger holes for larger plants and trees!
​
Enjoy!


0 Comments


Leave a Reply.

    Archives

    January 2023
    December 2022
    November 2022
    October 2022
    September 2022
    August 2022
    July 2022
    June 2022
    May 2022
    April 2022
    March 2022
    February 2022
    January 2022
    December 2021
    November 2021
    October 2021
    September 2021
    August 2021
    July 2021
    June 2021
    May 2021
    April 2021
    March 2021
    February 2021
    January 2021
    December 2020
    November 2020
    October 2020
    September 2020
    August 2020
    July 2020
    June 2020
    May 2020
    April 2020
    March 2020
    February 2020
    January 2020
    December 2019
    November 2019
    October 2019
    September 2019
    August 2019
    July 2019
    June 2019
    May 2019
    April 2019
    March 2019
    February 2019
    January 2019
    December 2018
    November 2018
    October 2018
    September 2018
    August 2018
    July 2018
    June 2018
    May 2018
    April 2018
    March 2018
    February 2018
    January 2018
    December 2017
    November 2017
    October 2017
    September 2017
    August 2017
    July 2017
    June 2017
    May 2017
    April 2017
    March 2017
    February 2017
    January 2017
    December 2016
    November 2016
    October 2016
    September 2016
    August 2016
    July 2016
    June 2016
    May 2016
    April 2016
    March 2016
    February 2016
    January 2016
    December 2015
    November 2015
    October 2015
    September 2015
    August 2015
    July 2015

    Categories

    All

    RSS Feed

© 2015 Yvonne Savio. All Rights Reserved.                                                                                                                                                         Web Design by StudioMAH.